Lunchbox Meal Prep That Doesn’t Get Soggy: The “Moisture Firewall” System for Salads, Wraps, and Rice Bowls
RecipeSimpli
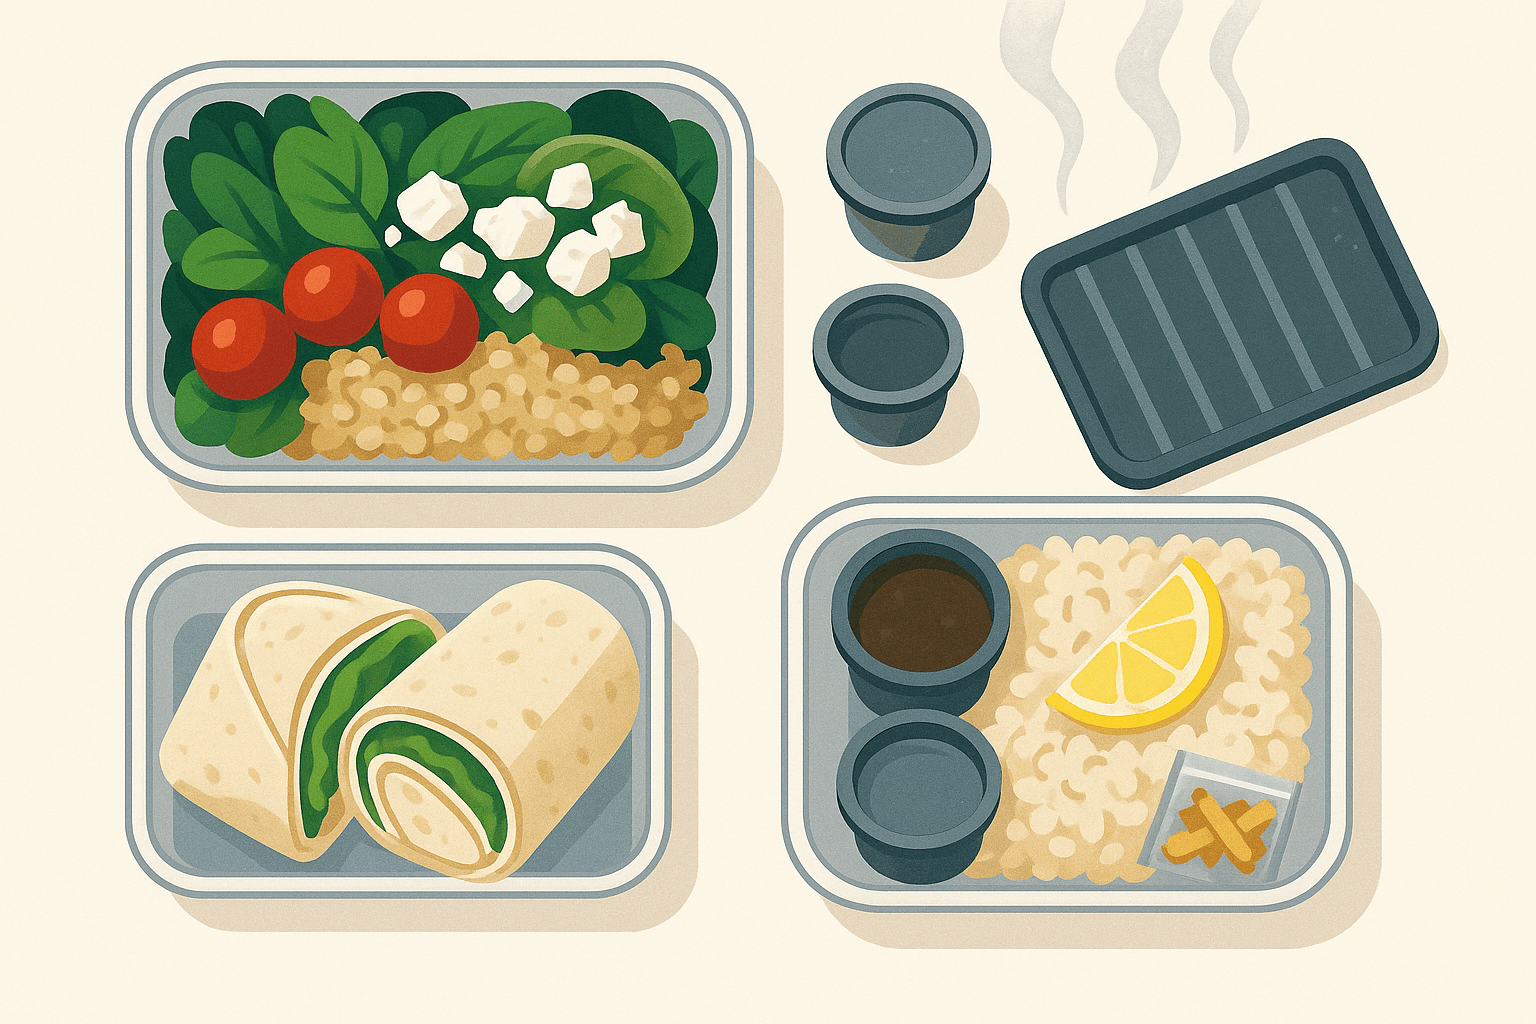
Why packed lunches get soggy (and why it’s not your fault)
If you’ve ever opened a lunch container to find limp greens, mushy rice, or a wrap that feels like it’s been steamed from the inside out, you’ve met the lunchbox enemy: water migration.
Sogginess isn’t just “too much dressing.” It’s a chain reaction driven by a few predictable forces:
- Steam + trapped heat: Warm food continues to release steam. In a sealed container, that steam condenses into water droplets and rains back onto your meal.
- Osmosis and salt: Salt (including salty sauces) pulls water out of vegetables and proteins, creating puddles over time.
- Acid and enzymes: Acidic dressings and juicy produce can weaken plant cell walls, speeding up softening.
- Starch retrogradation and absorption: Rice, pasta, and bread absorb moisture readily. They can also go hard (staling) when refrigerated—sometimes you get both “wet” and “stale” at once.
- Mechanical damage: Pre-cut produce leaks more because cell walls are already broken.
The good news: you can prevent most of this with a simple, repeatable approach. Think of it as packing lunch like a pro kitchen runs a salad station—keep wet and dry separate until the last responsible moment.
That approach is the Moisture Firewall System.
The Moisture Firewall System: a simple framework that works for almost anything
The Moisture Firewall System has four parts:
- Steam‑Vent Cooling: Stop condensation at the source.
- Container Zones: Pack “wet” and “dry” into intentional areas.
- Sauce Packing + Timing: Treat sauces like a finishing step, not an ingredient.
- Crunch Add‑Ins: Add texture at the end (or keep it protected until then).
Once you practice this a few times, it becomes automatic—and your lunches stay crisp, bright, and enjoyable.
1) Steam‑Vent Cooling: the most overlooked anti-soggy trick
The principle
Hot food in a sealed container is a condensation machine. In culinary science terms, when warm food cools, water vapor in the headspace hits a cooler lid and condenses. That liquid then drops back down onto your food—especially onto greens, grains, and bread.
The fix: let steam escape until food is no longer “steaming hot,” then seal.
The method (works for rice, roasted veg, proteins, pasta)
- Spread hot components thinly on a plate, sheet pan, or shallow container. Surface area is your friend.
- Vent for 10–20 minutes (depending on portion size). You want it warm—not hot—and not actively steaming.
- Seal and chill promptly once steam has mostly dissipated.
Food safety note (practical and conservative)
Most food safety guidance emphasizes minimizing time in the “danger zone” (roughly 40–140°F / 4–60°C). Don’t leave food out for hours to “cool naturally.” Use the spread-thin approach to cool efficiently, then refrigerate.
Fast cooling hacks
- Rice and grains: Spread on a tray; fluff to release trapped steam.
- Roasted vegetables: Cool on the pan you roasted on (faster than a deep bowl).
- Proteins: Slice after cooling slightly; slicing too early can release juices that later leak into your container.
This single step prevents more sogginess than any expensive container ever will.
2) Container Zones: build a physical barrier between wet and dry
Think like a bento designer
In Japanese bento culture, lunches are composed with an eye toward separation of textures—fried items stay crisp because they’re not sitting against wet pickles or sauced vegetables. You can borrow that logic no matter what cuisine you’re packing.
Choose your “zones”
You don’t need a fancy lunchbox, but it helps to have at least one of these:
- A container with compartments (true bento style)
- A main container + 1–2 small sauce cups
- A jar for salads + separate crunch pouch
The firewall hierarchy (what goes where)
Pack in layers or compartments from wettest → driest with a barrier between them.
Wet ingredients (keep contained):
- Dressings, salsas, chutneys
- Saucy beans or braises
- Cut tomatoes, cucumbers, citrus segments
- Pickles (delicious but moist)
Medium-moist ingredients (buffer zone):
- Roasted vegetables
- Cooked proteins
- Cheese (especially firm)
- Dense grains (quinoa, farro)
Dry/crisp ingredients (protect at all costs):
- Leafy greens
- Croutons, chips, crackers
- Nuts, seeds
- Fried toppings (shallots, onions)
- Toasted breadcrumbs
Edible barriers (the “moisture shield”)
Sometimes you can create your firewall with food instead of plastic.
- Leaf shields: whole romaine leaves or cabbage leaves between wet fillings and wraps
- Fat barriers: hummus, mayo, cream cheese, avocado spread—fats slow water migration
- Cheese sheets: a slice of provolone/cheddar lining bread in sandwiches
- Starch barriers: a tortilla or rice paper between juicy fillings and bread (use carefully)
A barrier doesn’t need to be thick—just continuous.
3) Sauce Packing + Timing: sauce is a finishing move
The rule
If it’s liquid at room temp, assume it will eventually make something soggy.
Instead of mixing dressing into salad at night, pack it in a separate container and combine right before eating.
How to pack sauces without leaks
- Use a screw-top cup or small jar.
- Don’t fill to the brim; leave a little headspace.
- For very thin dressings, add a tiny pinch of xanthan gum (optional) or whisk in a spoon of yogurt/mayo to slightly thicken.
Timing options (choose based on your lunch schedule)
- Immediate toss (best texture): add sauce right before eating.
- 30-minute pre-toss (best for hearty salads): toss during your commute; great for kale, cabbage, grain salads.
- Marinate on purpose: if you want softening (like cucumber in quick pickle), marinate it separately, then add to the main bowl.
Sauce “types” and their sogginess risk
- High risk: watery vinaigrettes, salsa, soy-based sauces without thickener
- Medium: creamy dressings, tahini sauces, peanut sauces
- Lower: pesto, thick chutneys, olive tapenade (still moist, but less likely to flood)
A thicker sauce clings; a thin one runs to the bottom and pools.
4) Crunch Add‑Ins: engineer texture like a restaurant
Restaurants rarely rely on just one texture. They finish with something crunchy—croutons, toasted nuts, crispy onions, tortilla strips. Packed lunches should do the same, but the key is keeping crunch dry until the end.
Crunch add-ins that travel well
Pack these in a small bag or dry compartment:
- Toasted nuts (almonds, peanuts, cashews, walnuts)
- Seeds (pepitas, sesame, sunflower)
- Fried shallots or crispy onions
- Tortilla chips/strips
- Pita chips
- Roasted chickpeas (best eaten within 1–2 days)
- Croutons (homemade or store-bought)
- Toasted panko breadcrumbs with herbs
Crunch insurance: double-texture strategy
Choose two crunch elements: one sturdy, one delicate.
- Sturdy: nuts, seeds
- Delicate: chips, fried onions
Even if delicate crunch softens slightly, the sturdy crunch still carries the bite.
Texture-preserving ingredient swaps (small changes, big payoff)
Here are the swaps that reliably reduce sogginess without sacrificing flavor.
For salads
- Swap tender greens (spring mix) → romaine, kale, cabbage, shredded Brussels sprouts
- Swap sliced tomatoes → grape tomatoes (kept whole), roasted tomatoes, or sun-dried tomatoes
- Swap fresh cucumbers → seeded cucumbers (remove watery core) or quick-pickled cucumbers (drained)
- Add whole herbs (parsley, cilantro) instead of delicate microgreens
For wraps and sandwiches
- Swap soft bread → toasted bread, sturdier rolls, pita pockets, lavash
- Add a fat barrier: mayo, hummus, cream cheese, pesto
- Use whole leaves (romaine, cabbage) as an inner wrap layer
- Keep juicy ingredients separate until eating (tomatoes, pickles)
For rice/grain bowls
- Use short-grain rice for stickier bowls (less watery separation) or brown rice for chew
- Cool rice properly (steam‑vent), then pack with a dry topping
- Keep wet vegetables (cucumber salad, salsa) in a separate cup
Containers and tools that actually matter
You can do this with what you have, but these help:
- Wide, shallow containers: better cooling, less steam pooling
- Compartment boxes: instant zones
- Leakproof sauce cups: essential
- Reusable silicone muffin cups: cheap “compartments” inside a larger box
- Paper towel trick (selectively): For very wet items like cut fruit or watery slaws, a small folded piece under the item can absorb pooling liquid. Don’t use it under leafy greens you want crisp (it can create damp contact).
The builds: 8 mix‑and‑match lunchbox meals that stay crisp
Each build includes:
- Base (structure)
- Moisture firewall (what keeps it crisp)
- Sauce plan
- Crunch add‑in
- Make-ahead notes
1) Greek-ish Mason Jar Salad (or container salad)
Base: chopped romaine + chickpeas + cucumber (seeded) + feta + red onion + olives
Moisture firewall: put dressing at the bottom, then chickpeas/feta, then cucumber/onion, then romaine on top (or keep dressing separate if you prefer maximum crunch).
Sauce plan: lemon-oregano vinaigrette in a mini jar (or bottom layer).
Crunch add-in: toasted pita chips packed separately.
Make-ahead: 3 days if romaine is very dry; keep pita separate until eating.
2) Thai Peanut Crunch Salad (cabbage-based)
Base: shredded green cabbage + carrots + edamame + scallions + cilantro
Moisture firewall: cabbage is naturally sturdy; keep edamame well-drained.
Sauce plan: peanut-lime sauce in a cup; thin it slightly at lunch with a splash of water if it thickens in the fridge.
Crunch add-in: crushed peanuts + sesame seeds + optional wonton strips (separate).
Make-ahead: 4 days; this salad is designed to hold.
3) Caesar-Style Wrap That Stays Firm
Base: tortilla or lavash + chicken + romaine
Moisture firewall: spread a thin layer of mayo or Caesar dressing on the tortilla (fat barrier), then add whole romaine leaves as an inner liner before chicken.
Sauce plan: extra dressing in a cup for dipping (don’t over-sauce inside).
Crunch add-in: croutons outside the wrap (packed separately) or parmesan crisps.
Make-ahead: assemble the night before; keep tomatoes out (or pack separately).
4) Mediterranean Hummus Veggie Wrap (no soggy tortilla)
Base: tortilla + hummus + roasted red pepper (well-drained) + spinach/romaine + shredded carrots + feta
Moisture firewall: hummus as the barrier; keep roasted peppers and any pickles patted dry.
Sauce plan: optional tzatziki in a separate cup (tzatziki inside = sog risk).
Crunch add-in: dukkah or toasted seeds sprinkled right before eating.
Make-ahead: 2 days; greens stay better if they’re dry and not overdressed.
5) Bibimbap-Inspired Rice Bowl (lunchbox-friendly)
Base: rice + sautéed spinach (squeezed dry) + carrots + cucumber (separate cup) + kimchi (separate cup) + egg or beef/tofu
Moisture firewall: cool rice with steam‑vent method; pack wet banchan (kimchi, cucumber salad) in separate cups.
Sauce plan: gochujang sauce in a mini jar; add at lunch.
Crunch add-in: roasted sesame seeds + crushed seaweed snacks added right before eating.
Make-ahead: 3–4 days for components; assemble bowls quickly.
6) Salsa Verde Chicken Burrito Bowl (without watery rice)
Base: cilantro-lime rice + black beans (drained) + corn + chicken + shredded lettuce
Moisture firewall: keep salsa verde separate; let rice cool uncovered briefly before sealing.
Sauce plan: salsa verde + a dollop of sour cream packed separately (or sour cream as a thicker barrier on top of rice, salsa separate).
Crunch add-in: tortilla strips or chips, packed dry.
Make-ahead: 4 days; lettuce stays best if placed on top and very dry.
7) Poke-Adjacent Salmon (or tofu) Bowl for Workdays
Base: sushi rice (or brown rice) + salmon/tofu + shelled edamame + shredded carrots + avocado (optional)
Moisture firewall: keep soy-based dressing separate; pack avocado with a little lemon and keep it away from rice if possible.
Sauce plan: soy-sesame dressing in a cup; add right before eating.
Crunch add-in: furikake + toasted sesame + crispy onions (separate).
Make-ahead: rice and toppings 3 days; add avocado day-of for best texture.
8) Italian Antipasto Pasta Salad (engineered to resist mush)
Base: short pasta (al dente) + salami + mozzarella pearls + artichokes (drained) + roasted peppers (patted dry) + arugula (optional)
Moisture firewall: choose sturdy ingredients; keep arugula separate or on top. Drain and dry jarred items.
Sauce plan: thicker Italian dressing or pesto kept separate; toss at lunch.
Crunch add-in: toasted pine nuts or crunchy breadcrumbs.
Make-ahead: 4 days; if using arugula, add day-of.
A simple packing blueprint (use this every time)
When you’re assembling any lunch—salad, wrap, or bowl—run this mental checklist:
- Did I cool hot items with steam‑venting?
- What’s the wettest thing here—and is it isolated?
- Do I have a barrier between wet and bread/greens?
- Is sauce separate (or intentionally placed where it won’t hurt)?
- Do I have a crunch element packed dry?
If you can answer yes to all five, your lunch is almost guaranteed to hold.
Troubleshooting: common soggy-lunch problems and fixes
“My salad is dry until I add dressing, then it gets watery.”
- Your vegetables are releasing water after salting/acidity.
- Fix: use sturdier greens (cabbage/kale), seed cucumbers, keep tomatoes whole, and add a creamy or emulsified dressing that clings.
“My rice bowl pools liquid at the bottom.”
- Hot rice sealed too soon, or wet toppings sitting directly on rice.
- Fix: steam‑vent cool rice; keep salsa/cucumber/kimchi separate; add a dry topping (sesame, seaweed, nuts).
“My wrap is gummy by lunch.”
- Juicy fillings + no fat barrier.
- Fix: line wrap with cheese or a thick spread; use whole lettuce leaves as a liner; pack tomatoes/pickles separately.
“My roasted veggies make everything damp.”
- They’re still steaming or were packed in a deep pile.
- Fix: cool spread out; pack them in their own zone; place them between grains and greens (buffer role).
Cultural and scientific context (why this system matches how pros cook)
Professional kitchens often separate components until the last minute: sauces are held in squeeze bottles, greens are spun dry, hot items rest briefly before being plated with cold items. Bento traditions similarly emphasize compartmentalization to preserve distinct flavors and textures.
From a food science perspective, your goal is to manage:
- Condensation (steam‑vent cooling)
- Water activity and migration (separate wet from absorbent)
- Cell wall breakdown (delay acid/salt contact)
- Texture contrast (crunch add-ins)
You’re not fighting your ingredients—you’re arranging them so each one stays in its best state until you eat.
Quick “mix-and-match” matrix (design your own builds)
Use this template to invent infinite non-soggy lunches:
- Base: romaine/kale/cabbage, rice/quinoa/farro, tortilla/lavash
- Protein: chicken, tofu, salmon, chickpeas, eggs
- Wet flavor (separate): salsa, dressing, soy-sesame, peanut sauce, chimichurri
- Medium buffer: roasted veg, cheese, beans (drained), dense grains
- Crunch (separate): nuts/seeds, chips, crispy onions, breadcrumbs
- Brightener (optional): lemon wedge, pickled onions (drained), fresh herbs
If you keep wet flavor separate and add crunch at the end, you can bend this system toward almost any cuisine.
Takeaway: crisp lunches are a packing skill, not a recipe
Soggy lunches aren’t inevitable. With the Moisture Firewall System—steam‑vent cooling, container zones, sauce timing, and crunch add‑ins—you’ll preserve the textures that make meals satisfying. Start with one build this week, then adapt it using the matrix.
Once you get the hang of it, meal prep becomes less about settling for leftovers and more about packing something you’ll actually look forward to eating.