Why Egg Whites Whip Foamy, Collapse, or Bake Chewy: Protein Denaturation, Copper Ions, and the Sugar‑Acid Rules for Better Meringues, Soufflés, and Macarons
RecipeSimpli
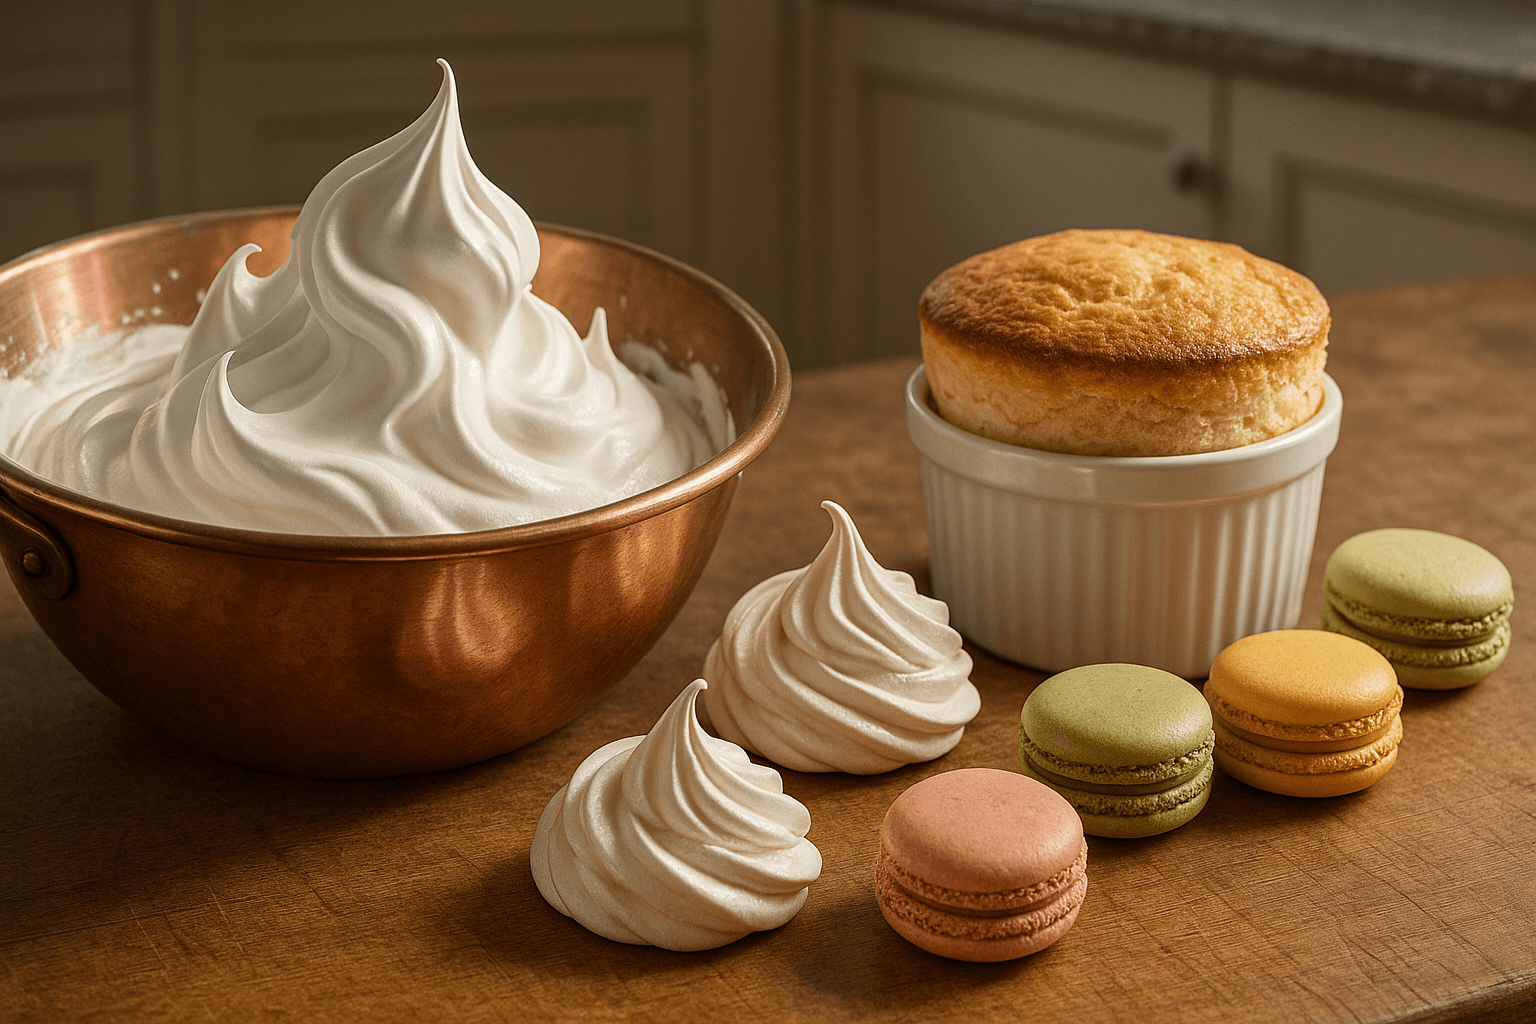
There is something almost theatrical about egg whites. One minute they are a slippery, translucent liquid. A few minutes later, with nothing more than a whisk and a bit of patience, they become a white cloud capable of holding peaks, lifting a soufflé, forming a meringue shell, or giving macarons their delicate feet. Then, just as dramatically, they can betray you: turning grainy, slumping in the bowl, weeping syrup on the tray, baking up hollow, chewy, or flat.
That inconsistency is exactly why egg whites are worth understanding. They are one of the clearest examples in cooking of structure emerging from chemistry. Foam is not magic. It is a temporary architecture built from water, proteins, air, heat, sugar, and acid—sometimes helped along by copper ions, sometimes ruined by a trace of fat. If you know what the proteins are doing, the rules of whipping, folding, and baking start to make sense. Suddenly “don’t get yolk in the whites” stops sounding like kitchen superstition and starts sounding like sound engineering.
This is the practical science of egg whites for home cooks: why they foam, why they fail, why sugar and acid matter, why copper bowls became legendary, and how all of it applies to French, Swiss, and Italian meringues, plus soufflés and macarons.
The basic structure of an egg white
Egg white, or albumen, is mostly water—about 88 to 90 percent. Most of the rest is protein, with a trace of minerals and almost no fat. That balance matters because it means egg whites start as a watery medium carrying dissolved proteins. Those proteins are the real structural players.
The major proteins in egg whites include:
- Ovalbumin: the most abundant protein, often cited at roughly 54 percent of total egg white protein
- Ovotransferrin: around 12 to 13 percent; notable because it interacts with metal ions, including copper
- Ovomucoid
- Ovomucin: present in smaller quantity but important for viscosity and foam stability
- Lysozyme
- Globulins: especially helpful in foaming behavior
Fresh egg whites are not all the same thickness. If you have ever cracked an egg and noticed a tighter, gelatinous portion hugging the yolk and a looser portion spreading farther, you have seen the thick and thin albumen. The thick portion owes much of its structure to ovomucin. As eggs age, pH rises and this structure loosens, making whites thinner.
That sounds like older eggs should always be worse, but reality is more nuanced. Slightly aged whites often whip faster because they are less viscous to begin with. Very fresh whites may create a more stable but slower-forming foam. This is one reason recipes and pastry chefs differ on whether room-aged or very fresh whites are best. The right answer depends on the application and on what kind of control you have over mixing and drying.
What denaturation really means
In their natural state, egg white proteins are folded into compact shapes. Their water-loving and water-avoiding regions are arranged in a way that is stable in liquid egg white. Denaturation means those proteins unfold. Heat can do it. Mechanical force can do it. Changes in acidity can contribute. Once unfolded, proteins expose sections that were previously tucked away.
For foams, that unfolding is crucial. When you whisk egg whites, you are doing two things at once:
- Forcing air into the liquid
- Mechanically denaturing proteins so they can surround and stabilize that air
As the whisk beats through the whites, it stretches the proteins and incorporates bubbles. The unfolded proteins migrate to the air-water interface, where they line the surface of the bubbles. In effect, they form a flexible film around each bubble. More whisking unfolds more proteins and can strengthen the network—up to a point.
This is why whipped egg whites increase dramatically in volume. You are not turning liquid into solid. You are creating a matrix of protein-stabilized bubbles dispersed through water.
But because this structure is fragile and temporary, everything matters: bowl cleanliness, whisk speed, sugar timing, acidity, and temperature.
Why egg whites become foamy
The first stage of whipping is loose foam. Large bubbles form quickly because air is being introduced faster than a stable network can fully organize. If you stop too early, the foam looks frothy and wet, with big unstable bubbles. That kind of foam collapses easily because the protein films are thin and uneven.
As whipping continues, bubble size becomes smaller and more uniform. Proteins continue to denature and align at the air-water interface. The foam gets whiter because many tiny bubbles scatter light more effectively than a few large transparent ones.
Eventually, the foam progresses through classic stages:
- Foamy: large bubbles, little structure
- Soft peaks: peaks curl over; ideal for folding into some batters and soufflés
- Medium peaks: more body, still flexible
- Stiff peaks: peaks stand upright; good for many meringues
- Overbeaten: dry-looking, clumpy, grainy; proteins have tightened too far and squeezed out water
That last point explains a lot of kitchen disappointment. More whipping is not always better. A successful foam needs elasticity as well as strength. If the protein network gets too rigid, it cannot stretch around bubbles gracefully. Water begins to leak out, and the foam becomes coarse and unstable.
Why fat contamination kills foam
This is one of the most practical rules in pastry, and it is grounded in simple interface chemistry.
Egg white foams depend on proteins coating and stabilizing the surfaces of bubbles. Fat interferes with that process. Even a small amount of yolk—egg yolk is rich in fat and emulsifiers like lecithin—can keep proteins from forming a clean, cohesive film around air bubbles.
That is why a bowl with greasy residue, a whisk with butter on it, or a tiny streak of yolk can reduce foam volume and stability dramatically.
Practical anti-fat rules
- Separate eggs while cold, when yolks are firmer and less likely to break.
- Then let whites come to room temperature for 20 to 30 minutes before whipping if the recipe benefits from maximum volume.
- Use a stainless steel, glass, or copper bowl. Avoid plastic if possible; plastic can hold onto grease.
- Wipe the bowl and whisk with a little vinegar or lemon juice, then dry well, if you want extra insurance.
- Separate each egg into a small bowl first before adding the white to the main mixing bowl, so one broken yolk does not ruin the whole batch.
If a yolk does break into the white, the safest move for foaming applications is usually to start over. Sometimes you can fish out the yolk, but the invisible fat residue often remains.
The copper bowl mystery: why copper helps
For generations, pastry cooks prized unlined copper bowls for whipping egg whites. This is not folklore. Copper really can stabilize egg white foam.
The key player is ovotransferrin, a protein in egg white that can bind metal ions. In a copper bowl, trace copper ions interact with ovotransferrin to form a more stable complex. That helps moderate how proteins bond during whipping, making the foam less likely to over-coagulate into a dry, grainy mass.
In plain English: copper gives you a bit more room for error. The foam tends to be fine-textured, stable, and less prone to overbeating.
This does not mean copper is mandatory. Plenty of excellent meringues are made in stainless steel stand mixers every day. But copper’s reputation is earned.
No copper bowl? Use acid.
Acid performs a different but related stabilizing function. Ingredients like cream of tartar, lemon juice, or a few drops of vinegar lower the pH of egg whites. That makes the proteins repel one another a bit more before linking up too tightly, which can help create a finer, more stable foam.
Typical amounts:
- Cream of tartar: 1/8 teaspoon per egg white, or 1/2 teaspoon per 4 whites
- Lemon juice or vinegar: about 1/4 teaspoon per egg white, used with a light hand
Too much acid can make the foam harder to whip to full volume and may affect flavor, so do not overdo it.
Why sugar changes everything
Sugar is not just there for sweetness. It transforms foam behavior.
When dissolved into egg whites, sugar increases the viscosity of the liquid phase. That does several useful things:
- Slows drainage of water out of the foam
- Helps create a smoother, glossier texture
- Delays protein coagulation, reducing risk of coarse curdled foam
- Supports a more stable structure during drying or baking
But sugar also has a trade-off: it slows foam formation. That is why many recipes have you start whipping whites first and add sugar gradually only after the foam has formed to a certain stage. If you add all the sugar too early, especially with a hand mixer, it can take much longer to achieve volume.
The timing rule for sugar
For many French meringues, the sweet spot is:
- Start whipping plain whites until foamy.
- Add acid if using.
- Once soft peaks begin to form, add sugar gradually, 1 tablespoon at a time.
- Continue whipping until glossy stiff peaks.
This allows proteins to establish initial foam structure before sugar thickens the liquid too much.
Fine vs coarse sugar
Caster sugar or superfine sugar dissolves faster and gives a smoother meringue. Standard granulated sugar works, but undissolved crystals can leave meringue gritty, cause beading, or contribute to weeping.
A simple test: rub a little meringue between your fingers. If it feels grainy, the sugar has not fully dissolved.
Why acid helps, and when it hurts
Acid—cream of tartar, lemon juice, vinegar—helps stabilize foam, especially in French meringue and soufflé bases. It promotes a finer bubble structure and helps prevent the proteins from setting too abruptly into a coarse network.
But acid is not universally beneficial in every amount. Too much can:
- Slow whipping too much
- Reduce final volume if overused
- Leave a noticeable flavor edge
- Alter how the foam integrates into certain batters
For macarons, many bakers use a tiny amount of acid or powdered egg white, while others skip it. In that context, the key is consistency and matching your method. Too much acid can alter drying and shell structure in subtle ways.
The heat rules: from glossy foam to baked structure
Whipped whites are still mostly water. Baking or cooking determines whether that water stays trapped, evaporates slowly, leaks out, or turns into steam that expands and then collapses.
Heat denatures proteins further and causes them to coagulate into a firmer network. At the same time:
- Water evaporates
- Sugar may dissolve more completely, then later recrystallize or form syrupy phases
- Steam pressure expands bubbles
- Surfaces dry faster than interiors
The balance among those changes determines whether you get:
- Crisp meringue
- Chewy center
- Marshmallow-soft interior
- Weeping beads of syrup
- Hollow shells
- Collapsed soufflé
Temperature and texture
As a general rule:
- Low baking temperatures (200 to 225°F / 93 to 107°C) dry meringues slowly for crisp results.
- Moderate temperatures (250 to 300°F / 121 to 149°C) can create shells with a crisper exterior and softer interior.
- Higher heat works in soufflés, where rapid steam expansion and protein setting create lift.
For meringue cookies and pavlovas, “baking” is often really controlled drying.
Why meringues weep, bead, or collapse
A perfect meringue is glossy before baking and dry where it should be after baking. Failures usually trace back to one of a few causes.
Weeping
Weeping is when liquid syrup forms under or on the meringue. It can happen because:
- Sugar was not fully dissolved
- Humidity is high
- The foam was underbeaten or unstable
- The meringue was spread onto a filling while too hot or too cold, creating moisture imbalance
- The meringue was underbaked
Beading
Tiny sticky droplets on the surface often happen when sugar migrates and condenses into syrup. Overbaking can also contribute.
Collapse
Collapse can happen when:
- The whites were underwhipped and lacked structural strength
- They were overwhipped and lost elasticity
- Sugar was added poorly
- The baked structure set before enough moisture escaped, then shrank dramatically while cooling
- A soufflé or foam was folded too aggressively and lost too much trapped air
Why overbeaten whites become dry and grainy
This is one of the most misunderstood problems. Overbeaten egg whites are not just “extra stiff.” They are structurally damaged.
As proteins continue to bond, the network tightens excessively. That squeezes out water, making the mixture look curdled or clumpy. The surface loses gloss. Instead of smooth, elastic peaks, you get a rough, cottony mass.
In baking, overbeaten whites often:
- Fold poorly into batters
- Create uneven large pockets and collapse
- Produce dry or cracked meringues
- Cause macarons to have unstable tops or hollow interiors
If the whites are only slightly overbeaten, you can sometimes rescue them by whisking in one additional fresh egg white. But prevention is much easier.
French, Swiss, and Italian meringue: same ingredients, different logic
All three meringues are based on egg whites and sugar, but technique changes texture, stability, and use.
French meringue
French meringue is the simplest: raw whites whipped with sugar.
Best for
- Meringue cookies
- Pavlova
- Folding into batters when a light, airy foam is needed
- Some macaron methods
Basic ratio
A common starting point is:
- 100 grams egg whites
- 100 to 200 grams sugar
Lower sugar gives lighter, less stable foam. Higher sugar gives denser, glossier, more stable meringue.
For crisp meringue kisses, many bakers use a 1:2 ratio by weight of whites to sugar.
Method
- Bring egg whites to room temperature, about 20 to 30 minutes.
- Preheat oven to 200 to 225°F (93 to 107°C) for crisp dried meringues.
- Place 100 grams egg whites in a clean bowl.
- Add 1/4 teaspoon cream of tartar or a few drops of lemon juice if desired.
- Whip on medium speed until foamy.
- Increase to medium-high and whip to soft peaks.
- Gradually add 200 grams superfine sugar, 1 tablespoon at a time.
- Continue whipping until the meringue is glossy and holds stiff peaks.
- Rub a little between fingers to check that the sugar has dissolved.
- Pipe or spoon onto parchment.
- Bake for 1 1/2 to 2 hours, depending on size, then turn off oven and let dry inside another 30 to 60 minutes.
Common mistakes
- Adding sugar too quickly
- Baking too hot, which browns and cracks the exterior before drying the interior
- Whipping to a dry foam
- Making meringue on a humid day without adjusting expectations
Swiss meringue
Swiss meringue is made by heating whites and sugar together over a water bath before whipping.
Best for
- Buttercream base
- Pie toppings
- Stable piped decorations
- Recipes needing a silkier, denser foam
Why it works
Heating helps dissolve sugar completely and partially denatures proteins before whipping. The result is a very smooth, glossy, stable meringue.
Target temperature
Heat the mixture to 160°F (71°C), whisking constantly, until the sugar dissolves.
Basic ratio
- 100 grams egg whites
- 150 to 200 grams sugar
Method
- Set a bowl over barely simmering water; the bottom should not touch the water.
- Combine 100 grams egg whites and 180 grams sugar.
- Whisk constantly until the mixture reaches 160°F (71°C) and feels completely smooth.
- Transfer to a mixer and whip on medium-high until thick, glossy, and cooled to room temperature, about 5 to 8 minutes.
- Use as desired, or continue into Swiss meringue buttercream.
Advantages
- Very smooth texture
- Lower risk of grittiness
- More stable than French meringue
- Excellent for torching or topping
Risks
- Overheating can scramble proteins along the bowl edges
- If not whipped until cool, the foam may be too loose for some uses
Italian meringue
Italian meringue is made by pouring hot sugar syrup into whipping egg whites.
Best for
- Very stable pie toppings
- Buttercream
- Mousses and parfaits
- Applications where a strong, glossy, marshmallow-like structure is ideal
Why it works
The syrup cooks and stabilizes the foam while creating a very fine sugar structure. It is the most technically involved, but also the most robust.
Syrup temperature
Cook sugar syrup to 240°F (116°C), the soft-ball stage.
Basic ratio
- 100 grams egg whites
- 200 grams sugar
- 50 to 60 grams water
Method
- Combine 200 grams sugar and 60 grams water in a saucepan.
- Heat without stirring after dissolution, washing down crystals if needed.
- When the syrup reaches about 230°F (110°C), start whipping 100 grams egg whites to soft peaks.
- When syrup reaches 240°F (116°C), remove from heat.
- With mixer running on medium, pour syrup in a thin stream down the side of the bowl.
- Increase speed and whip until glossy, stiff, and just warm or room temperature, about 6 to 10 minutes.
Advantages
- Highest stability
- Smooth, glossy, marshmallowy texture
- Excellent for finishing desserts
Risks
- Poor timing between syrup and whites
- Pouring syrup onto the whisk, causing spun sugar threads
- Undercooked syrup producing weak structure
- Overcooked syrup making the meringue dense
Soufflés: why they rise, and why they fall
A soufflé is not just whipped whites folded into flavoring. It is a carefully balanced expansion system.
The rise comes from two main forces:
- Air already trapped in the whipped whites expands with heat
- Water in the mixture turns to steam, inflating the structure further
The egg white proteins then set around those expanded bubbles. Meanwhile, the base—whether béchamel, pastry cream, chocolate mixture, or purée—provides flavor and some structural support.
The structural logic
If the whites are too stiff, they are harder to fold in evenly and may leave streaks or clumps that create uneven rise. If they are too soft, they do not provide enough lift. If the base is too heavy or too hot, it can knock out the foam. If the ramekin is overfilled or improperly coated, the soufflé may rise lopsided.
Practical soufflé method
For a standard batch using 4 egg whites:
- Prepare soufflé dish by buttering upward strokes and coating with sugar or cheese depending on recipe.
- Preheat oven to 375°F (190°C).
- Make base and cool until warm, not hot.
- Whip 4 egg whites with 1/4 teaspoon cream of tartar to soft to medium peaks.
- Stir one-third of the whites into the base to lighten it.
- Gently fold in the rest with a spatula, preserving volume.
- Fill dish to about 1/2 inch (1.25 cm) below the rim, or level as recipe directs.
- Bake until risen and set at the edges, usually 20 to 30 minutes depending on size.
- Serve immediately.
Why soufflés fall
All soufflés fall somewhat. That is normal. The interior is a hot expanded foam; once removed from the oven, steam cools and contracts. The goal is not permanent height but a structure that rises dramatically before gradual settling.
Premature collapse is worsened by underbaking, overfolding, weak foam, or oven-door drama in the earliest stages of baking.
Macarons: where meringue science meets precision
Macarons are one of the most unforgiving applications for egg white foam because they need a meringue that is stable enough to hold shape but fluid enough to settle after mixing. You want a shell that spreads just enough, forms a skin, lifts into feet, and bakes without cracking or hollowing.
Why the meringue matters so much
In macarons, the whipped whites are not the final texture. They are the gas-holding system that supports almond flour and sugar. During macaronage—the folding stage—the batter is intentionally deflated to a precise consistency. If the starting meringue is weak, the batter becomes runny. If it is overbeaten, the batter can remain too stiff, bake unevenly, or trap unstable pockets that later become hollows.
French vs Italian meringue macarons
- French method: simpler, but more sensitive to mixing and environment
- Italian method: more stable and consistent for many bakers, thanks to hot syrup
A practical French macaron framework
- 100 grams egg whites
- 100 grams superfine sugar
- 100 grams almond flour
- 100 grams powdered sugar
Whip whites to soft peaks, add sugar gradually, and whip to a firm but not dry glossy peak. Fold in sifted dry ingredients until batter flows in thick ribbons and settles slowly. Pipe, tap trays, rest until a dry skin forms if your method requires it, then bake around 300 to 325°F (149 to 163°C) depending on your oven and tray setup.
Why macarons turn hollow
Hollows can come from several interacting factors:
- Overwhipped meringue creating an unstable internal structure
- Undermixed or overmixed batter
- Oven too hot, causing rapid rise and shell set before interior stabilizes
- Underbaking
- Excess moisture or poor drying
The key is not just one variable but balance.
Fresh vs aged whites
Many macaron recipes call for “aged” egg whites—whites separated and held in the refrigerator for 24 to 72 hours, then brought to room temperature. The idea is that some moisture loss and protein relaxation improve consistency.
In practice, aged whites can be helpful, but they are not magic. For home bakers, the bigger wins usually come from:
- Precise weighing
- Clean equipment
- Controlled whipping
- Consistent oven heat
- Proper drying or resting when needed
If you age whites, store them covered in the refrigerator and bring them back to room temperature before use.
Humidity: the invisible ingredient
Meringue is hygroscopic because sugar attracts water. That means humid weather can sabotage crispness and drying. A perfectly baked meringue can become tacky in a damp kitchen within hours.
What to do
- Bake meringues on drier days if possible
- Cool completely before storage
- Store in an airtight container immediately
- For crisp shells, avoid refrigerating unless the recipe specifically accounts for it
Pavlova and macarons are especially sensitive to ambient moisture.
Step-by-step: a reliable crisp French meringue at home
Here is a practical formula that works well for home cooks.
Ingredients
- 4 large egg whites (about 120 grams)
- 1/2 teaspoon cream of tartar
- 240 grams superfine sugar
- 1 teaspoon vanilla extract (optional)
- Pinch of fine salt (optional, for flavor, not stability)
Equipment
- Stand mixer or hand mixer
- Metal or glass bowl
- Parchment-lined baking sheet
- Oven thermometer if possible
Method
- Let the whites stand at room temperature for 20 to 30 minutes.
- Heat oven to 225°F (107°C).
- Make sure bowl and beaters are spotless and grease-free.
- Beat whites on medium speed until foamy, about 1 minute.
- Add cream of tartar.
- Increase speed to medium-high and beat to soft peaks, about 2 to 3 minutes.
- Add sugar gradually, 1 tablespoon every 15 to 20 seconds.
- Continue beating until stiff, glossy peaks form and the mixture feels smooth, about 5 to 8 minutes total depending on mixer power.
- Beat in vanilla briefly if using.
- Pipe or spoon onto parchment.
- Bake 1 1/2 hours for smaller meringues, up to 2 hours for larger ones.
- Turn off oven, crack door slightly, and let meringues dry inside 30 minutes.
- Cool completely before removing.
What success looks like
- Smooth, glossy mixture before baking
- Peaks that stand without looking chunky
- Dry exterior after baking
- Center either crisp or slightly chewy depending on size and time
Troubleshooting by symptom
Problem: Whites will not whip
Likely causes:
- Greasy bowl or whisk
- Yolk contamination
- Too much sugar added too early
- Very low-power mixing combined with cold whites
Fix:
- Start over with clean equipment
- Separate more carefully
- Add sugar later
- Let whites warm slightly
Problem: Foam looks dull and curdled
Likely cause:
- Overbeating
Fix:
- Try whisking in one fresh egg white if only slightly overdone
- Otherwise restart
Problem: Meringue leaks syrup
Likely causes:
- Sugar not fully dissolved
- Humid environment
- Underbaking
Fix:
- Use superfine sugar
- Whip until smooth, not grainy
- Extend drying time at low temperature
Problem: Meringues are chewy all the way through
Likely causes:
- Oven too cool or insufficient bake time
- High sugar formula by design
- Humidity during cooling or storage
Fix:
- Increase drying time
- Confirm actual oven temperature with a thermometer
- Store airtight when fully cool
Problem: Meringues crack badly
Likely causes:
- Oven too hot
- Foam overbeaten
- Rapid cooling or uneven piping sizes
Fix:
- Lower oven by 15 to 25°F (8 to 14°C)
- Stop at glossy stiff peaks, not dry peaks
- Bake evenly sized portions
Problem: Soufflé rose unevenly
Likely causes:
- Uneven folding n- Ramekin not prepared uniformly
- Oven hot spots
Fix:
- Fold more evenly but gently
- Butter dish in upward strokes
- Rotate only if recipe and timing allow
A note on safety
Raw or lightly cooked egg white preparations carry some food safety risk. If serving very young, elderly, pregnant, or immunocompromised people, choose methods that heat the meringue adequately, such as Swiss or Italian meringue, or use pasteurized egg whites where suitable. Do note that carton whites do not always whip identically to fresh whites because processing can alter protein behavior.
The big takeaways
Egg white cookery becomes much less mysterious once you think of it as foam engineering.
- Proteins unfold when whipped and create films around air bubbles.
- Fat interferes with that film formation, which is why grease and yolk are so destructive.
- Copper ions help stabilize foam through interactions with ovotransferrin, giving finer texture and insurance against overbeating.
- Acid lowers pH and helps proteins form a more stable foam, especially in French meringue and soufflés.
- Sugar stabilizes, glosses, and thickens, but should usually be added gradually after initial foam forms.
- Heat determines whether the final structure dries crisp, stays chewy, puffs dramatically, or collapses.
- Technique changes the outcome: French meringue is light and simple, Swiss is silky and stable, Italian is the strongest and most resilient.
- Soufflés and macarons are not separate mysteries. They follow the same basic protein-and-bubble logic, just with different structural demands.
Once you grasp that, the old pastry rules stop sounding arbitrary. They become useful controls. Clean bowl. No fat. Soft peaks before sugar. Low heat for drying. Stop before dry peaks. Fold with intention. They are all ways of guiding proteins toward the structure you want.
And that is the beauty of egg whites: they reward both care and understanding. Learn the rules, and you can decide whether your dessert ends up shatter-crisp, chewy at the center, lofty as a soufflé, or smooth and glossy enough to crown a pie like satin.