Why Ghee Smells Nutty, Burns Clear, or Tastes Flat: Milk Solids, Water Activity, and the Clarification Rules Behind Better Searing, Tempering, and South Asian Cooking
RecipeSimpli
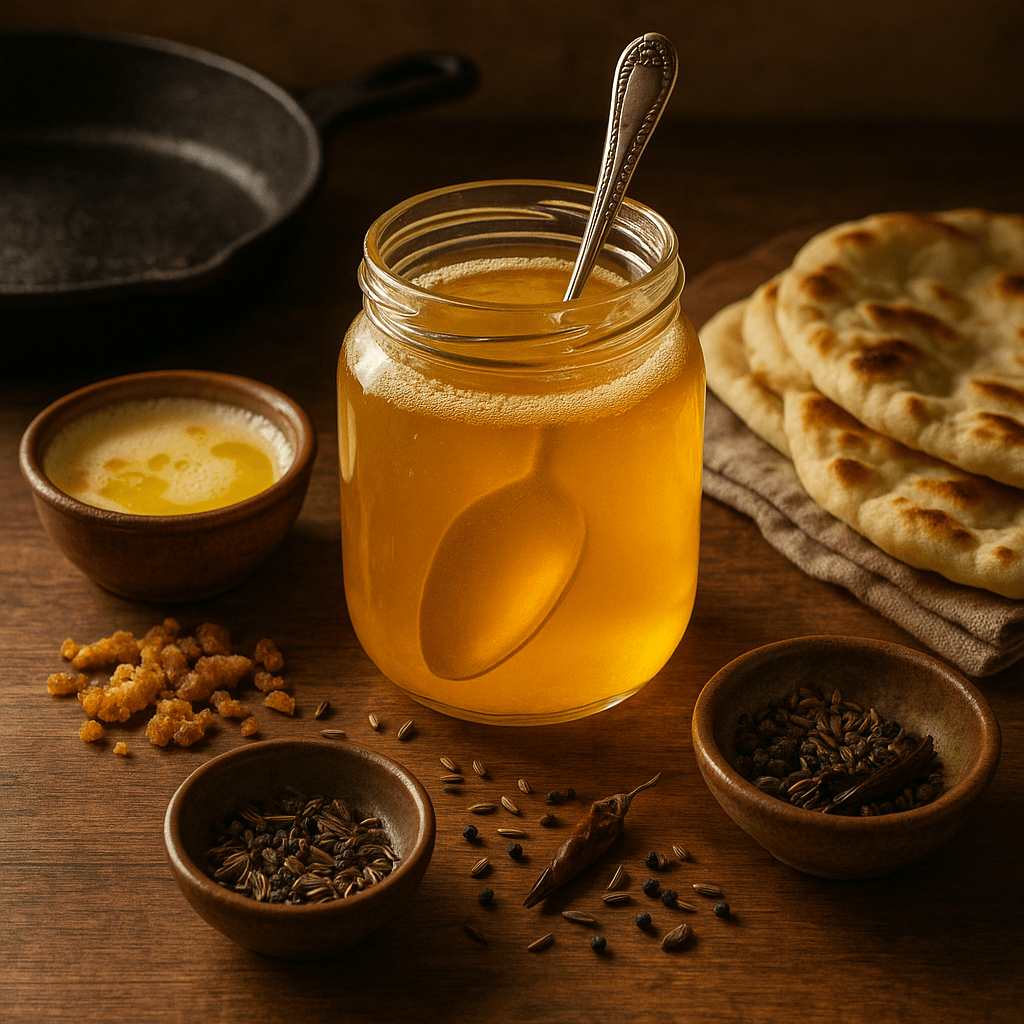
There’s a moment, if you’ve ever made ghee properly, when the kitchen stops smelling like melted butter and starts smelling like something deeper: toasted hazelnuts, warm caramel, fresh popcorn, maybe even the faint sweetness of condensed milk. That aroma is not magic, and it’s not just “butter, but stronger.” It’s the result of water leaving, proteins separating, sugars reacting, and milk fat becoming a cleaner, more heat-stable cooking medium. The difference between ghee that smells gloriously nutty, ghee that burns cleanly in a hot pan, and ghee that tastes oddly flat comes down to a few quiet but powerful variables: milk solids, water activity, and the degree of clarification.
For home cooks, ghee often gets reduced to a shortcut definition: butter that has been melted and strained. That description is useful, but incomplete in the same way saying bread is “flour mixed with water” is technically true while missing everything that matters. Good ghee is not merely strained butter. It is butter that has been guided through phase separation and controlled browning so that the water is driven off, the milk solids are either removed or selectively browned, and the fat is left with the aroma, stability, and texture you actually want for cooking.
That matters whether you’re making dal tadka, greasing a paratha griddle, searing a steak, brushing roast vegetables, or swapping ghee into a cake recipe. It matters if you want the fragrance of South Asian temple-style ghee, the neutral clarity of clarified butter for restaurant sauté work, or a richer, toastier ghee for drizzling over rice. And it matters because many disappointments with homemade ghee come from not knowing which stage you’re aiming for. Pull it too early and it tastes buttery but dull. Cook it too hot and the milk solids go from aromatic brown to bitter black. Leave in too much moisture and shelf life suffers. Remove every last browned speck and you may gain purity but lose flavor.
So let’s get into what ghee really is, how it behaves, and why technique matters.
Ghee, clarified butter, and where the line actually is
Butter is an emulsion: mostly milk fat, plus water, plus milk solids that include proteins and small amounts of lactose and minerals. Standard unsalted butter is roughly 80 to 82% fat, 16 to 18% water, and 1 to 2% milk solids. Those percentages vary a little by brand and country, but that range explains nearly everything that happens in the pot.
When you melt butter, that stable emulsion breaks. The components separate into layers and particles:
- Foam on top: mostly water vapor, air, and some proteins
- Golden fat in the middle: the part you want to keep
- Milk solids sinking to the bottom: proteins and sugars that can brown
If you stop once the butter is melted, skim the foam, and pour off the fat while leaving solids behind, you’ve made clarified butter. It is cleaner than whole butter and useful for sautéing because the solids that scorch first are mostly gone.
If you continue heating long enough to remove nearly all the water and allow the remaining milk solids to toast gently before straining, you’ve made ghee. That extra cooking time is what gives ghee its characteristic nutty aroma and slightly deeper color.
In practical terms:
- Clarified butter = cleaner, milder, less toasted
- Ghee = cleaner than butter, lower in moisture, often more aromatic because of controlled browning
South Asian ghee is not just a fat-processing trick; it’s a culturally central ingredient with religious, ceremonial, medicinal, and culinary importance across India, Pakistan, Bangladesh, Nepal, and beyond. It is used as a cooking medium, a finishing fat, an offering, a preservative, and a flavoring in sweets, breads, rice dishes, dals, and tempering oils. That is one reason reducing it to “high smoke point butter” misses the point. Ghee is functional, yes, but it is also deeply sensory.
Why ghee smells nutty: the role of milk solids and browning
The nutty smell people love in ghee comes largely from what happens to the milk solids during the final stage of clarification. Those solids contain proteins and residual milk sugars. As water diminishes and temperature in the solids rises, browning reactions accelerate, especially the Maillard reaction, which creates hundreds of aroma compounds associated with toast, nuts, caramel, and butterscotch.
A few important things are happening at once:
- Water is evaporating
- The concentration of proteins and sugars increases in the remaining solids
- The temperature of those solids rises enough for browning chemistry to kick in
- Fat captures and carries those aroma compounds
That last point matters. Fat is an excellent solvent for flavor molecules, so ghee doesn’t just sit next to browned milk solids; it absorbs part of their aromatic identity.
This is why two batches made from the same butter can taste completely different:
- A pale, lightly clarified batch may taste clean but somewhat flat
- A golden batch with lightly browned solids tastes nutty and rounded
- A dark amber batch with aggressively browned solids can be powerfully aromatic, or bitter if pushed too far
The sweet spot is usually where the milk solids at the bottom turn from cream-colored to light golden brown, and the bubbling quiets noticeably. That’s often the moment when the aroma suddenly shifts from dairy to toasted.
Why ghee burns clear: smoke point, solids, and moisture
People often say ghee has a high smoke point, and that’s true in a practical kitchen sense. But the full explanation is worth understanding.
Whole butter starts to misbehave in a hot pan not because milk fat itself is especially fragile, but because the milk solids and water complicate things.
- Water causes sputtering and limits temperature at first because it must boil off around 212°F / 100°C
- Milk proteins and sugars can scorch at relatively low pan temperatures compared with purified fat
- Those scorched solids create visible browning and bitter notes that people read as “burning”
Once those components are removed, you’re left with mostly milk fat, which tolerates higher temperatures more gracefully. Different sources report different smoke points based on purity and testing methods, but a useful working range is:
- Butter: roughly 300 to 350°F / 150 to 175°C in practical use
- Clarified butter: roughly 450°F / 230°C
- Ghee: often 450 to 485°F / 230 to 252°C, depending on residual solids and quality
Why the range? Because not all ghee is clarified to the same extent. A batch with more suspended browned particles may smoke sooner than a very clean, carefully strained batch. That does not necessarily mean it is worse. It may simply be more flavorful and slightly less neutral.
This is where the phrase burns clear makes sense. Ghee behaves more predictably in high heat because the compounds most likely to char early are gone or greatly reduced. In a pan for searing, that means:
- less sputtering
- less foamy confusion
- less risk of blackened milk solids
- better contact between food and pan
- a cleaner fat flavor at high heat
Why some ghee tastes flat
If homemade ghee tastes flat, the usual causes are surprisingly simple.
1. It was stopped too early
The butter melted, the foam was skimmed, and maybe the fat was strained—but the milk solids never really browned. The result is closer to clarified butter than aromatic ghee.
2. The heat was too low for too short a time
Evaporation happened, but the solids didn’t stay hot enough, long enough, to develop meaningful aroma.
3. It was over-filtered
If you strain very aggressively through an ultra-fine filter immediately, you may remove flavorful browned particles and volatile compounds before they contribute much character. This can be desirable if you want a very clean searing fat, but it can make the ghee less expressive.
4. The starting butter was bland
Ghee concentrates flavor, but it cannot create complexity from nowhere. Butter made from well-cultured cream or higher-quality cream can produce more aromatic ghee than cheap, neutral butter.
5. It picked up stale or oxidized notes
Because ghee is mostly fat, it can absorb off-aromas from poor storage, old butter, sunlight, or prolonged overheating.
Water activity: the quiet rule behind shelf life and flavor stability
Water activity is one of those scientific terms that sounds abstract until you see how useful it is. It does not simply mean “how much water is present.” It refers to how much water is available to support microbial growth and chemical reactions.
Butter contains enough water to make it perishable in ways pure fats are not. Ghee, when properly made, has very low available water because most of the moisture has been evaporated away. That lower water activity is a big reason ghee can be stored longer than butter and, in some traditional contexts, kept at room temperature if made cleanly and handled well.
Low water activity helps by:
- reducing microbial risk
- reducing hydrolytic spoilage
- improving storage stability
- making frying and tempering safer and less splattery
But there’s an important home-kitchen caveat: ghee is shelf-stable only when it is sufficiently dry and not re-contaminated with water.
That means:
- Don’t jar it while the container is wet.
- Don’t dip in a wet spoon.
- Don’t trap steam under the lid while it is still very hot.
- Don’t assume all homemade ghee is room-temperature safe forever.
For maximum safety and flavor retention, especially in humid kitchens, refrigeration is perfectly reasonable. The old-world image of ghee living on the counter is real, but that assumes a properly reduced, cleanly handled product and a household accustomed to using it regularly.
Lactose, casein, and digestibility
Ghee is often described as suitable for people sensitive to dairy, but that statement needs nuance.
During clarification, most of the lactose and casein-containing milk solids are removed with the browned sediment and skimmed foam. As a result, well-made ghee contains only trace amounts compared with butter.
That can make it easier to tolerate for some people who:
- are sensitive to lactose
- find butter heavy
- want dairy flavor with reduced milk solids
However, “reduced” does not always mean “zero,” especially in homemade ghee that is lightly strained or intentionally left with some suspended solids for flavor. Someone with a severe milk allergy should not assume ghee is safe unless it is specifically tested and labeled for that use.
For everyone else, this partial removal changes cooking performance as much as digestibility. Without those proteins and sugars, the fat behaves more cleanly in a hot pan and has a longer useful cooking range.
The clarification rules that actually matter
A good batch of ghee is less about tradition versus science than about understanding what signs mean. These rules will keep you out of trouble.
Rule 1: Start with unsalted butter
Use 1 pound / 454 g unsalted butter for a manageable home batch. Salted butter works in a pinch, but salt can muddy flavor and complicate moisture behavior.
Expected yield from 1 pound butter:
- about 1 1/2 cups / 340 g ghee, depending on water loss and solids removal
Rule 2: Use a light-colored pan if possible
A pale saucepan makes it much easier to judge the color of the milk solids. In a dark pan, the line between golden and burnt can pass unnoticed.
Rule 3: Melt gently, then maintain a quiet simmer
Start over low heat until fully melted. Then keep the butter between roughly 225 and 250°F / 107 to 121°C if you’re measuring, or at a gentle simmer if you’re not.
Too cool, and you’ll take forever to evaporate water. Too hot, and the bottom solids can scorch before the moisture is gone.
Rule 4: Don’t stir constantly
Once melted, leave it mostly alone. Stirring redistributes solids and can cloud your visual cues. An occasional gentle nudge is fine; vigorous stirring is not helpful.
Rule 5: Listen for the bubbles
The sound is a better indicator than many recipes admit.
Stages typically go like this:
- Loud bubbling and foam: lots of water still leaving
- Steady simmer, smaller bubbles: moisture dropping, solids settling
- Quieter bubbling, clearer fat: nearing completion
- Nutty aroma, golden solids: ready to remove from heat
When the crackling and foaming noticeably subside, you are close.
Rule 6: Judge by the solids, not just the clock
For 1 pound / 454 g butter, the process usually takes 20 to 35 minutes, depending on pot size, heat level, and butter brand. But time is only a guide.
The real endpoint is:
- clear golden fat
- milk solids on the bottom that are light golden to amber, not dark brown or black
- a distinct nutty aroma
- reduced bubbling
Rule 7: Carryover heat is real
Even after you turn off the stove, the hot fat continues cooking the bottom solids. If you wait too long to strain, perfect ghee can tip into bitterness.
Step-by-step: how to make deeply aromatic, stable ghee at home
Here is a reliable method for a flavorful all-purpose ghee that works for tempering, searing, and everyday cooking.
Ingredients
- 1 pound / 454 g unsalted butter
Optional for larger batch:
- 2 pounds / 908 g unsalted butter in a medium heavy saucepan
Equipment
- heavy-bottomed saucepan, preferably light-colored
- spoon or small skimmer
- fine-mesh strainer
- cheesecloth or coffee filter, optional for extra clarity
- heatproof measuring cup or bowl
- clean, dry glass jar with lid
Method
1. Melt the butter
Place the butter in the saucepan over low heat. Let it melt completely without stirring much.
After a few minutes, the butter will separate and a white foam will form on top.
2. Let the water cook off
Raise the heat slightly to maintain a gentle simmer, not a rolling boil. The butter will sputter and foam as water evaporates.
This stage usually lasts 8 to 15 minutes for 1 pound, depending on your stove.
What to watch for:
- active bubbling
- cloudy fat becoming more transparent
- foam gradually thinning
You may skim excess surface foam if you like, but it is not strictly necessary.
3. Watch for settling and browning
As the bubbling calms, milk solids will sink to the bottom. The fat in the middle will become clearer and more brilliantly golden.
Now stay close. In the final 5 to 10 minutes, the solids can go from pale to beautifully toasted quickly.
Tilt the pan gently if needed to inspect the bottom. You’re looking for solids that are the color of lightly toasted breadcrumbs or pale hazelnuts.
4. Pull it at the aroma peak
As soon as the ghee smells distinctly nutty and the solids are lightly browned, remove the pot from the heat.
If you want a milder ghee for baking or neutral high-heat cooking, stop at light gold. If you want a more assertive South Asian-style finishing ghee, let it reach deeper golden brown, but not chestnut-dark.
5. Rest briefly, then strain
Let the ghee rest for 2 to 5 minutes so the bubbling settles, but don’t leave it sitting too long on residual heat.
Strain through a fine-mesh strainer into a dry container. For very clear ghee, line the strainer with cheesecloth.
Some cooks intentionally leave a tiny amount of fine browned sediment in the jar for more flavor. That is fine if you’ll use it relatively quickly, but perfectly strained ghee stores better and behaves more predictably at high heat.
6. Cool and store
Let cool uncovered until warm, not hot, then seal.
Storage guidelines:
- Room temperature, cool pantry: about 1 month if very dry and handled cleanly
- Refrigerator: 3 to 6 months with good flavor retention
- Freezer: up to 1 year
If it smells stale, sour, or painty, it has oxidized and should be discarded.
How browning degree changes cooking behavior
One of the most useful distinctions for home cooks is that not all ghee should be used the same way.
Light ghee
Characteristics:
- pale gold
- mild aroma
- very clean flavor
- slightly higher practical heat tolerance
Best uses:
- high-heat searing
- roasting
- baking where you don’t want dominant nuttiness
- eggs, sautéed vegetables, delicate fish
Medium ghee
Characteristics:
- warm golden color
- clear nutty aroma
- balanced flavor and versatility
Best uses:
- everyday cooking
- rice dishes
- dal finishing
- parathas
- grilled meats
- pan-frying and shallow frying
Darker, more toasted ghee
Characteristics:
- deeper amber tone
- strong nutty/caramel notes
- may contain more aromatic browned compounds
- can smoke slightly sooner if not finely strained
Best uses:
- drizzling over khichdi or dal
- sweets like halwa or ladoo
- finishing roasted vegetables
- breads and festive dishes where aroma matters more than maximum heat tolerance
In other words, more browned is not always “better.” It is simply a different tool.
Ghee in tarka: why it blooms spices so beautifully
Tempering, or tarka/tadka, is one of the clearest demonstrations of why ghee matters. In this technique, whole or ground spices are briefly fried in hot fat to release aroma and infuse the oil before being poured over a dish.
Ghee excels here for three reasons:
- Low moisture means spices fry rather than steam.
- Good heat tolerance lets you reach blooming temperature quickly.
- Its own nutty aroma supports rather than overwhelms spices.
A practical tarka heat rule
Heat 1 to 3 tablespoons ghee in a small pan over medium heat until shimmering, about 325 to 375°F / 163 to 190°C if measured. Then add spices in order of sturdiness.
Example for dal tadka:
- 2 tablespoons ghee
- 1 teaspoon cumin seeds
- 1/2 teaspoon black mustard seeds
- 2 dried red chilies
- 6 to 8 curry leaves, dried or very carefully added if fresh
- 2 thinly sliced garlic cloves
- pinch of asafoetida, optional
Timing:
- cumin: 10 to 20 seconds, until fragrant and a shade darker
- mustard: until popping slows, 10 to 15 seconds
- garlic: 10 to 20 seconds, just to pale gold
Then immediately pour over the cooked dish.
The common mistake is overheating the ghee before the spices go in. If the ghee is smoking hard, the spices will scorch in seconds and taste harsh. For tarka, you want hot and lively, not punishingly hot.
Ghee for high-heat searing
Ghee is often marketed as ideal for searing, and it truly is useful here—if you follow the same rules chefs use with any hot fat.
Searing rule 1: preheat the pan, not the ghee forever
Get your skillet hot first, especially cast iron or stainless steel. Then add 1 to 2 teaspoons ghee shortly before the food goes in.
Target surface temperature for many proteins:
- 400 to 450°F / 204 to 232°C pan surface
The ghee should shimmer but not sit smoking unattended.
Searing rule 2: dry the food well
Ghee helps, but it cannot overcome wet meat or vegetables. Pat proteins dry thoroughly. Surface moisture delays browning and lowers the effective pan temperature.
Searing rule 3: don’t crowd the pan
Even with ghee, crowding traps steam and sabotages crust formation.
Searing rule 4: combine fats if useful
For some cooks, a blend of 1 tablespoon ghee + 1 tablespoon neutral oil gives both flavor and economy, especially in larger pans.
Ghee is particularly good for:
- steak finishing
- lamb chops
- paneer searing
- mushrooms
- cabbage wedges
- cauliflower steaks
- potatoes started on the stovetop, finished in the oven
Ghee in baking: what changes when water and solids are gone
Swapping ghee for butter in baking is not a one-to-one flavor decision only; it is a structural decision too.
Because butter contains water and ghee largely does not, replacing butter with ghee changes:
- dough hydration
- spread in cookies
- tenderness in cakes
- steam production in laminated or flaky applications
A practical substitution rule
If a recipe calls for 1 cup / 227 g butter, start with about:
- 3/4 cup to 7/8 cup ghee by volume, or
- around 185 to 200 g ghee by weight
Then consider adding back a little liquid if needed, such as:
- 1 to 2 tablespoons milk or water
Where ghee works especially well:
- shortbread
- some cookies
- dense cakes
- muffins
- granola
- pie crusts where a sandy tenderness is welcome
- Indian sweets like besan ladoo, mohanthal, and halwa
Where butter may still be better:
- laminated doughs
- recipes relying on butter’s water for steam lift
- very airy butter cakes designed around creaming whole butter
Ghee also brings a toasted note that can be wonderful with cardamom, nuts, banana, carrot, citrus, and warm spices.
Common mistakes and how to avoid them
Mistake: using high heat to go faster
Result: scorched bottom solids, bitter finish, uneven flavor.
Fix: keep the simmer gentle and steady.
Mistake: judging only by color of the liquid fat
Result: you miss what’s happening at the bottom.
Fix: check the milk solids; they tell the real story.
Mistake: straining into a damp jar
Result: shortened shelf life and possible spoilage.
Fix: make sure the jar is fully dry.
Mistake: sealing while steaming hot
Result: condensation under the lid reintroduces moisture.
Fix: cool until warm before closing.
Mistake: using dark, strongly browned ghee for every task
Result: overly intense flavor or premature smoking in delicate applications.
Fix: match the ghee to the cooking job.
Mistake: confusing sediment with failure
Result: unnecessary worry.
Fix: a little browned sediment is normal; black sediment is the problem.
Variations worth trying
Cultured butter ghee
Made from cultured butter, this can be more complex and tangy-aromatic, though subtle. Excellent for finishing grains and vegetables.
Desi-style deeper ghee
Cook a little longer until the solids are a richer golden brown. Wonderful for dals, khichdi, and sweets. Watch the line carefully between deep toast and bitterness.
Curry leaf or garlic-infused ghee
Infuse after clarification, not during the noisy water-evaporation stage, for cleaner control. Add dried curry leaves or lightly crushed garlic to hot finished ghee for 2 to 5 minutes, then strain.
Small-batch finishing ghee
Make a darker, more aromatic batch specifically for spooning over food at the table, and a lighter batch for searing and baking.
A final note on South Asian cooking and respect for ingredient choice
In many South Asian kitchens, ghee is not interchangeable with just any cooking fat. It has a specific flavor role in biryani, halwa, chapati finishing, tadka, festive sweets, and ritual foods. Understanding its science should sharpen appreciation, not flatten tradition into lab language.
When cooks say one ghee smells sweeter, another feels heavier, or a certain homemade batch is better for dal than for frying pooris, they are often observing genuine differences in browning level, residual solids, moisture content, oxidation, and source milk flavor—even if they aren’t describing them in scientific terms. The science simply gives us a second vocabulary for the same reality.
Takeaways: the simple rules behind better ghee
If you remember nothing else, remember this:
- Ghee is not just melted butter; it is butter that has been de-watered, separated, and gently browned.
- Its nutty smell comes from browned milk solids and the aromatic compounds they create.
- Its cleaner high-heat behavior comes from removing water, proteins, and sugars that scorch early.
- Ghee tastes flat when it is under-browned, over-filtered, or made from bland butter.
- Better shelf life depends on low water activity and clean, dry storage.
- The more completely you remove lactose and casein-rich solids, the cleaner the cooking performance—but often the milder the flavor.
- For tarka, use medium-hot ghee and bloom spices briefly, not aggressively.
- For searing, add ghee to a hot pan shortly before the food.
- For baking, remember that ghee has much less water than butter, so recipes may need slight adjustment.
If you make ghee with intention rather than habit, you stop thinking of it as a pantry extra and start treating it as three fats in one: a flavor concentrate, a high-heat tool, and a cultural ingredient with a real culinary personality. That’s when the difference becomes obvious in the pan. The dal smells fuller. The steak crusts more cleanly. The spices bloom instead of scorching. And the spoonful over hot rice tastes like more than butter ever could.