Why Peanuts Turn Paste-Smooth, Grainy, or Oily: Cell Rupture, Fat Release, and the Roast‑Salt‑Grind Rules for Better Peanut Butter, Sauces, and Brittle
RecipeSimpli
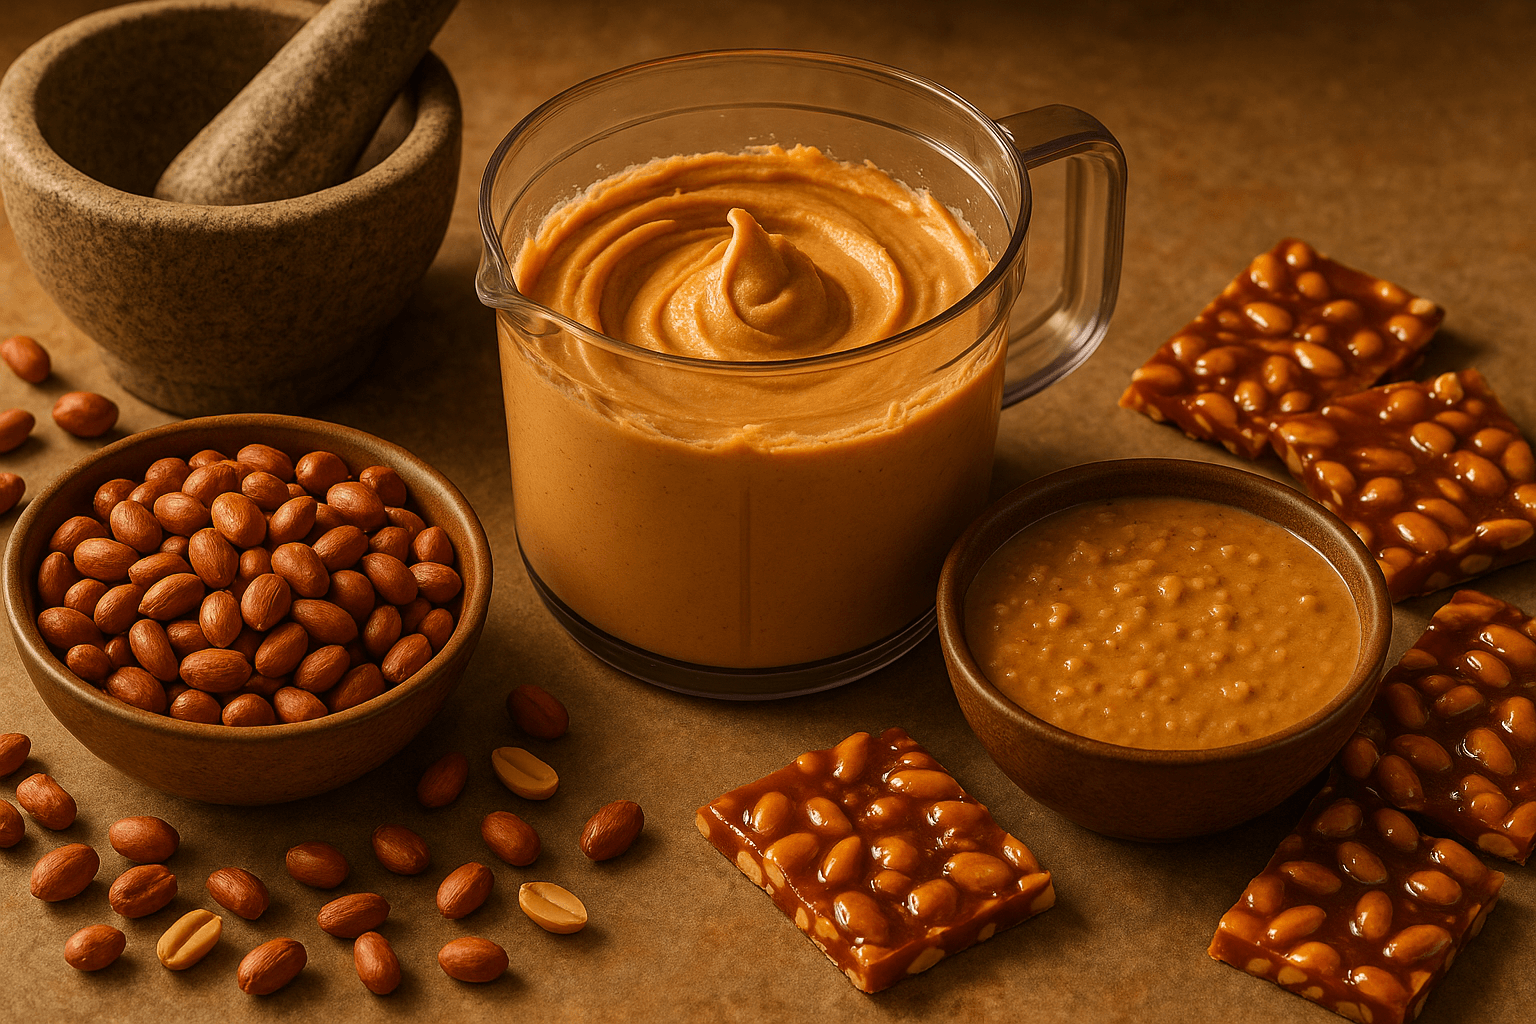
A handful of peanuts can become three wildly different things depending on what you do next: a lush, spoonable peanut butter that ribbons off a knife; a stubborn, gritty paste that seems to fight every stir; or a slick, oily mass that separates in the jar and leaves you wondering what went wrong. The same nut can also stay crisp in brittle, melt into satay-style sauce, or shower a noodle bowl with toasty crunch. That range is what makes peanuts so useful—and so misunderstood.
If you’ve ever blitzed peanuts in a food processor and watched them go from crumbs to clumps to something almost smooth, then suddenly too loose and oily, you’ve already seen the core science in action. Peanuts are tiny packages of cells containing fat, protein, starch-like carbohydrates, water, and flavor compounds. Roast them, grind them, add salt or sugar, and you’re changing how those cells break, how oil escapes, and how the resulting particles move past one another. Texture is not random. It’s a controlled consequence of cell rupture, particle size, moisture, temperature, and dissolved solids.
Understanding that gives you power. It tells you why warm peanuts make smoother butter, why a spoonful of water can seize a nut paste but coconut milk can relax it, why over-roasting makes bitterness more likely, and why the order in which you add salt and sugar matters more than most recipes admit. It also explains why the same peanut behaves one way in brittle and another in sauce.
This is a science-first guide to peanut behavior for home cooks: what roasting really does, how grinding turns nuts into butter, how salt and sugar affect flow, and the practical rules for better peanut butter, satay-style sauces, praline, and crunchy peanut toppings.
Peanuts: a legume that acts like a nut in the kitchen
Peanuts are legumes, not true nuts, but in cooking they behave enough like rich tree nuts that we treat them the same way. Composition is the key reason. Peanuts are roughly 45 to 50% fat, 25 to 30% protein, and around 10 to 15% carbohydrate, with a small amount of moisture when raw. Those numbers vary by variety and roast level, but they explain almost everything textural.
That high fat content means peanuts can become a self-lubricating paste with no added oil. The proteins and fine solid particles, meanwhile, can either help create a stable, spreadable emulsion-like suspension or make the result feel dry and gritty if they remain too coarse. Their low water content means peanuts do not dissolve into smoothness the way cooked beans do. Smooth peanut butter is not a puree in the watery sense; it is a dense suspension of microscopic solid peanut particles in released peanut oil.
Historically, peanuts have moved through many culinary identities. In West African cuisines, ground peanuts enrich soups and stews. In Southeast Asian cooking, they appear in satay sauces and sambals. In the Americas, they become candies, brittles, boiled snacks, savory toppings, and peanut butter. Each tradition, whether by mortar and pestle, stone grinder, or industrial mill, learned the same lesson: peanut texture depends on controlling roast, grind, heat, and additions.
What roasting changes before the grinder ever starts
Raw peanuts taste beany, pale, and a little grassy. Roasting transforms them because heat triggers several major changes.
1. Moisture drops
As peanuts roast, they lose water. Less water means a drier, crisper nut that fractures more easily. That matters for grinding. A roasted peanut shatters and then releases oil more readily than a raw one. Too much remaining moisture can make pastes feel heavy or gluey rather than fluid.
2. Flavor precursors react
Roasting drives Maillard reactions between amino acids and reducing sugars, creating hundreds of aromatic compounds: toasted, caramel, cocoa-like, coffee-like, and deeply nutty notes. It also pushes some sugar caramelization, though Maillard is usually the bigger player in peanut roasting. This is why lightly roasted peanuts taste milder and sweeter, while deeper roasts turn more intense and eventually bitter.
3. Cell walls weaken
Heat makes peanut structure more brittle. The tissue dries, proteins denature, and fat becomes more mobile. When the grinder blades hit warm roasted peanuts, the cells rupture more easily and release oil faster.
4. Color and bitterness increase
There is a sweet spot. Under-roast peanuts and you get weak flavor and reluctant oil release. Over-roast them and the darker compounds can move from pleasant toastiness into harsh bitterness and a drying finish.
A practical home roasting range
For most home applications, roast shelled peanuts at 325 to 350°F (165 to 175°C) for 12 to 20 minutes, stirring once or twice, depending on whether they are raw, blanched, or skin-on and how dark you want them.
- For smooth peanut butter: aim for medium roast, usually 325°F/165°C for 15 to 18 minutes.
- For satay sauce or peanut dressings: medium to medium-dark is excellent, around 15 to 20 minutes at 325°F/165°C, because dilution with liquid softens intensity.
- For brittle or praline: medium roast works best. The sugar contributes browning, so the peanuts need not be very dark.
- For crunchy toppings: you can roast slightly darker for contrast, but stop before acrid notes develop.
Good peanuts smell warm and nutty, look golden to light chestnut, and taste fully roasted at the center. Carryover cooking is real; they continue to darken slightly after leaving the oven.
From crumbs to butter: what the grinder is actually doing
The dramatic texture change during grinding happens in stages.
Stage 1: Fragmentation
At first, blades or burrs chop peanuts into coarse pieces, then smaller granules. You have essentially made peanut gravel.
Stage 2: Meal and clumping
As particles get smaller, their total surface area skyrockets. Tiny amounts of released fat coat those surfaces. The particles start sticking together into damp-looking clumps. This is the stage where many people think something has gone wrong. It hasn’t.
Stage 3: Cell rupture and oil release
Continue grinding and friction warms the mass. More cell walls rupture. More oil escapes. Once enough oil is free to continuously lubricate the particles, the paste suddenly loosens.
Stage 4: Paste refinement
After loosening, continued grinding reduces particle size further and distributes oil more evenly. This is where gritty paste can become smooth and creamy.
The big idea is this: smooth peanut butter is a threshold phenomenon. Before enough cells rupture and enough oil is released, the mixture feels dry and grainy. After the threshold, it flows.
That threshold is affected by roast level, peanut temperature, machine power, batch size, and any added ingredients.
Why peanuts turn grainy
A grainy peanut paste usually comes from one or more of these causes:
Particles are still too large
This is the most common reason. The solids haven’t been ground fine enough yet. Human tongues are surprisingly sensitive to particle size. Once particles drop to a small enough range, texture shifts from sandy to creamy.
Not enough oil has been released
If the peanuts are cool, under-roasted, or the grinder is weak, oil release may lag behind grinding. The particles stay insufficiently lubricated.
The batch is too small
In a food processor, a tiny batch can bounce around the bowl instead of staying in the blade path. For many standard processors, 2 to 3 cups (300 to 450 g) peanuts is the minimum efficient batch.
Add-ins were introduced too early
Sugar, cocoa, milk powder, or other dry ingredients can absorb free oil or interrupt efficient grinding if added before the peanut butter has already turned smooth.
The machine overheated and you stopped too early
People often pause at the clumpy stage because it looks wrong. In reality, another 1 to 4 minutes may be exactly what is needed.
Why peanuts turn oily
An oily peanut butter or peanut paste is not necessarily ruined. Often it simply means more oil has been released than the solid particles can hold in a thick network.
Over-grinding
The finer the particles and the warmer the mixture, the more free-flowing the paste becomes. Industrial peanut butters solve this with particle-size control and stabilizers; home versions often become looser because warm oil is mobile.
Peanuts were very warm
Warmth helps smoothness, but too much heat can make the butter temporarily runny. Freshly ground peanut butter may seem oily while hot, then thicken as it cools.
Natural separation
Over time, gravity pulls free oil upward in unstabilized peanut butter. That’s normal. Commercial “no-stir” styles use stabilizers such as fully hydrogenated vegetable oils to keep oil suspended.
High oil ratio from variety or added oil
Some peanuts are naturally richer in oil, and any additional neutral oil will make the end product looser unless balanced by more solids.
If your peanut butter looks oily right after grinding, cool it completely before judging. Refrigeration for 1 to 2 hours can dramatically thicken it.
The roast-salt-grind rules
If you remember only a few rules, make them these.
Rule 1: Roast enough for flavor and easy oil release, but not so far that bitterness dominates
Medium roast is the sweet spot for most uses. Think fragrant, golden-brown, fully crisp.
Rule 2: Grind peanuts alone first
For the smoothest results, process peanuts by themselves until they are fully fluid and creamy. Then add salt, sugar, honey, spices, or extra oil.
Rule 3: Warm peanuts grind better than cold peanuts
Let roasted peanuts cool just enough to handle, then grind while still slightly warm—around 100 to 120°F (38 to 49°C) is excellent.
Rule 4: Use enough volume for your machine
A half-empty processor often makes poor peanut butter. Keep the nuts circulating through the blade.
Rule 5: Salt and sugar change flow in different ways
Salt can slightly tighten or sharpen texture depending on grind size and amount. Sugar almost always makes the butter thicker or grittier unless it is very finely powdered or fully dissolved in another phase.
Rule 6: Water is the tricky ingredient
A little water added directly to ground peanuts can make them seize into a thicker paste because proteins and fine particles hydrate and bind. To thin peanut mixtures, add enough liquid gradually and often with fat or sugar present, as in coconut milk, stock, or syrup.
The science of salt, sugar, and liquid
These additions deserve special attention because they explain why peanut butter, satay sauce, and brittle all behave so differently.
Salt: more than seasoning
Salt obviously makes peanuts taste more peanutty by suppressing bitterness and amplifying flavor. But texture-wise, the effect depends on form and timing.
- Fine salt disperses better than coarse salt.
- Added after grinding, it seasons cleanly with minimal textural impact.
- Added early, especially if coarse, it can contribute to a rougher texture because crystals do not dissolve in oil.
A useful range for peanut butter is 0.8 to 1.5% salt by weight. For 500 g peanuts, that’s 4 to 7.5 g salt, or roughly 3/4 to 1 1/4 teaspoons fine kosher salt depending on brand. Start low; you can always add more.
Sugar: sweetness with structure
Sugar complicates peanut systems because it is not oil-soluble.
In straight peanut butter, granulated sugar remains solid crystals unless ground extremely fine. That can make the spread seem gritty. Powdered sugar works better for smoothness, though too much creates a frosting-like stiffness.
Typical sweetened peanut butter might use 3 to 8% sugar by weight. For 500 g peanuts, that’s 15 to 40 g sugar.
In sauces, sugar may be dissolved in water, lime juice, tamarind, soy, or coconut milk. Once dissolved in a water phase, it no longer feels gritty, though it still changes viscosity by tying up water and increasing the density of the liquid around peanut particles.
In brittle and praline, sugar behaves completely differently. There, it forms a glassy candy matrix that traps peanuts in place. Peanut oil can interfere with crystal control if handled carelessly, but in a proper brittle, the peanuts remain embedded in hardened sugar rather than trying to become a paste.
Water and peanut pastes: why they seize, then loosen
This surprises many cooks. Add a spoonful of water to pure peanut paste and it may tighten dramatically instead of thinning. Why?
Because peanuts contain proteins and finely ground solids that interact strongly with small amounts of water. A limited amount of water hydrates those solids and creates a thicker paste. Only after you continue adding liquid—and often whisking vigorously—does the system loosen into a sauce.
This is exactly what happens with tahini, peanut butter, and some curry pastes.
For satay-style sauces, the best practice is:
- Start with smooth peanut butter or finely ground peanuts.
- Add liquid in small increments at first—1 to 2 tablespoons (15 to 30 ml) at a time.
- Whisk fully between additions.
- Expect tightening before loosening.
Coconut milk is especially forgiving because it brings both water and fat. The water hydrates peanut solids; the fat keeps the sauce rich and helps lubricate the mixture.
Step-by-step: ultra-smooth homemade peanut butter
Here is a reliable home method designed around the science.
Ingredients
- 500 g raw shelled peanuts (about 3 1/2 cups)
- 5 g fine salt (about 1 teaspoon Morton kosher, adjust to taste)
- Optional: 10 to 25 g sugar or honey
- Optional: 5 to 15 g neutral oil only if needed for machine performance
Equipment
- Rimmed sheet pan
- Oven
- Food processor or high-power blender
- Spatula
- Instant-read thermometer, optional but helpful
Method
1. Roast the peanuts
Heat oven to 325°F (165°C). Spread peanuts in a single layer. Roast 15 to 18 minutes, stirring once halfway, until golden and fragrant.
If using already roasted peanuts, warm them for 3 to 5 minutes in the oven to improve grinding.
2. Cool briefly, not completely
Let the peanuts rest 5 to 10 minutes. You want them warm, not scorching. If you can hold one comfortably, they’re ready.
3. Grind peanuts alone
Transfer peanuts to the processor. Process continuously, scraping down as needed:
- 30 to 60 seconds: coarse chopped nuts
- 1 to 2 minutes: sandy meal
- 2 to 4 minutes: thick clumping paste
- 4 to 8 minutes: smoother, glossier butter
Time varies with machine strength. Be patient at the clump stage.
4. Judge temperature and texture
If the machine bowl feels very hot, pause 1 minute to protect the motor, then continue. If the butter is already smooth but seems a little loose, remember it will thicken slightly when cool.
5. Add salt, then optional sweetener
Once smooth, add salt and process 15 to 30 seconds. If using powdered sugar or honey, add now and process briefly.
If using granulated sugar, expect a bit more texture unless you process long enough to reduce crystal size.
6. Adjust consistency
Only if truly needed, add 1 teaspoon (5 ml) neutral oil at a time. Most roasted peanuts need none.
7. Cool before final evaluation
Transfer to a jar and cool completely. Refrigerate if you want a firmer set.
Common mistakes
- Using too few peanuts: the blade can’t grab effectively.
- Adding salt or sugar too early: slows the path to smoothness.
- Stopping at the clump stage: the butter hasn’t crossed the oil-release threshold yet.
- Over-roasting: creates bitterness that no amount of sugar can fully hide.
Step-by-step: satay-style peanut sauce that stays smooth
Peanut sauce is where many cooks accidentally create lumps, tightness, or oil slicks. The fix is order and gradual dilution.
Ingredients
- 120 g smooth peanut butter (about 1/2 cup)
- 160 ml coconut milk (about 2/3 cup)
- 1 to 2 tablespoons brown sugar or palm sugar, 12 to 25 g
- 1 1/2 tablespoons soy sauce, 22 ml
- 1 tablespoon lime juice, 15 ml
- 1 to 2 teaspoons red curry paste or chili paste
- Optional: 1 teaspoon tamarind concentrate
- Warm water as needed to thin, 1 tablespoon/15 ml at a time
Method
- In a bowl, mix peanut butter with 2 tablespoons (30 ml) coconut milk until very smooth. It may tighten at first.
- Add another 2 tablespoons (30 ml) coconut milk and whisk again.
- Whisk in sugar, soy, lime, chili paste, and tamarind.
- Add the remaining coconut milk gradually until pourable.
- Warm gently over low heat if serving hot, keeping the sauce below a bare simmer, around 180 to 190°F (82 to 88°C).
Why it works
Starting with small liquid additions creates a smooth base before the sauce gets too thin to homogenize. Coconut milk contributes emulsified fat, which helps body and gloss. Gentle heat dissolves sugar and relaxes viscosity without scorching peanut solids.
Common mistakes
- Dumping in all the liquid at once: hard-to-remove lumps.
- Boiling hard: can break the sauce or drive separation.
- Using natural separated peanut butter without stirring first: inconsistent fat balance.
Step-by-step: peanut brittle and praline without scorched nuts
In brittle, peanuts are not being ground into butter; they are being suspended in a sugar glass. The main risks are scorching the peanuts, crystallizing the sugar, or making the candy greasy.
Ingredients
- 200 g granulated sugar (1 cup)
- 120 ml light corn syrup (1/3 to 1/2 cup, depending on style; 100 to 160 g)
- 60 ml water (1/4 cup)
- 225 g roasted peanuts (about 1 1/2 cups)
- 30 g unsalted butter (2 tablespoons)
- 4 g fine salt (3/4 teaspoon)
- 3 g baking soda (1/2 teaspoon)
- Optional: 1 teaspoon vanilla
Method
- Line a sheet pan or silicone mat and have everything measured before you start.
- Combine sugar, corn syrup, and water in a saucepan. Cook over medium heat until dissolved, then increase heat.
- Cook without much stirring to 300°F (149°C), the hard-crack stage.
- Remove from heat. Stir in butter, salt, peanuts, and baking soda quickly.
- Spread immediately into a thin layer.
- Cool completely, then break into pieces.
The science
- Corn syrup helps prevent unwanted sugar crystallization.
- Baking soda creates tiny bubbles, making brittle lighter and easier to bite.
- Pre-roasted peanuts reduce the time peanuts spend in the hot syrup, lowering risk of scorching.
Practical rule
Do not rely on the candy syrup to roast raw peanuts fully unless you are following a tested recipe specifically built for that method. For clean peanut flavor, roast first.
Peanut toppings: keeping crunch instead of drift into soggy or greasy
For chopped peanuts on noodles, salads, sundaes, or stir-fries, the goal is usually crisp texture and clear roasted flavor.
Best practice
- Roast at 325°F (165°C) for 12 to 16 minutes.
- Cool completely before chopping to reduce smearing.
- Salt lightly while warm if desired, about 0.5 to 1% by weight.
- Store airtight.
If adding to hot dishes, sprinkle at the last minute. Peanut pieces absorb surface moisture and soften over time.
For extra-fragrant toppings, toss hot peanuts with a tiny amount of neutral oil—1 teaspoon per 2 cups peanuts—plus spices like chile flakes, curry leaf powder, or five-spice. More oil than that risks a greasy feel.
Troubleshooting by symptom
“My peanut butter is dry and won’t turn smooth.”
- Keep grinding another 1 to 3 minutes.
- Make sure the peanuts were sufficiently roasted.
- Warm the peanuts slightly or let the processor friction do its work.
- Increase batch size.
- Add 1 teaspoon oil only as a last resort.
“It’s smooth but oddly gritty.”
- You may need finer particle size: process longer.
- Sugar or coarse salt may be the culprit.
- Skins can add pleasant complexity but also a rougher texture.
“It turned runny and oily.”
- Cool completely before judging.
- Stir thoroughly; warm oil separates more easily.
- Refrigerate to firm.
- Next time, stop processing a little sooner once smooth.
“My peanut sauce seized into a stiff lump.”
- That’s usually from the first liquid addition. Keep whisking.
- Add more liquid gradually, 1 tablespoon at a time.
- Use warm liquid for easier loosening.
“My brittle tastes burnt.”
- Roast peanuts lighter next time.
- Pull the sugar at 300°F/149°C, not much higher.
- Work quickly once color is right; carryover can push bitterness.
Variations and advanced tips
Skin-on vs blanched peanuts
Skin-on peanuts have more tannins and slightly more bitterness but deeper complexity. For ultra-smooth, classic peanut butter, blanched peanuts are easier. For sauces and toppings, skin-on can be wonderful.
Honey-roasted style peanut butter
If you want a sweeter, dessert-like spread, add 20 to 30 g honey after the peanut butter is already smooth. Blend thoroughly. Expect a slightly tighter texture because honey contains water and dissolved sugars.
Crunchy peanut butter
Set aside 1/2 cup (70 g) roasted peanuts, chop them separately, and stir them into finished smooth peanut butter after cooling slightly. If you grind them in from the start, many pieces vanish instead of staying crunchy.
High-powered blender vs food processor
A blender can produce a very smooth butter but usually needs tamping and a sufficient volume to keep peanuts moving. A food processor is more forgiving for most home cooks. If using a blender, start with at least 3 cups peanuts and expect faster heating.
Defatted peanut powder
Peanut powder behaves differently because much of the fat is removed. It mixes into sauces more like a protein-rich flour. It cannot create classic peanut butter without reintroducing fat, and its texture tends to be drier and chalkier.
Stabilizing homemade peanut butter
If you want less oil separation, you can blend in 1 to 2 tablespoons (12 to 24 g) melted refined coconut oil per 500 g peanuts. Chill the jar to set. This is not identical to commercial stabilization, but it helps.
Cultural texture cues matter
What counts as “better” texture depends on the dish.
American-style peanut butter often aims for spreadable uniformity: smooth, slightly fluffy, spoonable at room temperature. West African peanut soups may begin with smoother peanut butter but finish as a rich broth where absolute silkiness matters less than integration. Southeast Asian peanut sauces vary from rustic and textured to polished and emulsified. Peanut pralines and brittles rely on preserving distinct nut identity rather than dissolving it into paste.
So the goal is not universal smoothness. It is matching peanut behavior to the dish.
For toast, smoother may be better. For noodles, a little texture can be welcome. For brittle, crunch is the whole point. Understanding the mechanics lets you choose intentionally instead of guessing.
A quick rulebook for better peanut results
Here’s the short version you can keep in your head:
- Roast medium for the broadest usefulness.
- Grind while warm for easier oil release.
- Process peanuts alone first until truly smooth.
- Add salt after smoothness; add sugar carefully because it thickens and can feel gritty.
- Expect a small amount of water to tighten peanut pastes before larger amounts loosen them.
- For brittle, roast peanuts first and cook sugar to hard-crack.
- For toppings, cool before chopping and add at the last minute to preserve crunch.
Peanuts don’t randomly become smooth, grainy, or oily. They follow a set of physical rules. Roast changes flavor and brittleness. Grinding ruptures cells and liberates oil. Salt sharpens flavor and can subtly influence texture. Sugar thickens, sweetens, or hardens depending on whether it is dispersed, dissolved, or cooked into candy. Water can seize a paste before it transforms it into sauce.
Once you see peanuts as a balance of solids, oil, heat, and particle size, better results become repeatable. Your peanut butter gets silkier. Your satay sauce stays glossy instead of clumpy. Your brittle tastes deeply nutty instead of scorched. And your toppings stay crunchy long enough to matter.
That’s the real kitchen payoff of food science: not just knowing why something happened, but being able to make the next batch exactly the way you want.