Why Quinoa Turns Bitter, Fluffy, or Waterlogged: Saponin Chemistry, Germ Structure, and the Steam Rules for Better Bowls, Salads, and Pilafs
RecipeSimpli
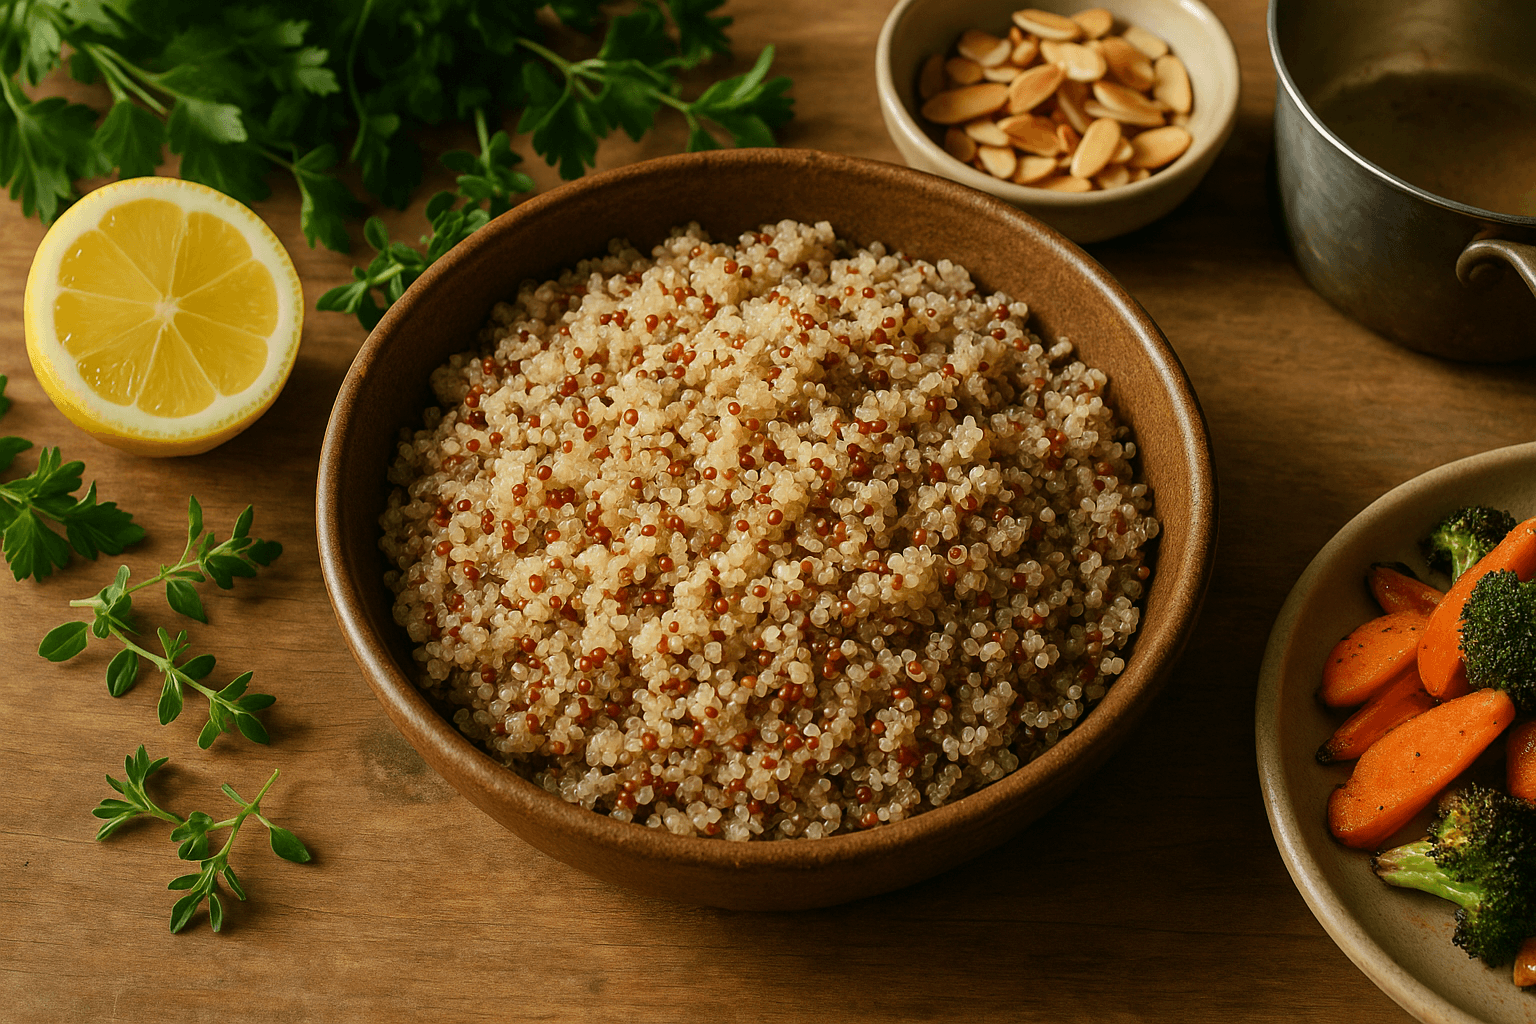
Quinoa has a reputation that few pantry staples can match: it is praised as a super grain, dismissed as bland health food, celebrated for weeknight ease, and quietly blamed for too many soggy lunch bowls. If you have ever cooked a pot that tasted faintly soapy, looked beautifully spiraled yet somehow mushy, or cooled into a dense, clumpy mass fit more for patching drywall than making dinner, none of that is random. Quinoa’s flavor and texture are unusually sensitive to a few very specific variables: residual saponins on the seed coat, the seed’s outsized embryo and tiny starch store, and the deceptively important rules of steam management after the water appears to be gone.
That is the good news. Once you understand what quinoa actually is and how it behaves in a pot, you can make it do what you want. You can cook it fluffy and separate for pilafs, a little softer for grain bowls, or intentionally firmer and drier for salads that sit in the fridge without collapsing. You can coax nuttiness by toasting, avoid bitterness without obsessive rinsing when it is unnecessary, and stop treating every color and type as if it cooks exactly the same.
This is a science-first guide to quinoa for real kitchens: what causes bitterness, why the little white tail matters, how water ratio and rest time change the final texture, and the practical rules that produce better bowls, salads, and pilafs every time.
Quinoa is not a grain, and that matters in the pot
Botanically, quinoa is a seed from Chenopodium quinoa, a plant related to spinach, beets, and lamb’s quarters. In the kitchen, we use it like a grain, but its structure is different from rice, wheat berries, or barley.
A rice grain is built largely around starch in the endosperm, wrapped in layers that soften and swell in a relatively predictable way. Quinoa seeds are tiny, with a comparatively small starch reserve and a relatively large embryo that wraps around the outside like a curved band. That embryo is the famous little white “tail” or ring that unfurls during cooking.
Because quinoa has less of the big, dense starch architecture that gives rice or farro their chew, it can move quickly from pleasantly tender to overhydrated. It does not have much structural margin for error. A little too much water, a little too much heat, or too much time trapped in steam can push it from separate grains into a damp, compact mass.
The same anatomy also explains one of quinoa’s charms: when properly cooked, it feels light rather than heavy. The seed softens, the embryo opens, and the tiny grains remain distinct if the moisture is managed well.
The bitterness question: saponins, not mystery
When people say quinoa tastes bitter, grassy, metallic, or even soap-like, the most common culprit is residual saponin.
Saponins are naturally occurring amphiphilic compounds found in the outer layers of many plants. “Amphiphilic” means they interact with both water and fats, which is why saponins can foam when agitated in water, a soap-like behavior that gives them their reputation. In quinoa, saponins function as a protective defense against birds, insects, and other predators. From the plant’s perspective, bitterness is a feature.
From the cook’s perspective, it is a processing issue.
Most quinoa sold in North America and Europe is pre-washed or mechanically processed to remove much of the saponin-rich outer coating. Even so, “pre-rinsed” does not always mean “saponin-free.” Trace amounts can remain, and some brands are much cleaner than others. Storage, dust in the bag, and the way quinoa is handled before packaging can also affect flavor.
What saponin bitterness tastes like
Residual saponins do not usually taste like dramatic, obvious soap. More often they create:
- a bitter finish at the back of the tongue
- a dry, slightly harsh edge
- a green or medicinal note
- dulling of otherwise nutty flavors
If your quinoa tastes merely bland, that is probably an under-seasoning or cooking issue. If it tastes actively unpleasant despite enough salt and aromatics, think saponins first.
Does all quinoa need rinsing?
Practically speaking, rinsing is still a good default. It is cheap insurance.
Rinse 1 cup quinoa in a fine-mesh sieve under cool running water for 30 to 60 seconds, rubbing the grains lightly with your fingers, until the water runs less cloudy and any foamy look subsides. Then drain very well.
There are exceptions:
- If a brand you trust is consistently clean and you are toasting the quinoa in oil before cooking, you may notice no bitterness at all without rinsing.
- If you are using quinoa flour or puffed quinoa, rinsing is not applicable.
- If you are cooking black quinoa for a very assertive, heavily seasoned dish, a faint residual edge may be masked, though that is not ideal.
But for most home cooks, the safest rule is simple: rinse unless you have a tested reason not to.
Why rinsing is not the whole story
A lot of quinoa advice stops at “rinse your grains,” as though bitterness is the only variable. In reality, rinsing helps flavor, not texture. You can rinse meticulously and still end up with waterlogged quinoa if the water ratio and steam phase are wrong. That is why many people feel they have “done everything right” and still do not love the result.
The embryo structure and the burst that tells you more than you think
One of quinoa’s signature visual cues is the white spiral or comma that appears as it cooks. This is the embryo separating from the seed body as the proteins hydrate, cell walls soften, and internal pressure changes.
People often treat that burst as a universal doneness signal: once the tails pop, quinoa is done. Not exactly.
The embryo unfurling tells you that hydration and heat have progressed enough to visibly alter the seed. It does not guarantee that:
- excess surface moisture has evaporated
- the center has reached your preferred tenderness
- the grains are dry enough to stay separate
- the pot has completed the carryover steam phase
In other words, visible spiral does not equal ideal texture. It is a signpost, not the finish line.
Because quinoa has that large external embryo, the grain can look theatrically “opened” before the moisture balance is right. This is one reason cooks often stop too early for crunchy centers or keep cooking too long in too much liquid and end up mushy.
What properly cooked quinoa should look like
For most uses, cooked quinoa should show:
- visible unfurled embryos on many or most grains
- tender seed bodies without a hard core
- little to no pooled liquid in the pot
- grains that separate easily when fluffed
The center should not crunch, but it should also not dissolve into porridge unless that is your intention.
Why quinoa goes fluffy or waterlogged: the steam rules
Texture is mostly a moisture-management problem. Quinoa does not just “absorb water.” It hydrates, steams, and then redistributes moisture during rest. If you interrupt or distort those phases, you change the final texture.
The biggest factors are:
- water ratio
- pot width and evaporation rate
- simmer intensity
- lid discipline
- rest time after heat
- draining or venting excess steam
Water ratio: the most abused quinoa number
You will often see quinoa cooked at 1 cup quinoa to 2 cups water. That works in some kitchens, especially with wide pots, active evaporation, and a cook who rests and fluffs aggressively. But in many home kitchens, 2 cups is more water than necessary for fluffy quinoa.
A better starting range is:
- For fluffy pilaf-style quinoa: 1 cup quinoa to 1 3/4 cups water
- For all-purpose bowls: 1 cup quinoa to 1 3/4 to 1 7/8 cups water
- For softer quinoa: up to 2 cups water
- For firmer salad quinoa: 1 cup quinoa to 1 2/3 cups water, sometimes even 1 1/2 cups depending on brand and pot
That is with rinsed quinoa and a covered simmer on the stovetop.
Why the difference? Pot geometry and stove behavior matter. A narrow saucepan with a tight lid loses less moisture than a wide pan or a loose lid. If you use 2 cups liquid in a very efficient pot, too much may remain trapped, making the finished quinoa damp even if fully cooked.
Lid discipline: leave it alone
Every time you lift the lid during cooking, you vent steam and reset the environment in the pot. That affects both hydration and temperature. Quinoa is small enough that this matters quickly.
A good rule:
- Bring quinoa and liquid to a boil uncovered or partially covered.
- As soon as it reaches a steady boil, reduce to the lowest simmer and cover tightly.
- Do not open the lid for about 12 to 15 minutes.
Frequent peeking often leads to uneven cooking because the top dries while the bottom remains wetter, encouraging overcorrection with extra water.
Simmer intensity: tiny grains hate aggression
A hard boil tosses quinoa around, breaks apart some grains, and encourages uneven absorption. Once the pot is covered, the ideal heat is low enough to maintain gentle steaming, not active churning.
If your burner runs hot, use a heat diffuser or move the pot partially off-center. Scorched quinoa on the bottom and wet quinoa on top usually means the heat was too high.
Rest time: the hidden step
If there is one technique that most improves quinoa, it is the off-heat rest.
When the liquid appears absorbed, turn off the heat and let the pot sit, covered, for 10 minutes. This allows residual steam to finish softening the grains and equalize moisture from bottom to top. Then uncover, fluff, and if needed let it vent for 1 to 3 minutes before serving.
This is the quinoa version of resting rice, and it is where a lot of the magic happens.
Without the rest, quinoa can seem wet on the surface and underdone at the core. With too long a rest in a very wet pot, it can continue to soften into mush. So the ratio and rest work together.
Venting: the step that prevents sogginess
If your quinoa is technically cooked but still feels damp, do not stir it vigorously in the pot. Instead:
- Fluff gently with a fork.
- Spread it on a sheet pan, large plate, or shallow bowl.
- Let excess steam escape for 5 minutes.
This is especially useful for quinoa destined for salads. Spreading the grains out stops carryover steaming and prevents clumping.
Color and type differences: white, red, black, and tri-color are not interchangeable
Quinoa color is not just cosmetic. Different varieties have different seed coat thickness, phenolic content, and cooking behavior.
White quinoa
White or ivory quinoa is the quickest-cooking and generally the softest. It tends to have the mildest flavor and fluffs easily. If you are new to quinoa or making a delicate pilaf, white is the easiest to control.
Use white quinoa for:
- breakfast quinoa
- soft grain bowls
- pilaf-style side dishes
- recipes where the quinoa should absorb dressing readily
Typical simmer time: 12 to 15 minutes
Red quinoa
Red quinoa usually holds its shape better and cooks a bit firmer. It is popular in salads because it remains more distinct after cooling.
Use red quinoa for:
- cold salads
- stuffed vegetables
- meal prep containers
- dishes where you want visible grain separation
Typical simmer time: 14 to 17 minutes
Black quinoa
Black quinoa tends to be the firmest and earthiest, with a slightly sweeter but more robust flavor. It can take longer and often benefits from the upper end of the water range.
Use black quinoa for:
- hearty salads
- grain bowls with roasted vegetables
- mixed-grain style presentations
- dishes where chew is desirable
Typical simmer time: 16 to 20 minutes
Tri-color blends
Tri-color quinoa is attractive but inherently compromises uniformity because the components do not cook at exactly the same rate. White grains may be perfectly tender while black grains remain firmer.
That is not a flaw if you expect texture variation. It can actually be pleasant. But if you want precision, buy a single type rather than a blend.
Toast-before-simmer: what it changes and what it does not
Toasting quinoa in a little oil or butter before adding liquid is one of the best ways to deepen flavor.
For 1 cup rinsed and well-drained quinoa, heat:
- 1 tablespoon olive oil, butter, or neutral oil
in a saucepan over medium heat. Add the drained quinoa and cook, stirring, for 2 to 4 minutes until it smells nutty and the grains look dry and lightly aromatic.
Then add your cooking liquid carefully and proceed.
Flavor effects of toasting
Toasting promotes:
- nutty, roasted aromas
- less grassy character
- a more savory profile
- a slightly drier surface feel in the finished dish
This happens because heat drives off some surface moisture and encourages browning reactions in a limited way, especially in the presence of proteins and residual sugars. Quinoa does not brown like bread crumbs, but the aroma noticeably improves.
Texture effects of toasting
Toasting can modestly help grains stay more separate because the surface dries before simmering, but it is not a cure for excess water. If you use too much liquid, toasted quinoa can still become soggy.
Should you toast before or after rinsing?
Rinse first, then drain thoroughly, then toast. If you toast unrinsed quinoa to avoid wetting it, you may lock in off flavors or miss the chance to remove residual saponins.
To speed drying after rinsing, shake the sieve well and let the quinoa sit for a minute before it goes into the pan.
The protein and mineral myths: what quinoa is, and what it is not
Quinoa is nutritious, but food mythology often outruns chemistry.
Myth: quinoa is uniquely high in protein
Quinoa is protein-containing, yes, but it is not some magical protein bomb. One cooked cup generally provides around 8 grams of protein, though values vary by source and variety. That is useful, especially for a plant food, but it is not equivalent to legumes, tofu, eggs, fish, or meat.
What made quinoa famous is partly that its protein includes all nine essential amino acids in meaningful amounts, often described as a “complete protein.” That is true in the technical sense, but it is often overstated in practical nutrition. Most people eating a varied diet do not need every single food to be complete on its own.
So the sensible conclusion is:
- quinoa contributes protein
- its amino acid profile is respectable
- it is not a standalone substitute for all other protein sources in most meals
Myth: quinoa is loaded with minerals no matter how you cook it
Quinoa does contain minerals such as magnesium, manganese, phosphorus, and iron. But the usable amount depends on variety, soil, processing, and what else you eat with it. Quinoa also contains compounds such as phytates that can bind minerals to some degree, affecting bioavailability.
This does not make quinoa unhealthy. It simply means nutrition is more nuanced than label worship.
Also, if you cook quinoa in a large volume of water and drain it aggressively, some soluble nutrients can be lost. Most standard absorption methods retain more.
Better framing
Think of quinoa as a versatile seed that offers:
- moderate protein
- fiber
- useful minerals
- gluten-free adaptability
- fast cooking compared with many whole grains
That is already plenty impressive without exaggeration.
Step-by-step master method for fluffy quinoa
Here is a reliable stovetop method for quinoa that is fluffy, distinct, and broadly useful.
Ingredients
- 1 cup quinoa, any single color preferred
- 1 3/4 cups water or stock
- 1/2 teaspoon kosher salt, or more to taste
- 1 teaspoon olive oil or butter, optional
Equipment
- fine-mesh sieve
- 2-quart saucepan with tight-fitting lid
- fork
Method
-
Rinse the quinoa. Place 1 cup quinoa in a fine-mesh sieve. Rinse under cool running water for 30 to 60 seconds, rubbing lightly. Drain very well.
-
Optional: toast. Heat 1 teaspoon oil or butter in the saucepan over medium heat. Add the drained quinoa and toast 2 to 4 minutes, stirring, until nutty.
-
Add liquid and salt. Pour in 1 3/4 cups water or stock and add 1/2 teaspoon kosher salt.
-
Bring to a boil. Over medium-high heat, bring the pot just to a boil.
-
Cover and reduce heat. Immediately cover with a tight lid and reduce heat to low.
-
Simmer gently. Cook without lifting the lid for 12 to 15 minutes for white quinoa, or longer for red and black as needed.
-
Check at the end. When the time is up, most liquid should be absorbed. If there is a thin film of moisture but no standing water, that is fine.
-
Rest off heat. Turn off the heat and let the pot stand, covered, for 10 minutes.
-
Fluff and vent. Uncover, fluff gently with a fork, and let steam escape for 1 to 2 minutes.
-
Serve or cool properly. For hot dishes, serve now. For salads, spread on a tray or plate to cool quickly.
Yield
1 cup dry quinoa yields about 3 cups cooked, depending on variety and final hydration.
Tailoring quinoa for bowls, salads, and pilafs
The ideal quinoa for one use is not always ideal for another.
Hot grain bowls
For bowls with roasted vegetables, beans, chicken, salmon, eggs, or tahini sauces, you usually want quinoa that is tender, warm, and able to absorb some dressing without feeling dry.
Best approach
- Use white or tri-color quinoa.
- Ratio: 1 cup quinoa to 1 3/4 or 1 7/8 cups liquid.
- Season the cooking liquid.
- Rest covered 10 minutes.
- Fluff and serve warm.
Flavor boosters
Cook in light stock instead of water, or add:
- 1 smashed garlic clove
- 1 strip lemon zest
- 1 small bay leaf
Remove aromatics before serving.
Common mistake
Making bowl quinoa too dry. If the grain is very firm and separate, it may not meld well with sauces. Aim for tender, not wet.
Cold salads
For salads, quinoa should be distinct, slightly firm, and dry enough on the surface to take vinaigrette instead of watering it down.
Best approach
- Use red quinoa or a red-white blend.
- Ratio: 1 cup quinoa to 1 1/2 to 1 2/3 cups water.
- Toast after rinsing for extra nuttiness.
- Rest only until cooked through, then spread out to cool.
- Dress when just warm or fully cool, depending on the recipe.
Why spreading out matters
If hot quinoa sits in a deep bowl, trapped steam keeps softening it. Spread it onto a tray for 5 to 10 minutes and you preserve texture.
Common mistake
Rinsing cooked quinoa for cooling. This washes away flavor and can make it waterlogged. Cool by spreading, not by dousing.
Pilaf-style quinoa
Pilaf treatment gives quinoa its best chance to feel like a deliberate, savory side dish rather than background health filler.
Best approach
- Sauté onion or shallot in 1 to 2 tablespoons oil or butter.
- Add rinsed, drained quinoa and toast 2 to 3 minutes.
- Add hot stock at 1 cup quinoa to 1 3/4 cups stock.
- Simmer covered, then rest.
- Finish with herbs, citrus, nuts, or dried fruit.
Why pilaf works so well
Fat coats the grains lightly, aromatics build flavor before hydration, and stock contributes savory depth. Since quinoa itself is mild, these layers matter.
A sample pilaf formula
For 4 servings:
- 1 cup white quinoa
- 1 tablespoon olive oil + 1 tablespoon butter
- 1/2 cup finely diced onion
- 1 3/4 cups chicken or vegetable stock
- 1/2 teaspoon kosher salt, if stock is unsalted
- 1/4 teaspoon black pepper
- 2 tablespoons chopped parsley
- 2 tablespoons toasted almonds
- 1 teaspoon lemon juice
Cook onion in fat for 4 minutes until soft, add quinoa and toast 2 minutes, add stock and seasonings, simmer covered 13 minutes, rest 10 minutes, fluff and finish with parsley, almonds, and lemon.
Common quinoa mistakes and how to fix them
1. Bitter quinoa
Cause: residual saponins, sometimes compounded by weak seasoning.
Fix: rinse well before cooking; choose better brands; season cooking liquid; toast after rinsing.
2. Mushy or compact quinoa
Cause: too much liquid, too long cooking, too long resting in a wet pot, or cooling in a deep container.
Fix: reduce water ratio next time; spread out after cooking; fluff sooner; use red quinoa for salads.
3. Crunchy center with wet exterior
Cause: heat too high, uneven simmer, insufficient rest, or too little water.
Fix: use lower heat and a tight lid; allow full 10-minute rest; add 2 to 3 tablespoons hot water and steam 2 more minutes if needed.
4. Burned bottom
Cause: pot too thin, burner too hot, liquid ratio too low for your setup.
Fix: lower heat; use a heavier saucepan; increase water by 2 tablespoons next time.
5. Bland quinoa
Cause: under-salting and under-flavoring, not a flaw in quinoa alone.
Fix: salt the liquid; use stock; toast in fat; finish with acid, herbs, spice, or crunchy toppings.
Practical flavor pairings that make quinoa shine
Quinoa benefits from contrast. Because its flavor is subtle and slightly earthy, it comes alive with ingredients that add brightness, richness, or crunch.
Excellent pairings include:
- lemon, lime, orange zest
- olive oil, butter, browned butter
- cumin, coriander, smoked paprika, black pepper
- scallions, parsley, cilantro, dill, mint
- toasted almonds, pistachios, pepitas
- feta, goat cheese, yogurt sauces
- roasted squash, carrots, mushrooms, cauliflower
- chickpeas, lentils, beans
Quinoa often disappoints when it is treated as a blank starch with no seasoning plan. Think of it as a neutral canvas that rewards aggressive finishing.
A note on stock, salt, and acidity
Cooking quinoa in stock is useful, but choose the stock carefully. Very salty commercial broth can make reduction taste harsh. If using store-bought broth, taste it first and reduce added salt.
Acid is best added after cooking. If you add a lot of lemon juice or vinegar to the cooking liquid, you can slow softening slightly and alter flavor unpredictably. Finish with acid at the end for cleaner brightness.
Batch cooking and storage
Cooked quinoa keeps well, but storage technique affects texture.
To store
- Cool quickly by spreading on a tray or shallow dish.
- Refrigerate within 1 hour.
- Store in an airtight container for up to 4 days.
To reheat
Sprinkle with 1 to 2 teaspoons water per cup and reheat gently in the microwave or in a covered pan over low heat.
For meal prep salads
Dress robustly structured salads shortly before serving if possible. If dressing ahead, use firmer red quinoa and avoid overcooking in the first place.
Takeaways: the rules that actually improve quinoa
If you remember only a few things, make them these:
- Bitterness is usually saponin-related. Rinse quinoa in a fine sieve unless you know your brand is reliably clean.
- Quinoa’s seed structure makes it easy to overhydrate. The visible tail is helpful, but it is not the only doneness test.
- Use less water than the old 2:1 rule when you want fluffy grains. Start around 1 cup quinoa to 1 3/4 cups water, then adjust for your pot and preferred texture.
- Simmer gently with the lid on. No aggressive boiling, no constant peeking.
- Rest off heat for 10 minutes. This is essential for even hydration.
- Vent or spread out for salads. Trapped steam is the enemy of distinct, cool grains.
- Match the variety to the dish. White for softness, red for salads, black for chew, blends for visual appeal with some texture variation.
- Toast for better flavor, not as a substitute for proper water management.
- Do not mythologize quinoa. It is nutritious and useful, but technique matters more than marketing.
- Season with intention. Salt the cooking liquid, use aromatics or stock, and finish with acid, herbs, and texture.
At its best, quinoa is not bitter, sodden health homework. It is nutty, light, distinct, and deeply adaptable. A properly cooked spoonful should taste clean and savory, with grains that separate easily and hold their own whether tucked beside roasted vegetables, folded into herbs and citrus for a salad, or enriched with onion and stock for a true pilaf. Once you understand saponins, embryo structure, and the steam rules, quinoa stops being finicky and starts being reliable. And that is when it becomes worth keeping in the pantry for far more than good intentions.