Why Scallions Taste Grassy, Sweet, or Sulfurous: Allium Anatomy, Heat Zones, and the Cut Rules for Better Noodles, Pancakes, and Finishing Oils
RecipeSimpli
If you have ever wondered why the same bunch of scallions can taste bright and grassy over noodles, mellow and sweet in fried rice, deeply savory in a ginger-scallion sauce, and oddly muddy in an overworked stir-fry, the answer is not just “raw versus cooked.” It is anatomy, chemistry, cut size, heat level, salt timing, and moisture management. Scallions are one of the most casually handled ingredients in the kitchen, yet they respond to technique with almost exaggerated sensitivity. A few seconds too long in a hot wok and the greens lose their sparkle. Slice them too thick for a finishing garnish and they dominate with watery sharpness instead of perfume. Crush them for a sauce and suddenly they taste louder, more pungent, more allium-forward than the same scallions cut into neat rings.
For home cooks, the usual advice is simple: cook the white parts, garnish with the green parts. That rule is useful, but incomplete. It does not explain why white parts can also be eaten raw without harshness if cut correctly, why green tops can become sweet and savory when slowly wilted in oil, or why a scallion oil can taste vivid and clean one day and cabbage-like the next. To make better noodles, scallion pancakes, soups, stir-fries, dumpling sauces, and finishing oils, it helps to understand what scallions are physically made of and how that structure reacts to cutting, salt, and heat.
Scallions belong to the allium family, alongside onions, garlic, leeks, chives, and shallots. They are immature onions harvested before a large bulb forms, which is why their flavor bridges several worlds at once: greener than onion, gentler than garlic, fresher than leek, but still capable of sulfurous force when damaged and heated aggressively. In East Asian cooking especially, scallions are not merely garnish. They are aromatic base, perfume, sweetness, texture, and finishing note. They appear in Chinese scallion oil noodles, ginger-scallion sauces for poached chicken and seafood, Korean pajeon, Japanese negi preparations, Taiwanese scallion pancakes, noodle broths, dumpling fillings, and countless stir-fries. Understanding them is a small master key for a very large part of the savory kitchen.
The anatomy of a scallion: why the white shaft and green tops behave differently
A scallion is not uniform from root end to tip. The lower white shaft, the pale green transition zone, and the dark green leaves differ in water content, cell structure, sugar perception, fiber, and sulfur chemistry.
The white shaft
The white and very pale green lower section is made of tightly packed leaf sheaths. It is denser, juicier, and generally more onion-like. Because this part grows protected from light, it contains less chlorophyll and tastes less grassy. It also tends to carry more of the savory, sulfur-capable allium character people associate with onion. The cell walls here are firmer but less stringy than the greens, which makes the white shaft ideal for slicing into rings, mincing for sauces, smashing for marinades, or cooking as an aromatic base.
This section often tastes slightly sweeter once cooked because its flavor starts closer to onion than leaf. It also tolerates medium and even fairly high heat better than the green tops. If you sauté scallion whites in 1 to 2 tablespoons oil over medium heat for 2 to 3 minutes, they soften, turn fragrant, and begin converting from sharp to sweet. Push them harder, to light browning at around 320 to 350°F (160 to 177°C) pan surface conditions, and they become nutty and savory. Push them too far and they turn sulfurous, then muddy.
The green tops
The green portion is hollow, leafier, higher in chlorophyll, and generally more fibrous. It contains more of the fresh-cut grassy aroma people identify as “green onion flavor.” Because it is thinner and more delicate, it loses its fresh aroma faster under heat. It also wilts rapidly when salted. The greens can absolutely be cooked, but they cook on a shorter clock. If treated gently, they become silky and sweet-green. If subjected to prolonged high heat, they turn dull olive, stringy, and flat.
The darker green sections are especially prone to drying out or turning ropey in soups and stir-fries if sliced too long or added too early. They are better used as quick finishers, brief wilting aromatics, or components in pastes and oils where their chlorophyll and fresh sulfur notes can bloom without overcooking.
The transition zone matters
That pale green middle area is often the best of both worlds: not as pungent as the white, not as grassy as the dark green, and sturdy enough to cook while still retaining freshness. In many dishes, especially noodle toppings and dumpling sauces, this section gives the most balanced flavor.
The chemistry: how cutting unlocks aroma
Like other alliums, scallions contain sulfur-bearing precursors and enzymes stored in separate parts of the cell. When you cut, crush, smash, or blend them, those compartments rupture and mix. The enzyme alliinase acts on sulfur-containing compounds to create the characteristic sharp, oniony aromas. The more thoroughly you damage the cells, the more intense and immediate the flavor release.
This is why shape matters so much.
Thin rings
Very thin rings, around 1/16 inch or 1 to 2 mm, rupture a moderate amount of cells while keeping the pieces intact. The result is a flavor that feels bright and distributed rather than aggressive. Thin rings are ideal for finishing noodle soups, congee, fried rice, cold tofu, savory pancakes, and egg dishes because they spread aroma quickly without a big watery crunch.
Thinly sliced whites can be surprisingly elegant raw, especially if soaked in ice water for 5 to 10 minutes and dried. That soak firms texture, rinses away some free sulfur compounds, and curls the slices for visual lift.
Thick rings
Thicker slices hold more water and release aroma more slowly. They can read as juicier but also more blunt. In a stir-fry, thick green rounds may stay chewy at the center while the outside overcooks. Thick rounds work best when you actually want scallion texture, as in hearty braises, pancake fillings, or grilled skewers.
Batons and julienne
Long matchsticks or batons expose fewer ruptured surfaces than a mince, so they stay fresher and less sulfurous. This is why ginger-scallion condiments often use fine julienne or very thin bias cuts when a cleaner, higher aroma is wanted. Batons are excellent in stir-fries and noodle tosses where you want distinct ribbons of scallion that wilt but do not disappear.
Minced or crushed scallions
Mincing increases cell damage dramatically. Crushing with salt, smashing with the side of a knife, or grinding in a mortar takes it even further. Now the flavor turns more pungent, more sulfurous, and more integrated. This is exactly what you want in sauces, fillings, and scallion-ginger systems where the allium should merge with oil, soy, or broth rather than sit on top.
A crushed scallion paste can taste almost garlic-like in intensity for the first few minutes after it is made. Let it sit for 5 to 10 minutes and the sulfur profile changes again, becoming rounder and more cohesive. That brief resting time can be useful in dressings and finishing sauces.
Blended scallion paste
Blending produces the most cellular destruction of all. It gives maximum aroma release, but also maximum risk: heat from the blender and extensive oxidation can turn the flavor murky or cabbagey fast. If you blend scallions for an oil, chutney, or green sauce, work cold, pulse rather than run continuously, and use the sauce quickly or chill it immediately.
A good home rule is this:
- Need freshness and sparkle? Slice thin or baton-cut.
- Need body and integration? Mince or crush.
- Need full extraction into oil or dough? Paste, but keep it cool and controlled.
Heat zones: low, medium, and blistering heat create different scallion personalities
Scallions are highly heat-responsive. Instead of thinking only “cook” or “garnish,” think in heat zones.
Low heat: 180 to 250°F / 82 to 121°C ingredient temperature, gentle oil or steam environment
This is the sweet spot for scallion oils, confit-like softening, soup finishing, and delicate aromatics. At low heat, the sulfur edge relaxes without tipping into bitterness. Water slowly leaves the cells, natural sugars become more noticeable, and the green parts can soften while keeping a fairly vivid flavor.
This is how you make a clean scallion oil:
- 1 cup neutral oil
- 1 packed cup finely sliced scallions, mostly pale green and green parts
- Optional: 1/4 teaspoon salt
Heat the oil to about 225°F (107°C), add the scallions, and maintain roughly 200 to 225°F (93 to 107°C) for 5 to 8 minutes. You want active soft sizzling, not browning. Once fragrant and softened, remove from heat. For a greener oil, strain immediately and chill. For a toastier oil, let the scallions steep 10 minutes before straining.
At this range, sweetness and grassiness can coexist. It is the best route when you want scallion flavor to feel clear and elegant.
Medium heat: roughly 275 to 350°F / 135 to 177°C pan environment
This is sauté territory. Here scallion whites turn savory and sweet, and pale greens become aromatic. This is ideal for fried rice, noodle stir-fries, omelets, dumpling fillings, braises, and aromatic starts for soups.
Cook sliced whites in oil for 1 to 3 minutes until translucent and fragrant. Add pale greens for the last 30 to 60 seconds if you want some freshness left. If using dark greens, add them off heat or in the final 15 to 20 seconds.
Medium heat gives the most balanced “cooked scallion” flavor: less raw bite, more sweetness, still distinct. It is usually the best choice when scallions are not the star but play a supporting aromatic role.
Blistering heat: 400°F+ / 204°C+ pan or wok conditions
Very high heat can be glorious or disastrous. Brief blistering chars the exterior, adding smoky sweetness and a roasted allium depth. But because scallions are thin and watery, the window is tiny. Ten seconds can be thrilling; thirty seconds can be muddy.
Whole or halved scallions can be grilled or wok-blistered over intense heat for 30 to 90 seconds total, depending on thickness. This works best with larger scallions or spring onions rather than thin supermarket bunches. The result is excellent with grilled meats, miso dressings, yogurt sauces, or chopped into relishes.
For sliced scallions in a screaming hot wok, use them either at the very beginning for seconds only, or at the very end off heat. Letting dark greens fry hard in a near-dry wok often produces bitter sulfur and swampy flavor.
Why “muddy flavor” happens
Muddy scallions are usually the result of three things happening at once:
- Excessive cell damage from over-mincing or rough handling
- Too much heat for too long, especially on the green tops
- Steam trapping in a crowded pan, causing scallions to stew before they fry
Instead of smelling fresh, sweet, or roasted, the compounds break down into duller sulfur notes. The color also shifts from vibrant green to olive drab, signaling chlorophyll degradation and flavor loss.
Salt timing: why seasoning changes flavor release
Salt is not neutral when it comes to scallions. It draws water out through osmosis, weakens structure, and speeds flavor migration. That can be wonderful or destructive depending on the dish.
Salt early when you want extraction
If you are making a scallion-ginger relish, a mashed condiment, or a filling where scallion flavor should permeate the mixture, salting early helps. Try:
- 1/2 cup finely minced scallions
- 2 tablespoons finely minced ginger
- 1/2 teaspoon kosher salt
Mash lightly for 30 to 60 seconds, then add 3 tablespoons hot oil or 2 tablespoons neutral oil plus 1 teaspoon sesame oil. The salt helps release juices and creates a more cohesive sauce.
Salt late when you want freshness and structure
If scallions are a garnish or a quick stir-fry component, salt them late or season the dish around them. Early salt can make sliced green tops slump, leak water, and lose crispness. In noodle garnishes, omelets, or pancake toppings, salting just before serving preserves brightness.
Salt and soups
In soups, the broth is already salty, so scallions effectively get salted on contact. Add them at the end if you want aroma. Add them early only if you want them subdued and integrated.
The scallion-ginger system: a foundational East Asian pairing
Scallion and ginger are one of the great aromatic systems in Chinese cooking and beyond because they complement each other structurally and chemically. Ginger brings heat, citrusy terpenes, and fibrous pungency. Scallion contributes green freshness, sulfur depth, and sweetness when heated. Together they can read as cleaner than garlic, especially in seafood, poached chicken, steamed fish, and noodle sauces.
There are several classic expressions of this pairing.
Raw-warm ginger-scallion sauce
Finely mince 1/2 cup scallions and 2 tablespoons ginger. Add 3/4 teaspoon kosher salt. Heat 1/4 cup neutral oil until shimmering, around 350°F (177°C), then pour over the aromatics. Stir and rest 5 minutes.
The hot oil blooms the aromatics without fully frying them. You get a mixture of freshness, sweetness, and controlled allium pungency. This is ideal spooned over poached chicken, steamed fish, silken tofu, blanched greens, or plain rice.
Stir-fried ginger-scallion base
For stir-fries and braises, add sliced ginger first for 10 to 15 seconds over medium-high heat, then add scallion whites for another 20 to 30 seconds. This sequencing matters. Ginger benefits from a little longer contact to release its aroma into oil. Scallions burn faster and should follow.
Noodle finishing system
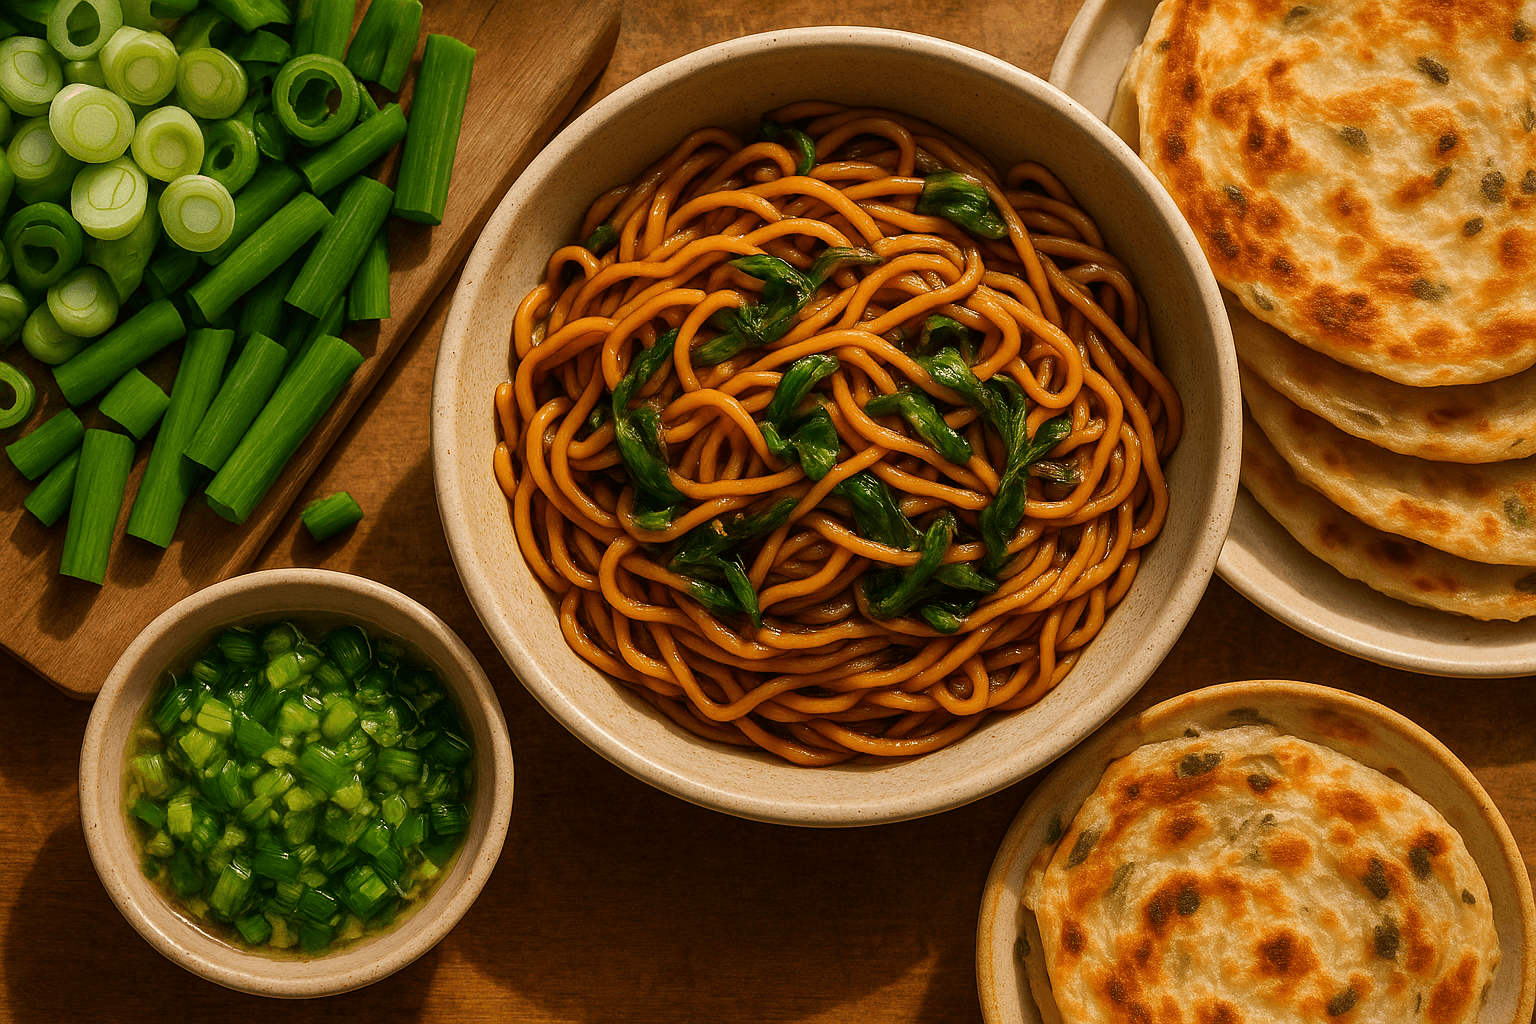
A classic noodle move is to place raw minced scallions in a bowl with soy sauce, a little sugar, perhaps black vinegar, then pour over 2 to 3 tablespoons hot oil. The oil flashes the scallions into aroma. If the oil is around 375°F (190°C), it should sizzle immediately but not scorch. Too cool, and the flavor stays raw and watery. Too hot, and the scallions brown and turn harsh.
Scallion pancake lamination: why cut and moisture control matter
Scallion pancakes are a lesson in structure. The goal is not simply to put scallions in dough, but to laminate layers so that steam and fat separate them during cooking, creating flaky chew. Scallions influence this mechanically as much as they do flavor-wise.
The best scallion cut for pancakes
Use very thin slices, about 1/16 inch or finer, mostly green and pale green parts. Thick pieces puncture layers and create gaps. Very wet scallions can steam the dough and cause gumminess.
After slicing, spread the scallions on a towel for 5 to 10 minutes to dry slightly. If they seem especially wet, toss with a tiny pinch of salt, wait 5 minutes, then blot dry. This pre-manages moisture so the pancake layers separate instead of turning bready.
Why fat matters
Brush the rolled dough with a thin layer of fat, typically 1 to 2 tablespoons neutral oil, lard, or sesame-neutral mix per pancake. Sprinkle scallions evenly. The fat coats flour and inhibits gluten bonding between layers. The scallions create aromatic pockets. Roll into a log, coil, rest, then roll out again.
Cooking temperature
Cook over medium heat, not blasting high. A skillet surface around 350 to 375°F (177 to 190°C) is ideal. Too low and the pancake absorbs oil and toughens before crisping. Too high and the outside scorches before the inner layers steam and separate.
Common pancake failures
- Stringy bites: scallions cut too long or too thick
- Dense interior: too much moisture from fresh scallions, not enough fat, or too little resting
- Leaking scallions: overfilled layers or poor sealing
- Dull flavor: old scallions or scallions cooked too long before the dough crisped
Why scallions turn stringy or dull in soups and stir-fries
This is one of the most common home kitchen frustrations. You add scallions expecting fragrance and color; you get limp threads and a muted, vegetal taste.
In soups
Scallions become dull in soup when added too early or cut too long. The green tops especially lose volatile compounds quickly in hot liquid. Their fibrous length then becomes more noticeable than their flavor.
Better approaches:
- Add thin green rings just before serving for freshness.
- Add thicker white slices during cooking if you want sweetness in the broth.
- For both effects, split the scallions: simmer whites for 10 to 20 minutes, finish with greens at the table.
If making chicken noodle soup, wonton soup, ramen-style broths, or rice porridge, this two-stage approach gives a more dimensional scallion presence.
In stir-fries
Stringiness usually comes from long cuts of the darker greens cooked past the point of softening. Because their fibers run lengthwise, long pieces can become threadlike if not cut across the grain.
Better approaches:
- Slice greens crosswise into short pieces for quick tosses.
- Use bias-cut 1 1/2-inch segments only when the dish benefits from visible scallion ribbons and the cooking time is under 1 minute.
- Add greens at the end.
- Avoid crowding the pan so they fry instead of steam.
Practical rules by dish
A good cook does not just ask, “Do I use whites or greens?” Ask, “What job do I need the scallion to do?” Here are reliable rules.
For noodle soups
- Use simmered white parts for broth sweetness.
- Use thin green rings as a final garnish.
- Add garnish after the bowl is filled, not during prolonged holding.
For dry noodles and noodle tosses
- Use hot oil on minced scallions for maximum aroma.
- Combine whites and pale greens for fuller flavor.
- Reserve dark greens for a final sprinkle if you want freshness.
For fried rice
- Sauté whites first in oil for 30 to 60 seconds.
- Toss in greens right at the end.
- If adding raw garnish, keep it sparse so it brightens instead of tasting wet.
For stir-fried vegetables or meats
- Use 1- to 2-inch batons of white and pale green for aromatic structure.
- Add dark greens in the last 15 seconds.
- For ginger-scallion stir-fries, ginger first, scallions second.
For dumpling fillings
- Mince scallions finely.
- Salt only through the filling mixture, not far in advance, to prevent water release.
- Mix in scallions after meat has been stirred with seasonings, so they stay distinct and do not bruise excessively.
For scallion pancakes
- Use mostly greens and pale greens, sliced very thin.
- Dry them slightly before layering.
- Cook at medium heat for flake and aroma.
For finishing oils
- Use low heat for a clean green note.
- Use pale greens and greens for brightness; add some whites for sweetness if desired.
- Chill quickly if storing to preserve color.
For grilled or charred applications
- Use larger scallions or spring onions.
- Cook whole or halved over very high heat for under 2 minutes total.
- Finish with acid or fat to balance char.
Storage science: how to keep scallions crisp and vibrant
Fresh scallions are mostly water, and their quality declines through dehydration, mechanical damage, and chlorophyll loss. Good storage preserves crunch and aroma.
What scallions need
They need moisture retention without wet rot. If left loose in the refrigerator, they dehydrate and go limp. If trapped soaking wet in plastic, they slime.
Best home storage method
- Remove any rubber band or tight tie.
- Trim off roots only if dirty; otherwise leave them intact for slightly better moisture retention.
- Wrap the bunch loosely in a barely damp paper towel.
- Place inside an unsealed or lightly vented plastic bag.
- Store in the crisper drawer at about 34 to 40°F (1 to 4°C).
This creates a humid but breathable environment. Properly stored, scallions often stay good for 5 to 7 days, sometimes 10.
Alternative upright storage
Place scallions upright in a jar with 1/2 inch water touching the roots only, then loosely tent with a plastic bag and refrigerate. Change the water every 1 to 2 days. This works well for very fresh bunches, though refrigerator height can be awkward.
Reviving limp scallions
If the greens are limp but not slimy, trim the ends and soak in ice water for 10 to 15 minutes. This restores turgor pressure temporarily by rehydrating the tissues. Dry thoroughly before slicing.
Signs they are past their prime
- Slimy film
- Strong cabbagey or sulfur-heavy smell without cutting
- Yellowing or transparent greens
- Hollow leaves collapsed into mush
Old scallions are far more likely to turn muddy in cooking because their cell structure has already degraded.
Step-by-step: three master preparations every home cook should know
1. Classic hot-oil scallion noodle topping
Makes enough for 2 to 3 servings
- 6 scallions
- 3 tablespoons neutral oil
- 1 1/2 tablespoons light soy sauce
- 1/2 teaspoon sugar
- 1 teaspoon black vinegar, optional
- Pinch of white pepper
- Slice 3 scallions thinly from white through pale green.
- Slice the remaining 3 mostly dark green tops into thin rings.
- In a heatproof bowl, combine the sliced scallions, soy sauce, sugar, vinegar if using, and white pepper.
- Heat the oil to about 375°F (190°C), just until shimmering and a test slice sizzles instantly.
- Pour over the scallions. Stir immediately.
- Let stand 2 minutes, then toss with hot noodles.
- Taste before adding more soy; the scallions should still taste bright, not fried brown.
Why it works: the whites and pale greens give sweetness and body; the greens contribute high aroma. The oil blooms without prolonged frying.
2. Ginger-scallion finishing sauce
Makes about 3/4 cup
- 1/2 cup finely minced scallions, mostly pale green and green
- 2 tablespoons finely minced fresh ginger
- 3/4 teaspoon kosher salt
- 1/4 teaspoon sugar
- 1/4 cup neutral oil
- 1 teaspoon toasted sesame oil, optional
- Mince the scallions and ginger finely by hand; do not puree.
- Combine with salt and sugar in a heatproof bowl.
- Heat neutral oil to 325 to 350°F (163 to 177°C).
- Pour the oil over the mixture. It should sizzle actively.
- Stir in sesame oil if using.
- Rest 5 to 10 minutes before serving.
Use over poached chicken, steamed fish, tofu, noodles, or blanched vegetables.
Why it works: salting first extracts juices; hand mincing preserves some texture while releasing enough sulfur compounds for depth.
3. Better scallions for scallion pancakes
For 4 pancakes
- 1 1/2 cups very thinly sliced scallions, mostly pale and dark green parts
- 1 tablespoon neutral oil for the filling layer of each pancake
- 1/4 teaspoon fine salt total, used lightly
- Slice scallions very thinly crosswise.
- Spread on a towel 5 to 10 minutes to remove surface moisture.
- If very juicy, toss with a pinch of salt, wait 5 minutes, then blot dry.
- Brush rolled dough lightly with oil.
- Scatter scallions evenly, avoiding thick clumps.
- Roll into a log, coil, rest 10 minutes, then roll gently.
- Pan-fry over medium heat, about 3 to 4 minutes per side, adjusting heat to avoid scorching.
Why it works: the thin cut prevents stringiness; drying reduces steam pockets that turn layers gummy.
Common mistakes and how to avoid them
Mistake 1: Treating all parts the same
Use the white, pale green, and dark green zones intentionally. Each has different resilience and flavor.
Mistake 2: Overcrowding the pan
Scallions need either quick frying or gentle oil infusion. Crowding causes steaming, which dulls flavor.
Mistake 3: Chopping too far in advance
Pre-cut scallions lose aroma and dry at the edges. For best flavor, slice within 30 minutes of serving, or store cut scallions tightly covered with a barely damp towel for a few hours at most.
Mistake 4: Using high heat for delicate green tops
Dark greens are fragile. Reserve them for finishing or ultra-brief cooking.
Mistake 5: Salting garnishes early
This makes them weep and slump. Salt the dish, not the garnish.
Mistake 6: Assuming raw scallion harshness is inevitable
Thin slicing, ice-water soaking, and choosing more pale-green sections can make raw scallions sweet and elegant rather than aggressive.
Variations worth knowing
Scallion ash and charred scallions
Fully charred scallions can be blended into mayonnaise, yogurt, or butter for a smoky condiment. Burn whole scallions over flame until blackened, steam in a covered bowl 5 minutes, peel if desired, then chop. This is a different flavor universe from fresh scallion, more like roasted leek crossed with onion.
Crisp fried scallions
Slice whites and pale greens thinly, fry at about 300°F (149°C) until golden, 3 to 6 minutes depending on quantity, then drain and salt lightly. Use over congee, salads, or braised dishes. Keep the greens out or add only at the very end, as they darken too fast.
Fermented or salted scallion relishes
Salt-heavy scallion relishes mellow over time as water is drawn out and flavors integrate. These can be folded into noodles, savory yogurt, or grilled meat sauces. The flavor shifts from sharp-green to jammy-allium.
The big takeaway
Scallions are not one flavor but several layered together: grassy leaf, sweet onion, sulfur snap, and savory depth. Which one you taste depends on where on the plant you cut, how much cellular damage you cause, when you salt, and what heat zone you choose. Thin rings taste different from crushed paste because the chemistry of damage is different. Low heat coaxes sweetness and clarity; medium heat builds balanced savor; blistering heat offers thrilling char only if used briefly. The white shaft is not simply “for cooking,” and the green top is not simply “for garnish.” Both can move across roles when technique supports them.
If you remember only a handful of rules, make them these: cook whites longer than greens, cut according to the job, salt early only when you want extraction, keep scallion oils gentle unless chasing toastiness, and add green tops late in soups and stir-fries. For pancakes, dry the slices a bit. For sauces, mince or crush. For finishing, slice thin. For storage, keep them humid but breathable.
Once you start treating scallions as an ingredient with anatomy rather than a generic garnish, your food changes quickly. Noodles become more fragrant, pancakes more layered, soups brighter, stir-fries cleaner, and finishing oils more vivid. It is a small ingredient with very precise behavior, and that precision is exactly what makes it powerful.