Homemade Rice That’s Fluffy, Not Gummy: The Rinse‑Soak‑Steam Method, Water Ratios by Variety, and the “Rest Window” for Perfect Grains Every Time
RecipeSimpli
Rice is one of the most cooked foods on earth—and also one of the most frequently “almost right” foods in home kitchens. You’ve probably had at least one of these outcomes:
- Gummy, clumpy rice that sticks to itself like wallpaper paste.
- Crunchy, undercooked centers even though the pot looks dry.
- Mushy, waterlogged grains that collapse when you stir.
- Perfect… except the bottom is scorched.
The good news: these aren’t mysteries. They come from a few predictable variables—starch on the surface, grain hydration, evaporation rate, pot geometry, and resting time. Master those, and you can make fluffy, distinct grains reliably on the stovetop, in a rice cooker, or in an Instant Pot.
This guide gives you a repeatable framework:
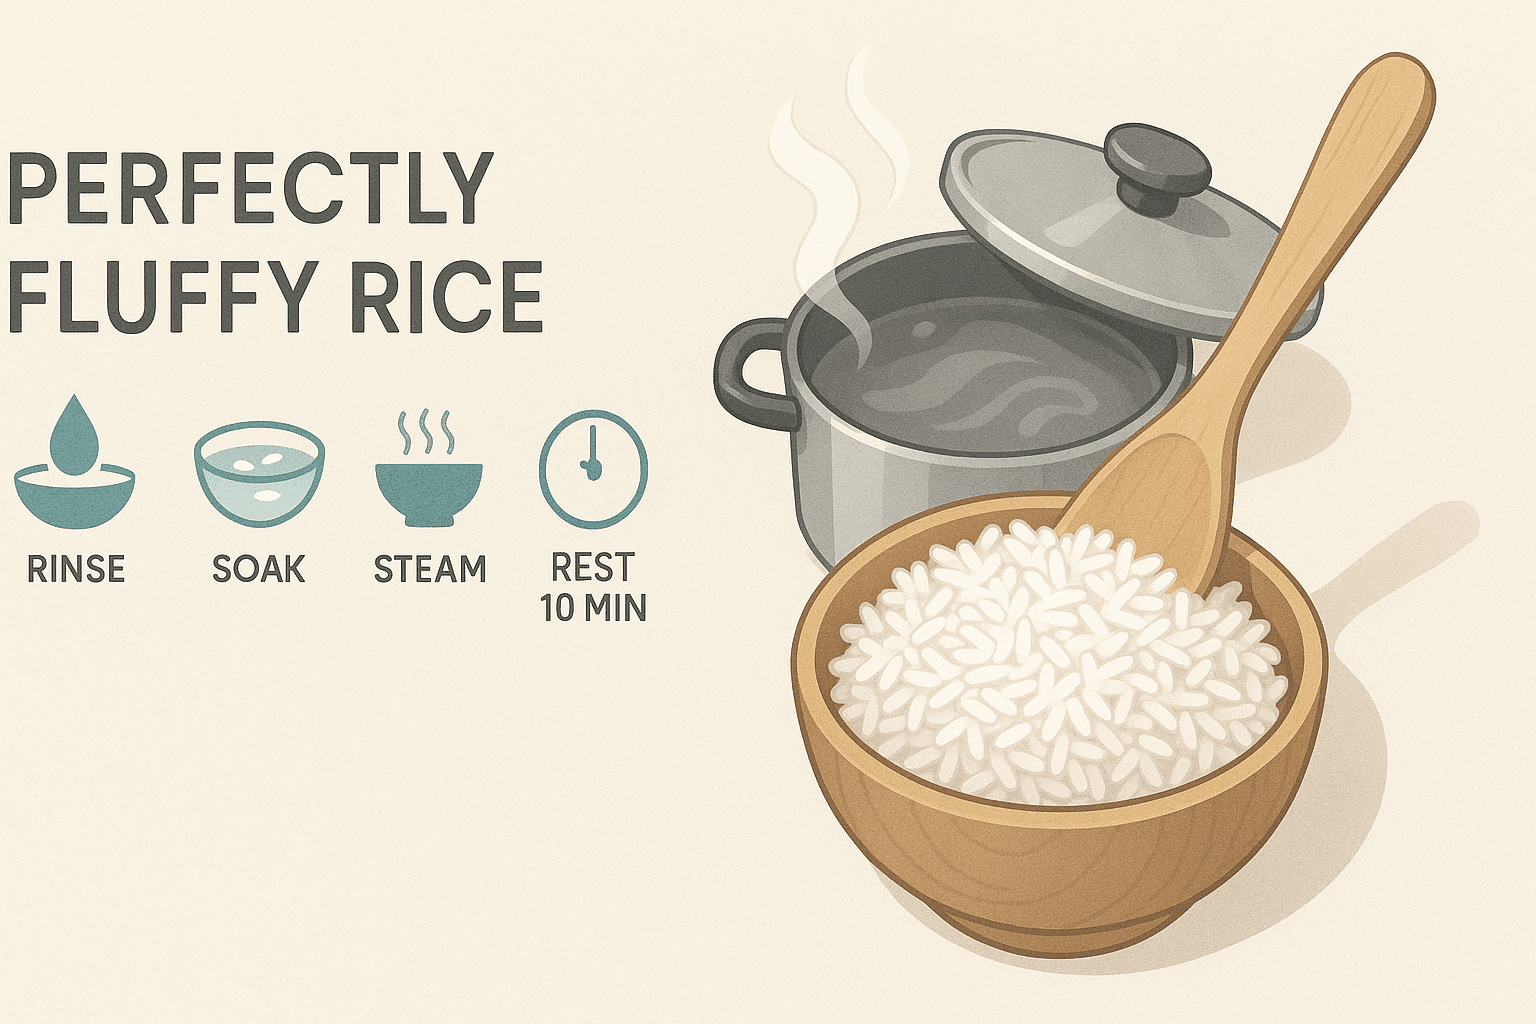
- Rinse to control surface starch (and therefore gumminess).
- Soak to even out hydration and prevent crunchy centers.
- Steam (covered) to finish gently without agitation.
- Rest in a specific “window” so moisture redistributes instead of turning rice to mush.
Along the way, you’ll get variety-specific water ratios, plus charts for stovetop, rice cooker, and Instant Pot.
The Core Problem: Why Rice Turns Gummy or Crunchy
Gummy rice: surface starch + agitation
Most white rice is milled and polished. During processing and transport, grains rub against each other, creating rice dust: loose starch that coats the outside. When you add water and heat, that starch gelatinizes quickly and can form a sticky film that glues grains together—especially if you stir, boil hard, or use too much water.
Fix: rinse (and cook at a gentle simmer/steam with minimal agitation).
Crunchy rice: uneven hydration or insufficient steam time
Crunchy centers happen when the outside hydrates and cooks faster than the inside. Two common causes:
- Not enough water for your pot and heat level (evaporation steals what the grains needed).
- No soak / too short soak for varieties that benefit from it (especially basmati and some long-grain rices).
Fix: soak when appropriate; keep the pot covered; ensure enough water for absorption + small evaporation losses.
Mushy rice: too much water or too long in the “hot wet zone”
Rice can absorb a lot, but once it’s fully gelatinized, extra time sitting hot and wet breaks down structure. That’s why the rest window matters: it finishes cooking with steam, then stabilizes as moisture redistributes.
Fix: correct ratio + controlled rest (covered, off heat).
The Rinse‑Soak‑Steam Method (Universal Framework)
This method works for most non-parboiled white rices and many whole-grain rices with tweaks.
Step 1: Rinse (to control gumminess)
Best for: jasmine, most medium-grain, most long-grain white rice, sushi rice (short-grain), and many store brands.
How:
- Put rice in a bowl.
- Add cool water, swish vigorously with your hand.
- Pour off cloudy water.
- Repeat 3–6 times until the water is less cloudy (it won’t always run perfectly clear, especially for short-grain).
Notes and nuance:
- Rinsing primarily removes surface starch, not the starch inside the grain.
- For risotto (arborio/carnaroli), you typically don’t rinse because you want that starch for creaminess.
- For enriched rice (common in some countries), rinsing may remove surface-added vitamins/minerals. If that matters to you, compensate through the rest of your diet—or choose non-enriched.
Step 2: Soak (to prevent crunchy centers and improve texture)
Soaking isn’t mandatory for every rice, but it’s one of the biggest levers for consistency.
General guidance:
- Long-grain white (basmati): 20–30 minutes improves elongation and evenness.
- Jasmine: optional, 10–15 minutes if you want slightly softer, more even grains.
- Sushi/short-grain: 20–30 minutes is common for even hydration.
- Brown rice: benefits greatly (30–60 minutes, or longer in some approaches).
What soaking does (culinary science, in plain terms):
- Water moves into the grain before heat hits, which reduces the time the outside spends overcooking while the center catches up.
- You get more uniform gelatinization, improving tenderness without mush.
Step 3: Steam (covered) rather than “boil hard”
Rice cooks best with gentle heat and a tight lid.
Rule: once you hit a brief boil, drop to the lowest simmer and do not lift the lid.
Why? Because rice finishes cooking by a combination of absorption and steaming. Lifting the lid releases steam, drops temperature, and changes the math.
Step 4: The Rest Window (the hidden key)
When the water looks absorbed, rice is not finished. A rest allows:
- Moisture to redistribute from wetter outer layers to drier centers.
- Surface steam to settle so grains separate instead of smear.
Best-practice rest:
- Turn off heat.
- Keep covered.
- Rest 10 minutes for most white rice, 15 minutes for short-grain/sushi, 10–20 minutes for brown.
After resting, fluff gently with a fork or rice paddle (cutting and lifting, not stirring like porridge).
Important: The rest window has an upper bound.
- If rice sits too long on residual heat (especially in a thin pot), it can continue softening into mush.
- In a rice cooker on “warm,” it can dry out over time.
A practical window:
- Serve within 10–30 minutes after the rest for best texture.
Water Ratios by Variety (Absorption + Real-World Losses)
A frequent frustration is hearing “1:2 rice to water” as if it’s universal. It isn’t.
Water needs depend on:
- Grain type (starch structure, milling level)
- Soak/no soak
- Cooking method (open boil vs tight-lid steam vs pressure)
- Pot geometry and lid seal (evaporation losses)
Below are starting ratios that work for most home kitchens with a standard covered saucepan.
Stovetop Water Ratio Guide (by volume)
For rinsed rice; soak as indicated; tight lid; low simmer; 10-minute rest unless noted.
| Rice variety | Rinse? | Soak? | Rice:Water (stovetop) | Simmer time (after boil) | Rest |
|---|---|---|---|---|---|
| Jasmine (white, long-grain aromatic) | Yes | Optional 10–15 min | 1 : 1.25–1.5 | 12–15 min | 10 min |
| Basmati (white) | Yes | 20–30 min | 1 : 1.5 | 12–14 min | 10 min |
| Long-grain white (generic) | Yes | Optional 10 min | 1 : 1.5–1.75 | 14–16 min | 10 min |
| Medium-grain white (Calrose, etc.) | Yes | Optional 15–20 min | 1 : 1.5–1.75 | 15–18 min | 10 min |
| Short-grain / sushi rice | Yes | 20–30 min | 1 : 1.1–1.25 | 12–15 min | 15 min |
| Brown rice (long/medium) | Yes | 30–60 min helpful | 1 : 2–2.5 | 35–45 min | 10–20 min |
| Parboiled (converted) rice | Rinse optional | No | 1 : 2 | 18–22 min | 5–10 min |
How to choose within a range:
- Use the lower end if you have a tight-fitting lid and low evaporation.
- Use the higher end if your lid leaks steam, you use high heat, or your pot is wide.
The “Finger Trick” (and why it sometimes fails)
The fingertip water method works only when the pot diameter and rice quantity are consistent. It’s essentially estimating a constant “extra water layer” to cover evaporation and absorption.
If you change pots, batch size, or rice variety, it breaks. Use ratios for consistency—especially when troubleshooting.
Stovetop Method (Repeatable, No Guesswork)
Standard absorption-steam method (most white rice)
- Rinse rice 3–6 times.
- Soak if using (then drain well).
- Add rice and measured water to a saucepan. Add salt (optional, recommended): ~1/4 tsp per cup dry rice.
- Bring to a brief boil uncovered.
- Stir once (optional) just to prevent initial sticking, then cover.
- Reduce to lowest possible simmer.
- Cook for the time in the chart.
- Turn off heat and rest covered.
- Fluff gently.
Two pro-level knobs: lid seal and heat diffusion
- Lid seal: If steam escapes, you lose water and end up crunchy. If your lid is loose, place a clean kitchen towel between pot and lid (keep away from flame) or use a tighter lid.
- Heat diffusion: Thin pots create hotspots and scorched bottoms. A heat diffuser, thicker pot, or slightly higher water ratio can help.
Rice Cooker Method (Set-and-forget, but still variety-dependent)
Rice cookers work by controlling temperature: they cook until free water is mostly gone, then switch to warm. But they still need correct water for the variety and whether you rinsed/soaked.
Rice Cooker Ratio Guide (by volume)
Assuming a typical cooker with “white rice” and “brown rice” modes.
| Rice variety | Rinse? | Soak? | Rice:Water (rice cooker) | Notes |
|---|---|---|---|---|
| Jasmine | Yes | Optional | 1 : 1.1–1.25 | Many cookers prefer less water than stovetop |
| Basmati | Yes | 20 min | 1 : 1.25–1.5 | Drain well after soaking |
| Long-grain white | Yes | Optional | 1 : 1.25–1.5 | Adjust for your machine |
| Sushi/short-grain | Yes | 20–30 min | 1 : 1.05–1.2 | Often benefits from a longer rest on warm (10 min) |
| Brown | Yes | Optional 30 min | 1 : 1.75–2.25 | Use brown mode if available |
The rest window in a rice cooker
Most cookers automatically shift to warm, which is effectively an extended rest. That can be great—until it isn’t.
- After the cooker finishes, let it sit 10 minutes (covered) for white rice.
- Then fluff.
- For best texture, serve within 30–60 minutes. After that, it may dry at the edges.
Tip: If holding longer, place a damp kitchen towel under the lid (if your cooker design allows safely) or mix in a tablespoon of water and gently re-steam for a few minutes.
Instant Pot / Pressure Cooker Method (Fast and consistent, different ratios)
Pressure cooking reduces evaporation to near zero. That means you generally need less water than stovetop.
Instant Pot Ratio Guide (by volume)
Assuming High Pressure, then Natural Release (NR) for best texture.
| Rice variety | Rinse? | Soak? | Rice:Water (Instant Pot) | Pressure time | Release | Rest/Fluff |
|---|---|---|---|---|---|---|
| Jasmine | Yes | Optional | 1 : 1 | 3–4 min | 10 min NR | Fluff after NR |
| Basmati | Yes | Optional 15–20 min | 1 : 1 | 4–6 min | 10 min NR | Fluff |
| Long-grain white | Yes | Optional | 1 : 1 | 4–5 min | 10 min NR | Fluff |
| Sushi/short-grain | Yes | 20 min | 1 : 1.05–1.1 | 5–6 min | 10–12 min NR | Fluff gently |
| Brown rice | Yes | Optional 30 min | 1 : 1.25–1.5 | 20–24 min | 10–15 min NR | Fluff |
Why natural release matters: Quick release vents steam violently and can disrupt the grain surface, leading to broken grains and a wetter top layer.
Pot-in-pot method (excellent for small batches):
- Put rice + water in a heatproof bowl on a trivet with 1 cup water in the main pot.
- Reduces scorching risk and improves evenness.
The Rest Window: Exact Timing and What It Fixes
Resting is not a vague suggestion; it’s a controlled phase of cooking.
What’s happening during rest
- Carryover heat completes any last gelatinization.
- Steam equalizes moisture—wetter grains on top share with drier grains below.
- Starch on the surface sets slightly, helping grains separate.
Recommended rest windows
- Most white long/medium-grain: 10 minutes.
- Short-grain/sushi: 15 minutes (structure benefits from a slightly longer settle).
- Brown rice: 10–20 minutes.
If you skip rest
- You’ll often see wet clumps when fluffing.
- Texture will seem inconsistent: some grains perfect, some too wet, some firm.
If you over-rest (especially on heat)
- Rice can become too soft (mushy) or dry at edges.
Practical rule: rest off heat, covered; fluff promptly; then hold warm gently.
Troubleshooting: Diagnose and Fix in One Cook
Problem: Rice is sticky/gummy
Likely causes:
- Not rinsed enough
- Too much water
- Too much stirring/agitation
- Cooking at a hard boil
Fixes:
- Rinse 3–6 times.
- Drop water ratio by ~5–10% next time.
- Once boiling, go straight to low simmer and don’t stir.
- Use the rest window; fluff gently.
Problem: Rice is crunchy
Likely causes:
- Not enough water (often from lid leak or high evaporation)
- Heat too high (water evaporates before absorption finishes)
- No soak (especially basmati)
Fast rescue:
- Sprinkle 2–4 tbsp hot water over rice (for 2 cups cooked).
- Cover and steam on low for 5 minutes.
- Rest 5 minutes.
Problem: Rice is mushy
Likely causes:
- Too much water
- Too long cooking time
- Kept hot too long before fluffing
Fixes:
- Reduce water ratio.
- Shorten simmer time slightly.
- Rest off heat, then fluff.
- If it’s already mushy: spread on a sheet pan to vent steam; reheat gently later.
Problem: Burnt bottom
Likely causes:
- Heat too high
- Thin pot
- Not enough water
Fixes:
- Lower heat; use a thicker pot.
- Increase water slightly (small increments).
- Consider pot-in-pot (pressure cooker) or a diffuser.
Practical “Water Math”: A Simple Way to Adjust Ratios to Your Kitchen
If you want truly consistent rice, think of water as:
Water needed = absorption water + evaporation allowance
- Absorption is mostly tied to rice type.
- Evaporation depends on pot width, lid seal, and simmer intensity.
How to calibrate quickly
- Choose a baseline from the charts.
- Cook once.
- If slightly crunchy: add +2 tbsp water per cup dry rice next time.
- If slightly wet: subtract -2 tbsp water per cup dry rice next time.
Two tablespoons per cup is a small change, but it’s often the difference between “fine” and “perfect.”
Cultural Context: Why Different Cuisines Cook Rice Differently
No single method is “correct”—it depends on the desired texture.
- Japanese short-grain: rinsed, soaked, cooked to plump, slightly sticky grains that hold together for chopsticks and sushi.
- South Asian basmati: often soaked and cooked to separate, elongated grains for biryani, pulao, and curries.
- Southeast Asian jasmine: fragrant and tender, usually softly separate rather than dry-fluffy.
- Parboiled rice in many cuisines: designed for resilience and separation, useful for large batches and holding.
Understanding the goal texture helps you choose your method.
Advanced Tips for Next-Level Rice
1) Salt: small amount, big improvement
Salt doesn’t just season; it can subtly improve perceived “rice flavor.” Add it to the cooking water so it distributes evenly.
2) Fat (optional)
A teaspoon of butter, ghee, or neutral oil can reduce foaming and add gloss. It can also help separation slightly, but it’s not a substitute for rinsing.
3) Toasting rice (for nutty flavor)
For pilaf-style rice:
- Sauté rinsed-and-drained rice briefly in oil/butter until it smells nutty.
- Add hot water/stock.
- Cover and steam-cook as usual.
Toasting can slightly reduce surface starch behavior and adds depth.
4) Don’t peek
Every lid lift changes the environment: steam escapes, temperature drops, and timing becomes unpredictable. Trust the method.
5) Measure the way you repeat
If you use the rice cooker cup, use it for both rice and water consistently. If you use standard cups, keep it consistent.
Quick Reference: Minimal-Step Recipes
Fluffy jasmine (stovetop)
- 1 cup jasmine rice, rinse well
- Water: 1 1/4 cups
- Bring to boil → cover → low simmer 12–15 min
- Rest covered 10 min → fluff
Separate basmati (stovetop)
- 1 cup basmati, rinse + soak 20 min, drain
- Water: 1 1/2 cups
- Bring to boil → cover → low simmer 12–14 min
- Rest 10 min → fluff
Sushi rice base (stovetop)
- 1 cup short-grain, rinse + soak 20–30 min, drain
- Water: 1.1–1.25 cups
- Bring to boil → cover → low simmer 12–15 min
- Rest 15 min → fluff gently
(Then season with sushi-zu if making sushi.)
Food Safety Note (for leftovers)
Cooked rice can be a risk food if left warm too long (because of Bacillus cereus spores). For safety:
- Cool leftovers quickly (spread on a tray if needed).
- Refrigerate promptly.
- Reheat thoroughly.
Summary: The Reliable Path to Fluffy, Not Gummy
If you remember only four things:
- Rinse to remove surface starch.
- Soak when the variety benefits (especially basmati, short-grain, brown).
- Steam gently: brief boil, then low simmer, lid on, no stirring.
- Rest (covered, off heat) in the right window: usually 10 minutes, longer for short-grain and brown.
Once your ratios match your rice variety and your pot, the results stop being luck. They become repeatable: fluffy grains, clean separation, no gumminess, no crunch.
References and further reading (science + practice)
- Harold McGee, On Food and Cooking (starch gelatinization, grains, and moisture behavior)
- J. Kenji López-Alt, The Food Lab (practical testing mindset and method-based cooking)
- Rice cooker manufacturer guides (Zojirushi, Tiger, Panasonic) for variety settings and water lines (useful calibration baselines)
- USDA and food safety agencies on cooked rice cooling/reheating practices