Why Duck Skin Turns Glassy, Flabby, or Burnt: Subcutaneous Fat Rendering, Collagen Drying, and the Heat Rules for Better Breasts, Legs, and Crispy Roast Duck
RecipeSimpli
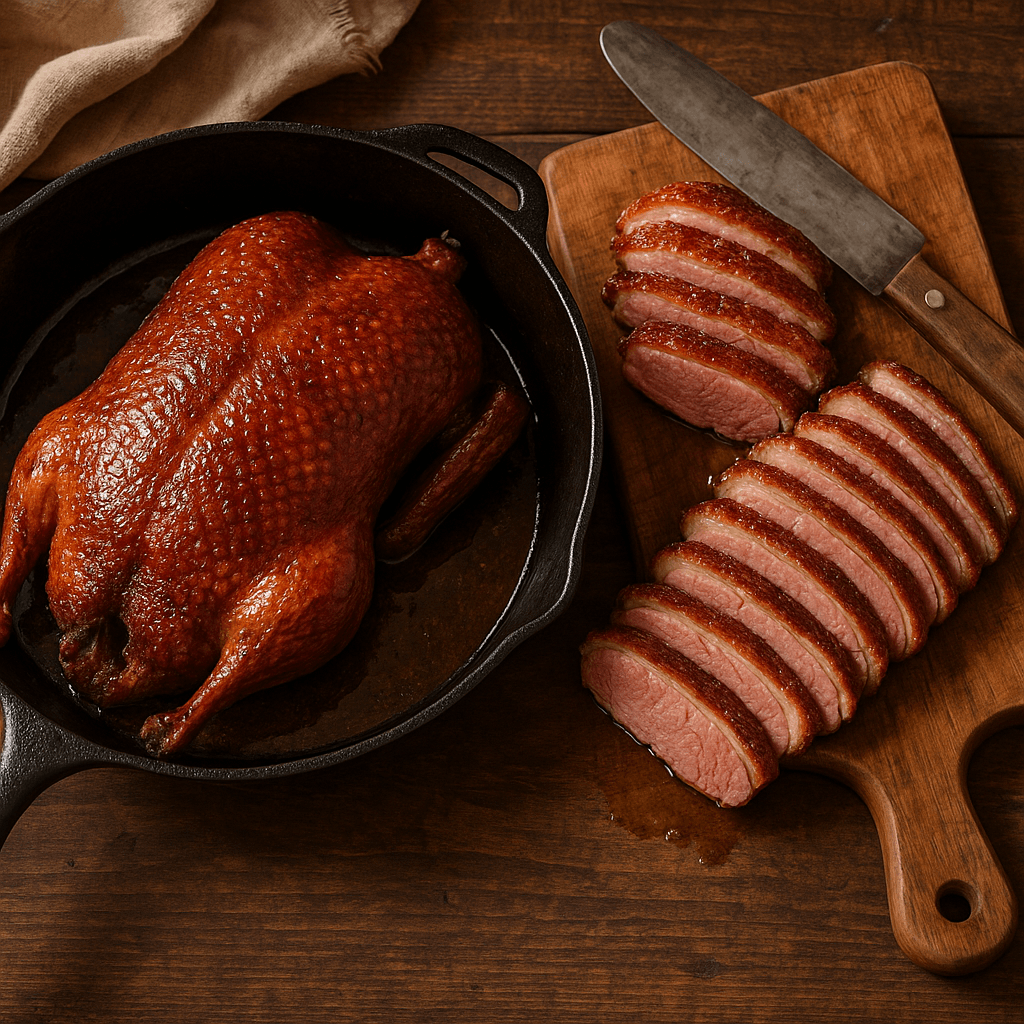
Duck asks more of a cook than chicken does, but it also gives more back. When duck is great, it has that nearly impossible combination of juicy, rosy meat; skin that shatters or crackles instead of sagging; and a rich, deep flavor that feels both luxurious and primal. When duck goes wrong, though, it tends to fail in very specific ways. The skin can come out rubbery and blond, with a thick layer of warm fat trapped underneath. Or it can become thin but leathery, like varnished paper. Or it can burn in patches before the fat has had any chance to render, leaving bitter spots on top of greasy flesh. Those outcomes are not random. They are the direct result of duck’s anatomy and of how heat moves through skin, fat, collagen, and muscle.
If you understand that duck skin is not just skin, but skin sitting over a substantial layer of subcutaneous fat, and that different cuts of duck carry different amounts of connective tissue and need different heat strategies, duck becomes much more predictable. A breast wants one path. A leg wants another. A whole roast duck is a third problem entirely, because now the breast, legs, cavity, skin, and rendered fat all have to be managed at once.
At heart, crisp duck skin is about sequence. First, you need to dry the skin and slowly render enough subcutaneous fat that the surface can dehydrate and fry in its own fat. Only then does high heat become useful, because browning crisp skin is easy; crisping wet, fat-bloated skin is not. Most duck disasters happen when those steps get reversed. Home cooks blast the duck with high heat, expecting the skin to magically become crisp. Instead, the surface browns or burns while the fat underneath remains intact, insulating the skin from true dehydration. The result is flabby skin under a dark topcoat.
That basic rule explains nearly everything else: why scoring helps but can also cause moisture loss if done carelessly; why salting in advance improves both flavor and crispness; why air-drying is so powerful; why pan position matters; why breasts do best with a cold-pan start; why legs improve with low, slow cooking; and why a lacquered roast duck needs staged heat, not just brute force.
Duck is not chicken: the anatomy that changes everything
Chicken skin is relatively thin, and while it certainly contains fat, most supermarket chicken does not carry the same thick, continuous blanket of subcutaneous fat that sits beneath duck skin. Ducks are waterfowl. They evolved to insulate themselves and to store energy differently. In culinary terms, that means they arrive in your kitchen with a lot more fat directly under the skin.
That fat is both the glory and the challenge.
On a duck breast, the skin side can be 1/4 to 1/2 inch thick when you include the fat cap under the skin. On a whole duck, especially a well-fed Pekin or Moulard, the body may carry enough fat that you can render off several tablespoons to more than a cup over the course of cooking, depending on size and method. That is a wonderful thing when properly managed. It bastes, it fries, it enriches potatoes for weeks. But if the fat stays trapped under the skin, it creates a soft layer that keeps the skin from fully drying and crisping.
The meat structure matters too. Duck breast, especially from domestic ducks, behaves more like a small red-meat roast than like chicken breast. It is tender enough to be enjoyable at medium-rare to medium, with an ideal internal temperature often in the 130 to 140F range after carryover, depending on your preference. Legs are different. They are full of working muscle and connective tissue, with more collagen and a structure that benefits from longer cooking. They become lush and tender only after time and heat convert collagen into gelatin.
So the first practical rule is simple:
- Breast: protect the meat from overcooking while giving the skin enough time to render.
- Legs: give connective tissue time to soften; crisping usually happens after or alongside slow cooking.
- Whole duck: manage different zones of the bird and render fat from the entire skin surface before relying on browning.
Why duck skin turns glassy, flabby, or burnt
Those three outcomes come from three different balances of heat, moisture, and fat rendering.
Glassy skin
“Glassy” duck skin can mean one of two things. In the good sense, it refers to lacquered, brittle skin that dries into a thin, shiny shell, especially on roast duck prepared with careful drying and perhaps a glaze. In the bad sense, it can mean skin that looks taut and shiny but is leathery rather than crisp, as if it has dried on the outside without enough puffing or frying.
The difference is what happened underneath.
Good glassy skin occurs when:
- the skin dried thoroughly,
- a meaningful amount of subcutaneous fat rendered out,
- surface proteins and sugars browned,
- and the remaining skin dehydrated enough to become brittle.
Bad glassy skin happens when:
- the outer surface dries and tightens,
- but too much fat remains trapped beneath,
- or the skin dries before enough fat has rendered,
- so it becomes tight and leathery rather than crisp.
Flabby skin
Flabby skin is the classic duck problem. It usually means the bird never spent enough time at a low enough heat for fat to melt and escape before final browning. If the fat layer stays thick, the skin essentially sits on a soft mattress. Even if the top gets some color, that layer below keeps the skin flexible. A few minutes under a broiler cannot fix that.
Typical causes include:
- starting with skin that is wet from packaging or rinsing,
- not salting in advance,
- skipping air-drying,
- cooking at too high a heat too early,
- not scoring thick skin on breasts,
- overcrowding the pan so rendered fat steams instead of frying the surface,
- and failing to pour off accumulated fat during cooking.
Burnt skin
Burnt duck skin is almost always a sequencing problem or a sugar problem.
Sequence problem: the cook applies high heat before sufficient fat has rendered. The skin surface gets hotter than the fat beneath can support. Thin high spots, exposed edges, or scored ridges brown too fast and then burn before the thicker parts are ready.
Sugar problem: glazes containing honey, maltose, hoisin, maple syrup, or other sugars can darken very quickly. They belong late in the process or in carefully controlled layers, not from the very beginning of a roast.
Burning also happens because duck fat is a good conductor once rendered. If the pan is too hot, the skin side can fry aggressively in its own fat. That sounds promising, but it easily jumps from golden to mahogany to bitter if you are not controlling the burner.
The science of crispness: fat rendering, collagen drying, and surface browning
Three physical changes create great duck skin.
1. Fat rendering
Duck skin sits over a layer of subcutaneous fat made of fat cells held in connective tissue. As temperature rises, that fat softens and then liquefies. Broadly speaking, noticeable rendering begins well below the temperatures associated with strong browning. In practical kitchen terms, duck fat renders best when the skin side spends time in the roughly 250 to 300F pan-surface environment, or in a moderate oven, before you chase hard browning.
This is why a cold-pan start for duck breast works so well. The pan and duck heat up together. Instead of shocking the surface, you gradually melt and release fat. If you start with a screaming-hot pan, the proteins and sugars at the skin surface brown before enough underlying fat has melted.
As fat renders, two good things happen:
- the layer under the skin gets thinner, bringing skin into closer contact with heat,
- and the escaping fat effectively shallow-fries the skin surface.
2. Drying and collagen contraction
Skin contains collagen. As it heats, collagen shrinks, tightens, and eventually gelatinizes only under certain conditions. But crisp skin does not need to become gelatin-rich. In fact, for crackly skin you mostly want the skin to dry out, tighten, and lose enough water that it becomes brittle rather than rubbery.
Water is the enemy of crispness. As long as significant moisture is evaporating from the skin, the surface temperature is pinned near the boiling point of water. Only after the surface dries can it climb into the higher temperature range needed for efficient browning and crisping.
This is why air-drying works. Leave a salted duck uncovered on a rack in the refrigerator for 12 to 48 hours, and the circulating cold air dehydrates the skin. That removes one of the major barriers to crisping before cooking even begins.
3. Maillard browning and, sometimes, caramelization
Once the surface is relatively dry and the underlying fat has reduced, the skin can brown. This happens largely through Maillard reactions, in which amino compounds and reducing sugars react to form hundreds of flavorful brown compounds. If a glaze is present, caramelization of sugars can also contribute.
The key is that browning should be the final phase, not the opening move. Think of duck skin as needing a pregame: dry, render, then brown.
The prep rules that matter most
Before we talk cut-by-cut cooking, it helps to establish the preparation moves that consistently improve duck.
Pat very dry
Take duck out of its packaging and dry it thoroughly with paper towels. If you have time, let it sit uncovered on a rack in the refrigerator. Even 4 to 6 hours helps. Overnight is better. Twenty-four hours is excellent.
Salt in advance
For breasts, use about 1 to 1 1/4 teaspoons Diamond Crystal kosher salt per pound or 1/2 to 3/4 teaspoon Morton kosher salt per pound. Salt at least 45 minutes ahead, and preferably 12 to 24 hours ahead.
For legs and whole duck, a similar salt rate works well. If you are seasoning a whole bird, distribute salt evenly over the skin and a little inside the cavity.
Why this helps:
- Salt seasons the meat.
- It initially draws moisture to the surface, then that moisture dissolves salt and is reabsorbed.
- Given enough time, the exterior ultimately dries better than if it had been cooked immediately.
- Salt also slightly alters proteins and improves texture.
Score carefully, especially on breasts
Scoring duck breast skin gives rendered fat channels to escape. Use a very sharp knife and cut through the skin and fat, but not into the meat. Make parallel lines about 1/2 inch apart, then cross them for a diamond pattern if you like.
Why not cut into the flesh? Because exposed meat juices can seep out, encouraging sticking, spattering, and moisture loss. Deep cuts also create thin edges that burn early.
Small duck breasts with thin skin may need only light scoring or none at all. Large Magret-style breasts with thick fat caps benefit the most.
Prick for whole ducks, but don’t mutilate
For whole duck, especially roast duck, lightly prick the skin all over with a clean skewer or the tip of a knife, focusing on fatty zones around the breast, back, and thighs. Do not pierce deeply into the meat. The goal is to create exits for melted fat, not channels for juices.
Use a rack when roasting
A whole duck or tray of legs placed on a rack roasts more evenly and stays out of accumulating fat. If the bird sits directly in rendered fat, the underside steams and softens.
Manage rendered fat actively
Duck releases a lot of fat. In a skillet, spoon or pour it off periodically into a heatproof container, leaving a thin film in the pan. In the oven, be aware that a deep pool of fat can smoke or partially fry parts of the bird unevenly.
The heat rules for duck breast
Duck breast is where many cooks either fall in love with duck or become convinced it is impossible. The fix is understanding that the meat and skin want different things and giving the skin a head start.
The target
For most domestic duck breast, aim for:
- Pull at 128 to 132F for a final temp around 130 to 135F after rest, rosy and juicy
- Pull at 133 to 136F for a final temp around 135 to 140F, medium and still moist
Wild duck is a different conversation because species, fat level, and food source vary, but the rendering principle remains.
Best method: cold-pan render, then finish
For two duck breasts, about 8 to 10 ounces each:
- Dry and season. Pat dry, score the skin, and salt 12 to 24 hours in advance if possible.
- Start in a cold skillet, skin side down. Use a heavy skillet, ideally cast iron or stainless steel. No added oil is needed.
- Turn heat to low or low-medium. On many stoves, this means the pan will come gently up to temperature over several minutes.
- Render slowly for 8 to 15 minutes, depending on thickness. Rotate the breasts occasionally if your burner has hot spots. Press lightly only if edges curl, but do not mash the breasts constantly.
- Pour off fat every few minutes once a substantial amount accumulates.
- When the skin is deep golden and much of the fat layer has visibly reduced, increase heat slightly if needed for the last 1 to 2 minutes to sharpen crispness.
- Flip and cook flesh side 1 to 3 minutes for medium-rare, depending on thickness.
- Optional but reliable: finish in a 350F oven for 3 to 6 minutes if the breasts are thick and you want more precise internal doneness without over-darkening the skin.
- Rest 5 to 8 minutes on a rack or warm plate, skin side up.
Why the cold-pan start works
It extends the rendering window before aggressive browning kicks in. You are slowly melting the fat cap rather than searing the skin shut. A hot-pan start can still work in expert hands, but it narrows your margin for error.
Pan position matters
A breast placed dead-center over a powerful burner may brown too fast in the middle while the edges stay pale and fatty. Moving the breast slightly off-center, rotating it every couple of minutes, or using two-burner moderate heat for a larger pan can improve evenness. This sounds fussy, but it is often the difference between uniformly crisp skin and one scorched oval surrounded by rubber.
Common breast mistakes
- Too much heat too early: burnt ridges, under-rendered fat.
- No scoring on thick skin: trapped fat, patchy crispness.
- Crowded skillet: skin steams instead of fries.
- Not pouring off fat: shallow-fry turns into greasy pooling and uneven browning.
- Cooking skin side too briefly: lovely meat, disappointing skin.
- Resting skin side down: steam softens your hard-earned crispness.
The heat rules for duck legs
Legs are rich in connective tissue and need a different strategy. Their best version is not usually rare or rosy. It is succulent, shreddable or nearly so, with skin crisped at the end or in stages.
The target
Duck legs generally need internal temperatures in the 175 to 195F zone to become truly tender, because collagen needs time and heat to dissolve into gelatin. Exact numbers matter less than texture. A skewer should slide in easily, especially around the joint.
Confit-style method at home
Traditional confit is cured and poached in fat at a low temperature, often around 190 to 210F. A home approximation can be done beautifully in the oven.
For 4 duck legs:
- 4 duck legs, about 10 to 12 ounces each
- 2 tablespoons Diamond Crystal kosher salt or 1 tablespoon plus 1 teaspoon Morton kosher salt
- 4 garlic cloves, lightly crushed
- 4 thyme sprigs
- 1 bay leaf, crumbled
- 1/2 teaspoon black pepper
- Enough duck fat to mostly submerge, often 3 to 4 cups
- Cure legs with salt, garlic, thyme, bay, and pepper for 12 to 24 hours refrigerated.
- Wipe off excess cure.
- Arrange in a snug baking dish and cover with melted duck fat.
- Cook at 225F for 2 1/2 to 4 hours, until very tender.
- Cool in fat or remove and chill.
- To crisp, place skin side up on a rack and roast at 425F for 15 to 25 minutes, or sear skin side down in a skillet over medium heat until crisp.
Roasted braise approach
If you do not want to use that much fat, legs can be seasoned and cooked covered at 300F with a little stock or aromatics for 1 1/2 to 2 1/2 hours, then uncovered and finished at 425F until the skin crisps.
Why legs often burn before they tenderize
Because cooks treat them like chicken thighs. The skin darkens relatively early, but the collagen-rich interior still needs time. If you blast them at 425F from the start, the skin can get too dark long before the connective tissue breaks down. Better to tenderize first, crisp second.
The heat rules for whole roast duck
Whole roast duck is the grand puzzle because every principle has to work at once. A whole duck has thick skin, large fat reserves, a cavity that traps steam, legs that need more cooking than breasts, and a skin surface large enough to brown unevenly. The answer is staged cooking.
The target
For a 5 to 6 pound domestic duck:
- Breast meat is best around 135 to 145F, depending on preference.
- Legs need to be in the more well-done, tender zone.
- Skin needs significant rendering before final browning.
You will not get perfect steak-like breast doneness and ultra-tender confit-like legs from a standard whole roast without special butchery. But you can get excellent balance.
A reliable roast method
- Prep 1 to 2 days ahead. Remove giblets. Pat dry. Trim excess fat from the cavity opening and neck area. Prick skin lightly all over fatty areas without piercing meat. Salt all over with about 1 1/2 to 2 tablespoons Diamond Crystal kosher salt for a 5 to 6 pound duck. Leave uncovered on a rack in the refrigerator 24 to 48 hours.
- Bring out 30 to 45 minutes before roasting. This takes the chill off slightly.
- Optional but useful: pour a kettle of just-boiled water slowly over the duck set on a rack in the sink. This tightens the skin and starts fat release. Dry thoroughly afterward, then return to the fridge uncovered for at least 1 hour if time allows.
- Roast at 300F on a rack in a roasting pan for 1 1/2 to 2 1/2 hours, depending on size, until a lot of fat has rendered and the skin looks taut and lightly colored.
- Carefully pour off fat from the pan every 30 to 45 minutes.
- Increase heat to 425F and continue roasting 20 to 35 minutes to brown and crisp the skin.
- If using a glaze, apply during the last 10 to 15 minutes in thin layers.
- Rest 15 to 20 minutes before carving.
This low-then-high method gives the bird time to render before the final lacquer stage.
Why the cavity matters
Steam rising from the cavity can soften breast skin from below. Some cooks roast the duck breast side up the whole time; others briefly roast on one side, then the other, to encourage drainage and rendering. For home cooks, the simplest approach is to keep the cavity open rather than tightly stuffed. Aromatics are fine in small amounts, but a packed cavity slows cooking and traps moisture.
What about flipping the bird?
Flipping can improve rendering, especially on very fatty birds, but it increases handling and splatter risk. If you do it, use sturdy tongs and a towel, and flip only once or twice during the low-temperature phase. It is helpful, not mandatory.
Lacquered duck and the danger of sugar
Glossy roast duck is seductive, but glaze is where many birds go from bronzed to burnt.
Sugary ingredients like honey, maltose, brown sugar, hoisin, and syrups lower your margin for error dramatically. Use them after rendering is mostly complete. Apply in thin layers near the end, allowing each layer to set before adding more.
A simple finishing glaze might be:
- 2 tablespoons honey or maltose syrup
- 1 tablespoon rice vinegar
- 1 tablespoon soy sauce
- 1 tablespoon hot water
Brush lightly during the last 10 to 15 minutes of a 400 to 425F finish, not during the full roast.
If the duck is browning too fast after glazing, reduce heat to 375F and continue until the color looks right.
Scoring, blistering, and shrinkage
Cooks often notice that scored skin can shrink dramatically or blister in odd ways. That is normal, but the pattern tells you something.
Why blistering happens
As moisture escapes and fat renders, parts of the skin can puff slightly. This can be desirable, especially on very dry skin exposed to high finishing heat. Blistering usually means the skin surface has dried enough for localized frying and puffing.
Why shrinkage happens
Skin tightens as collagen contracts and moisture leaves. Deep scores accelerate that effect. If cuts are too close together or too deep, the skin can pull apart and expose meat. Keep scores shallow and evenly spaced.
Scored versus unscored on breasts
- Scored: better rendering, faster crisping, more dramatic texture, but greater risk of over-darkening along cut edges.
- Unscored: more even surface and less risk of cutting meat, but slower rendering and often thicker residual fat.
For most thick domestic duck breasts, shallow scoring is worth it.
Air-drying: the quiet superpower
If there is one low-effort step that upgrades duck the most, it is uncovered refrigeration. Air-drying reduces surface moisture and firms the skin. This gives you:
- faster browning,
- less sticking in the pan,
- better blistering,
- and more even crispness.
Even overnight makes a visible difference. Twenty-four hours is better. Forty-eight hours can be excellent for whole duck if your refrigerator is clean and cold and the bird is protected from contact.
You are essentially doing a mini dry-aging of the skin surface, not of the meat interior.
Practical temperature map by cut
Here is the simplest cheat sheet.
Duck breast
- Start: cold pan
- Rendering heat: low to low-medium
- Skin-side time: 8 to 15 minutes
- Flesh-side time: 1 to 3 minutes
- Optional oven finish: 350F for 3 to 6 minutes
- Pull temp: 128 to 136F depending on preference
- Rest: 5 to 8 minutes
Duck legs
- Tenderizing heat: 225 to 300F depending on method
- Time: 2 to 4 hours until tender
- Crisping finish: 425F or medium skillet sear
- Tender final internal feel: usually 175F+, often closer to 185 to 195F for best texture
Whole duck
- Drying: 12 to 48 hours uncovered in fridge
- Rendering roast: 300F
- Rendering time: 1 1/2 to 2 1/2 hours for 5 to 6 pounds
- Crisping finish: 425F for 20 to 35 minutes
- Rest: 15 to 20 minutes
Common mistakes and how to fix them
“The skin browned, but it’s still chewy.”
Cause: surface browned before enough fat rendered. Fix: lower the initial heat next time; render longer; air-dry more thoroughly; score thick skin.
“The breast meat overcooked before the skin crisped.”
Cause: insufficient skin-side rendering head start. Fix: use a colder pan start and slower rendering; choose thicker breasts if possible; finish gently in oven rather than trying to force skin crispness at high burner heat.
“The skin burned in the scored areas.”
Cause: cuts too deep or heat too high. Fix: score shallower, keep burner moderate, rotate in pan, and raise heat only at the end.
“The whole duck is greasy.”
Cause: fat did not have enough time or pathways to render and drain. Fix: prick skin, roast on a rack, pour off fat regularly, and extend low-temperature phase.
“The glaze scorched.”
Cause: sugar applied too early or heat too high. Fix: glaze only near the end, in thin coats.
Cultural context: why classic duck methods look the way they do
Many traditional duck methods around the world are really systems for controlling fat, moisture, and skin texture.
French confit preserves and tenderizes legs by salting and cooking them gently in fat. That method is not just luxurious; it is structurally perfect for collagen-rich dark meat.
Chinese roast duck traditions, including Peking duck, elevate skin drying into an art. Air inflation to separate skin from flesh, scalding, hanging, and lacquer application are all ways of improving rendering, drying, and brittle skin formation while preserving juicy meat.
European roast duck often pricks the skin and roasts on a rack, acknowledging the bird’s heavy fat layer. In each case, centuries of practice arrived at the same truth modern food science explains clearly: duck skin needs time to dry and fat needs time to leave.
Step-by-step master recipes
Crispy duck breast for two
Ingredients
- 2 duck breasts, 8 to 10 ounces each
- 2 teaspoons Diamond Crystal kosher salt or 1 teaspoon plus 1/4 teaspoon Morton kosher salt
- 1/2 teaspoon black pepper
Method
- Pat breasts dry. Score skin in a 1/2-inch crosshatch, cutting only through skin and fat.
- Season with salt and pepper. Refrigerate uncovered on a rack overnight, or at least 1 hour.
- Place breasts skin side down in a cold skillet.
- Turn heat to low-medium. Render slowly 10 to 12 minutes, pouring off fat as needed.
- When skin is deep golden and crisp, flip and cook 2 minutes on flesh side.
- Check internal temperature. If under 128F and breasts are thick, place skillet in 350F oven for 3 to 4 minutes.
- Rest 5 minutes, skin side up. Slice and serve.
Tender duck legs with crisp skin
Ingredients
- 4 duck legs
- 2 tablespoons Diamond Crystal kosher salt
- 1 teaspoon black pepper
- 4 thyme sprigs
- 3 garlic cloves
Method
- Season legs with salt, pepper, thyme, and garlic. Refrigerate 12 hours.
- Arrange in a baking dish, skin side up. Cover tightly with foil.
- Bake at 300F for 2 hours.
- Uncover. Increase oven to 425F.
- Roast 20 to 30 minutes more until skin is crisp and meat is very tender.
- Rest 10 minutes before serving.
If there is a lot of rendered fat in the dish after the covered phase, spoon most of it off before the final crisping phase.
Crispy roast duck
Ingredients
- 1 whole duck, 5 to 6 pounds
- 1 1/2 tablespoons Diamond Crystal kosher salt
- 1 teaspoon black pepper
Method
- Remove excess cavity fat. Pat duck very dry.
- Prick skin lightly all over, especially breast, thighs, and back.
- Season with salt and pepper. Refrigerate uncovered on a rack 24 hours.
- Roast on a rack at 300F for 2 hours, pouring off fat every 30 to 40 minutes.
- Increase heat to 425F and roast 25 minutes more, until skin is mahogany and crisp.
- Rest 20 minutes before carving.
For extra lacquer, brush with a honey-soy glaze in the last 10 minutes.
Tips and variations
- Use the rendered fat. Strain and refrigerate it. Duck fat is gold for potatoes, beans, cabbage, mushrooms, and toasted bread.
- Try a dry spice cure. Five-spice, juniper, coriander, orange zest, or fennel pair beautifully with duck, but keep sugar low during the early cooking phases.
- For exceptionally fatty breasts, trim excess overhanging skin. It crisps better than leaving floppy fringes that burn.
- For stronger blistering, finish briefly under a broiler after rendering, but watch constantly. Thirty to ninety seconds can be enough.
- Use a thermometer. Duck is forgiving in some ways, but guessing invites overcooked breast and under-tender legs.
- Rest on a rack if possible. Air circulation preserves crispness better than a flat plate.
- Do not cover finished duck with foil unless you intentionally want softer skin.
The big takeaways
Duck cookery gets easier the moment you stop treating duck like chicken and start treating it like a bird wrapped in its own frying medium. Thick skin and abundant subcutaneous fat are the whole game. Crispness does not come mainly from high heat. It comes from drying the skin and slowly rendering fat first, then using higher heat to brown and finish.
So if your duck skin is flabby, think: not enough rendering, too much moisture, or both. If it is burnt, think: too much heat too soon or sugar too early. If it is glassy in the best way, you probably respected the sequence.
For breasts, the core rule is cold pan, low heat, and patience on the skin side. For legs, it is low and slow until collagen yields, then a final crisp. For whole roast duck, it is staged roasting with active fat management and a dry skin surface.
Duck rewards cooks who think in phases instead of minutes. Dry. Render. Brown. Rest. Once those heat rules click, better breasts, silkier legs, and truly crisp roast duck stop feeling like restaurant magic and start feeling like something you can do on a Tuesday night, with a skillet, an oven, and a little respect for the bird’s beautiful excess.