Why Brown Butter Smells Nutty, Burns Bitter, or Disappears Into Dough: Milk Solids, Water Loss, and the Heat Rules for Better Sauces, Cookies, and Pasta
RecipeSimpli
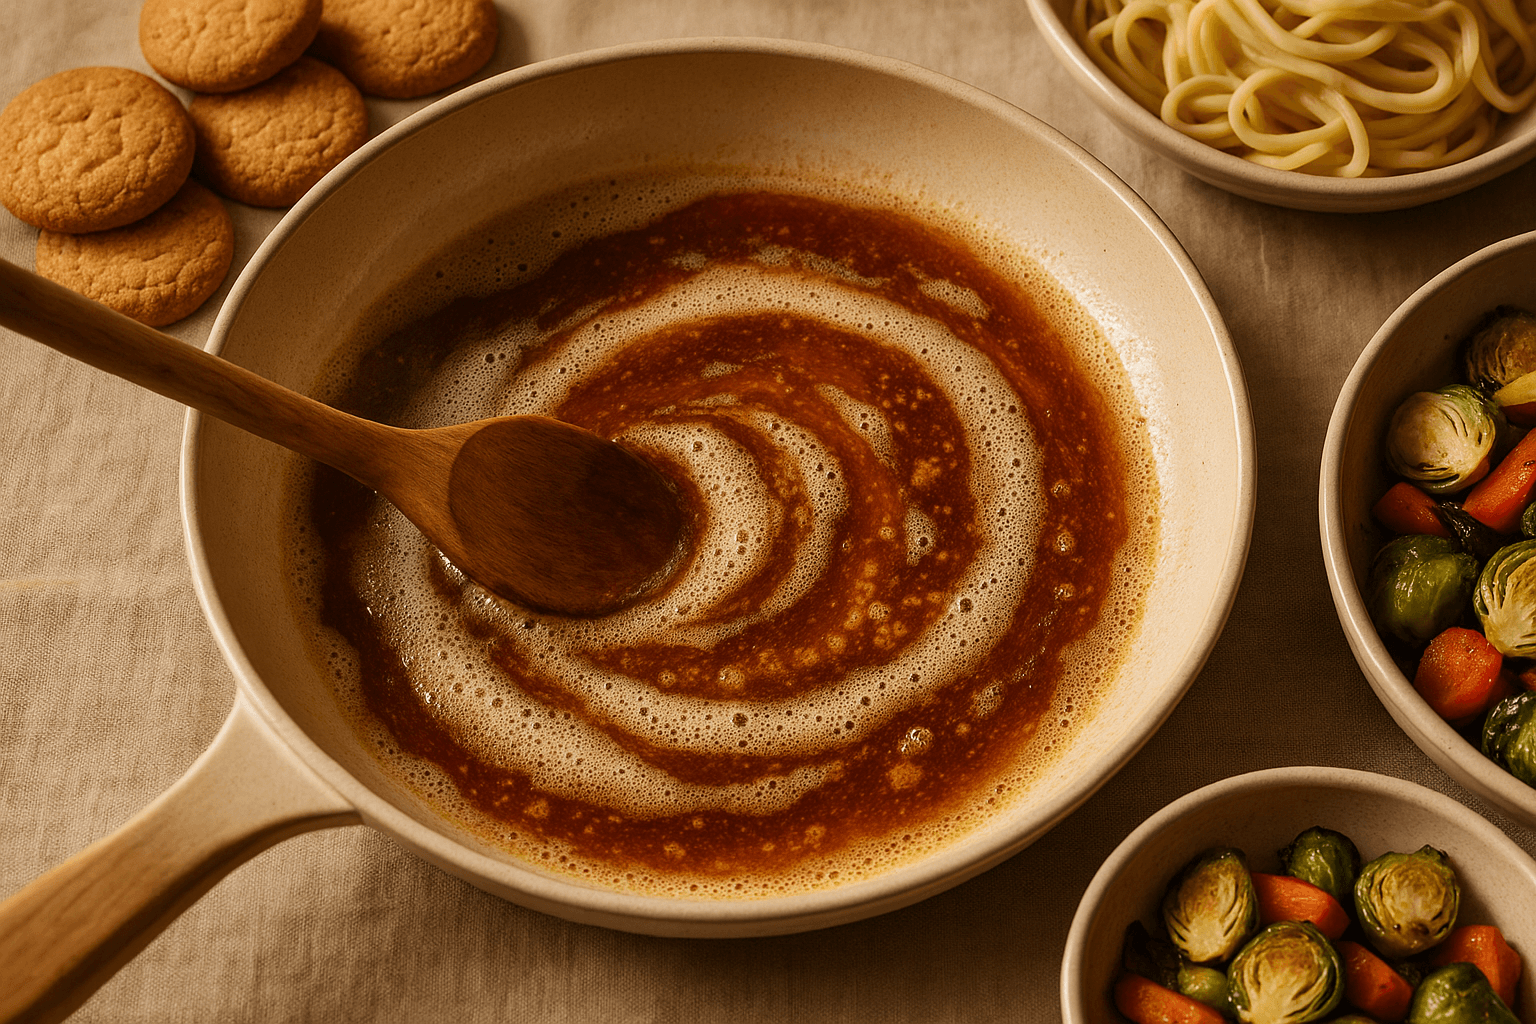
There is a very short window in cooking when butter transforms from sweet and creamy to deeply nutty, almost caramel-like, and astonishingly complex. Hit that window and a pan of melted butter suddenly smells like toasted hazelnuts, warm toffee, and fresh-baked pastry. Miss it by a minute, or sometimes by thirty seconds, and those same solids darken too far, the aroma turns sharp and acrid, and what should have elevated a dish instead drags in bitterness.
That dramatic shift is why brown butter feels a little magical and a little intimidating. Plenty of recipes say some version of “cook until golden and fragrant,” but that advice skips the useful part: what is actually browning, what is evaporating, what your eyes can and cannot see through the foam, and why the same butter that makes pasta taste luxurious can make cookie dough behave differently from expected.
Brown butter, or beurre noisette in the French tradition, is not just melted butter with a fancy name. It is butter that has lost much of its water while its milk solids toast in the butterfat. That means it tastes different, smells different, behaves differently, and needs different handling than plain melted butter. If you understand those changes, you can use brown butter with intention instead of luck—building a better pan sauce, a more complex cookie, a richer cake, or vegetables with an edge of roasted sweetness.
This is the science-first version of brown butter: what it is, where the flavor comes from, why pan choice matters, how much water you lose, what that does to texture in baking, and the practical heat rules that help you stop at nutty instead of bitter.
What brown butter actually is
Standard American-style butter is roughly 80% butterfat, 16% to 18% water, and 1% to 2% milk solids, though exact percentages vary by brand and style. European-style butters often contain 82% to 85% butterfat, which means slightly less water and a somewhat different browning profile. Those small percentages matter.
When you melt butter, you are separating an emulsion. Solid butter starts as a water-in-fat emulsion with suspended milk components. As it heats, the water begins to simmer and evaporate, the butterfat becomes fully liquid, and the milk solids—mostly proteins plus some lactose and minerals—settle or float in the pan depending on the stage of cooking and movement.
When making brown butter, you are pushing butter past simple melting. You are driving off much of the water and toasting the milk solids in the fat. The browning occurs primarily in those milk solids, not in the pure fat itself. Butterfat can overheat and take on harsh flavors, but the celebrated “brown butter” aroma comes from chemical reactions in the milk solids as they toast.
That is why clarified butter and ghee behave differently. Clarified butter has had most or all milk solids removed; it is useful for high-heat cooking but does not become classic brown butter because the toasty particles are gone. Ghee is clarified butter cooked long enough that remaining milk solids brown before being strained, so some of that nutty aroma is built in—but once strained, it won’t continue developing the same way as whole butter in a pan.
A little history and culinary context
Brown butter has deep roots in European cooking, especially French cuisine, where beurre noisette—literally “hazelnut butter”—is prized for its nutty aroma and amber color. It shows up in sauces for fish, with capers and lemon, spooned over vegetables, in pastry, and as a foundational flavor in both savory and sweet dishes.
French technique often pairs brown butter with ingredients that sharpen or brighten it: lemon juice, parsley, vinegar, capers, sage. This is not an accident. Brown butter is rich and aromatic, but also a little heavy and roasted. Acid and herbs keep it lively.
Over time, bakers and restaurant cooks pushed it far beyond classic French sauce work. Brown butter found a natural home in cookies, financiers, madeleines, frostings, banana bread, cakes, and pie fillings. In modern restaurant cooking it appears with pasta, squash, cauliflower, carrots, scallops, and gnocchi. It is one of those ingredients that migrated easily because its chemistry makes food taste more cooked, more rounded, and more complex, often without adding a separate ingredient.
Why brown butter smells nutty
The signature aroma of brown butter comes from browning reactions involving milk proteins and sugars, especially lactose. The key family of reactions is often grouped under the Maillard reaction, though caramelization and other thermal decomposition pathways can also contribute. In practical kitchen terms, heat transforms the milk solids into hundreds of aromatic compounds.
One of the most important is diacetyl, which contributes a buttery aroma. Other compounds formed during browning create notes that read as toasted nuts, caramel, butterscotch, biscuit, and toffee. Chemists can list them by name; cooks recognize them by smell. That smell is your most important cue.
Why doesn’t plain melted butter smell like this? Because melting alone does not create enough heat concentration at the milk solids. As long as a significant amount of water remains, the temperature is held near the boiling point of water, around 212°F/100°C at sea level. Once more water evaporates, the milk solids can toast more aggressively in the hot fat, and the aroma shifts rapidly from creamy to nutty.
This is also why brown butter seems to “arrive” all at once. For several minutes, it can look like a pan of noisy melted butter with foam. Then, as moisture drops and the solids toast, the smell deepens quickly. If you are waiting only for visual color, especially in a dark pan, you may be late.
Why brown butter burns bitter
The same solids that produce the best flavor are also the first part to burn. Milk proteins and lactose brown beautifully over a narrow temperature range, but continue darkening if heat stays high. Past amber and chestnut, flavor compounds skew away from pleasant toastiness and toward acrid bitterness.
Three things make burning especially easy:
- Residual heat: Butter keeps cooking after you turn off the burner, especially in heavy pans like stainless steel or cast iron.
- Foam obscures the solids: Water boiling produces a cap of foam that can hide the true color underneath.
- Dark cookware lies to you: A black skillet can make pale butter look darker while hiding the actual color of the browned milk solids.
The solids themselves are tiny. They can go from golden to mahogany to black in less than a minute. Once they are truly burnt, there is no elegant rescue. Straining removes the particles but not the bitter compounds already dissolved into the fat.
The practical lesson: brown butter should usually be made over medium to medium-low heat, in a light-colored pan, with constant or frequent swirling, and it should be transferred out of the hot pan immediately once it reaches the color and aroma you want.
The role of foaming and why pan color matters
If you have ever browned butter and wondered what stage you were even looking at, you are not alone. Butter goes through a series of visual phases:
- Melting: Butter liquefies, often separating into golden fat and pale foam.
- Active simmering: Water boils off, creating lots of bubbling and hissing.
- Foamy stage: The surface can look thick with pale foam, making it hard to see below.
- Foam subsides: Bubbling becomes finer and quieter as water decreases.
- Browning: Milk solids turn tan, then amber, then brown on the bottom of the pan.
The foam is not the enemy, but it hides information. You can manage that in a few ways:
- Use a light stainless steel or silver-colored pan, ideally with a pale interior.
- Swirl the pan and stir with a light-colored silicone spatula or wooden spoon to lift solids off the bottom.
- Tilt the pan or drag a spoon through the foam to expose the butter underneath.
- Listen: loud, wet bubbling means lots of water remains; quieter sizzling suggests you are approaching browning.
A small saucepan or sauté pan with a pale interior is ideal. Nonstick pans often have dark interiors that make color judgment harder, and very thin pans can create hot spots. Cast iron holds heat so well that it can overshoot easily.
Water loss: why brown butter “disappears” into dough
One of the biggest practical surprises of brown butter is that you finish with less volume than you started with. If you begin with 1 cup (227 grams, or 2 sticks) unsalted butter, you may lose around 25 to 45 grams during browning, depending on how far you cook it and your butter’s starting composition. Most of that loss is water.
This matters because recipes are systems. If a cookie recipe was developed with plain butter, that butter brought both fat and water. If you replace it with brown butter without accounting for the missing moisture, the dough may be:
- drier or stiffer
- greasier in feel because fat is now more concentrated
- slower to emulsify with sugar and eggs
- prone to spreading differently
- more intensely flavored but less structurally balanced
So when people say brown butter “disappears” into dough, they often mean two things at once. First, there is literally less butter by weight after browning because water evaporated. Second, its flavor can seem diffuse if it is not used in enough concentration or if the dough’s structure changes in a way that masks it.
A practical rule for replacing plain butter with brown butter
If a recipe calls for 227 grams unsalted butter, and you want the same total mass of browned butter in the bowl, start with about 255 to 270 grams butter and cook it down until you have 227 grams browned butter left. Weighing is the easiest and most accurate method.
If you do not have a scale, a rough home-kitchen rule is this:
- For every 1/2 cup (113 grams, 1 stick) butter you need in finished browned form, start with about 9 tablespoons to 10 tablespoons butter.
That said, recipe goals differ. Sometimes you want the reduced water because it gives chewier cookies or a more tender, less cakey crumb. Sometimes you need to add moisture back deliberately.
When to add water back
For baking projects where the original water content mattered—certain cakes, softer cookies, quick breads, or when a recipe was not specifically designed for brown butter—you may want to whisk in 1 to 2 tablespoons (15 to 30 grams) water, milk, or an ice cube per cup of butter originally browned after the butter has cooled slightly. This can help restore the original hydration.
Many bakers use ice to cool the butter quickly while replacing evaporated water. That works, but add it carefully: hot butter can sputter violently if hit with water. Let the butter cool for 2 to 5 minutes first, then whisk in water a little at a time.
Brown butter in cookies, cakes, and doughs
Brown butter changes more than flavor. It changes texture because you altered the ratio of fat to water and often the butter’s temperature and physical state.
Cookies
In cookies, brown butter usually creates deeper flavor and often more chew. Because some water is gone, there is less steam and often less gluten development than with standard melted butter, though sugar and egg ratios matter more overall. Many brown butter cookie recipes also call for chilling the dough because the butter is fully melted and the dough can spread quickly.
Practical rules for cookies:
- If adapting a standard recipe, cool brown butter to warm or room temperature before mixing unless the recipe says otherwise.
- For stronger flavor, let the brown butter cool until opaque around the edges, then beat or whisk it with sugars.
- If dough seems greasy or loose, rest it 20 to 30 minutes or chill it.
- Expect potentially more spread if the dough starts warm.
Cakes and quick breads
In cakes, brown butter contributes wonderful aroma but can reduce lift or alter crumb if the recipe depends on creaming softened butter with sugar. Once butter is melted and browned, it can no longer trap air the same way as soft butter.
Practical rules:
- In recipes based on melted butter, brown butter is usually an easy substitution.
- In recipes based on the creaming method, look for a recipe specifically designed for brown butter or chill the browned butter until it resolidifies to a soft, spreadable texture before creaming.
- Consider replacing lost moisture with 1 tablespoon liquid per 1/2 cup butter browned if the batter seems too thick.
Pastry and laminated doughs
Brown butter is harder to use as a direct swap in laminated doughs or pastries that rely on intact butter structure because browning melts and separates the butter. It is better used as a flavoring in fillings, glazes, streusels, or doughs developed specifically for it.
Brown butter in sauces, pasta, and vegetables
Savory applications are often more forgiving because exact hydration is less critical and the nutty flavor has fewer obstacles.
Pasta sauces
A classic brown butter pasta sauce works because starch from the pasta water helps emulsify the butterfat into a glossy coating instead of a greasy puddle.
For 8 ounces (225 grams) pasta, a good starting sauce is:
- 4 tablespoons (57 grams) unsalted butter
- 1/4 cup (60 ml) pasta water, plus more as needed
- 1 teaspoon lemon juice or a squeeze to taste
- 2 tablespoons grated Parmesan (optional)
- black pepper
- herbs like sage, parsley, or thyme if desired
Brown the butter, then lower the heat and add pasta water carefully. It will sputter. Toss in the pasta and stir vigorously until the sauce looks glossy. Finish with acid and cheese. The water is not just dilution; it is what lets the sauce emulsify.
Vegetables
Brown butter flatters vegetables with natural sweetness or nuttiness: carrots, squash, cauliflower, cabbage, green beans, Brussels sprouts. It is especially good with ingredients that also benefit from a little acidity.
For 1 pound (450 grams) vegetables, start with 2 to 3 tablespoons brown butter and finish with one of the following:
- 1 to 2 teaspoons lemon juice
- 1 teaspoon sherry vinegar
- toasted hazelnuts or almonds
- chopped parsley, dill, or sage
- a pinch of chile flakes
Fish and delicate proteins
Classic brown butter with capers and lemon is a case study in balance. The fat delivers richness, the toasted solids bring depth, capers add salinity and acidity, and lemon keeps the sauce from tasting heavy.
For 2 portions of fish:
- Brown 4 tablespoons (57 grams) butter
- Add 1 tablespoon drained capers
- Finish with 1 to 2 teaspoons lemon juice and parsley
- Spoon immediately over cooked fish
The key is to add lemon after browning, off heat or at low heat, to prevent spattering and preserve brightness.
The science of temperature and carryover heat
People often ask for the exact temperature of brown butter, but the more useful answer is that you are working through stages rather than aiming for one number. Water keeps the temperature moderated early on; once enough water evaporates, the milk solids can brown rapidly in fat that is much hotter than boiling water.
In practical use:
- Butter melts around 90 to 95°F (32 to 35°C).
- Water in the butter boils around 212°F (100°C).
- Noticeable browning of milk solids accelerates after enough water is gone and local temperatures at the pan surface climb well above that.
Infrared thermometer readings on a butter surface are not always especially useful because foam and movement distort the reading. Better cues are smell, sound, and visible sediment color.
What matters most is heat control. High heat shortens the timeline so much that the solids often burn before the cook can react. Medium or medium-low heat gives you time to smell the transition and pull the pan when the color is right.
A good home method for 1 stick/113 grams butter is:
- Put the butter in a light-colored saucepan over medium heat.
- Melt completely, then swirl or stir often.
- After 3 to 5 minutes, bubbling will likely still be active.
- Between about 5 and 8 minutes, depending on pan and heat, the foam may thin and solids will begin to tan.
- Watch for an amber color and a pronounced nutty aroma.
- Remove from heat immediately and pour into a heatproof bowl to stop carryover cooking.
Times vary a lot with pan size, burner strength, and butter quantity, so do not cook by the clock alone.
Step-by-step: how to make brown butter reliably
Here is the most dependable home-kitchen method.
Basic brown butter
Yield: about 85 to 95 grams browned butter from 113 grams (1/2 cup, 1 stick) unsalted butter, depending on evaporation
You need:
- 1 stick (113 grams) unsalted butter
- a light-colored small saucepan or skillet
- a heatproof bowl
- silicone spatula or wooden spoon
Method
-
Cut the butter into pieces. This helps it melt evenly. Add it to the cold pan.
-
Set over medium heat. Let the butter melt fully. Stir or swirl occasionally.
-
Watch the bubbles. The butter will foam as water boils off. At first the bubbling is loud and wet-sounding.
-
Stir more frequently once foamy. Scrape along the bottom of the pan to keep milk solids moving so they brown evenly rather than scorching in one spot.
-
Look beneath the foam. Tilt the pan or part the foam with the spatula. You are looking for tiny specks turning from pale yellow to tan.
-
Use your nose. The aroma will shift from buttery and milky to toasted and nutty. This is the cue that matters most.
-
Stop at amber-brown, not dark brown. For all-purpose use, pull the butter when the solids are medium golden-brown and the fat is amber. If the specks are dark brown and the smell is sharp, you are at or beyond the edge.
-
Transfer immediately. Pour everything, including the browned solids, into a heatproof bowl. Leaving the butter in the hot pan is one of the most common causes of accidental burning.
-
Use as needed. Use warm for sauces and vegetables; cool for baking according to recipe needs.
Optional: restoring moisture for baking
If you need to replace lost water, let the browned butter cool for a few minutes, then whisk in 1 to 2 teaspoons water per 4 tablespoons browned butter, or enough to match the original recipe’s intended hydration.
Common mistakes and how to avoid them
Mistake 1: Using heat that is too high
This is the fastest route to bitter butter. Keep the burner at medium or even medium-low if your stove runs hot. Browning is not a searing project.
Mistake 2: Using a dark pan
If you cannot see the solids, you are browning blind. A pale stainless pan gives you the information you need.
Mistake 3: Not stirring the bottom
The solids settle and toast on the pan surface. If you do not move them, they can scorch in one area before the rest of the butter catches up.
Mistake 4: Walking away
Brown butter needs attention near the end. The jump from perfect to burnt is quick.
Mistake 5: Forgetting carryover cooking
Always transfer out of the pan. Even 30 extra seconds in a hot pan can push it too far.
Mistake 6: Substituting it into baking recipes without accounting for water loss
If a recipe becomes dry, greasy, or oddly dense after your swap, moisture balance is often the reason.
Mistake 7: Straining out the solids unnecessarily
Unless a recipe needs perfectly smooth fat, keep the toasted solids. They hold much of the flavor.
Smart variations and flavor pairings
Brown butter is delicious on its own, but it gets even better when paired thoughtfully.
Herbs
- Sage: the classic, especially with squash, pasta, and gnocchi
- Thyme: elegant with mushrooms or chicken
- Rosemary: use lightly; it can dominate
Add hardy herbs in the final moments so they crisp gently without burning.
Acid
- lemon juice
- sherry vinegar
- cider vinegar
- verjus if you have it
Acid sharpens the nutty notes and cuts richness. Add it after browning, with care.
Sweet applications
Brown butter loves:
- chocolate
- pecans, walnuts, hazelnuts
- oats
- vanilla
- maple
- banana
- coffee
That is why it works so well in chocolate chip cookies, blondies, banana bread, and nut cakes.
Savory applications
Pair with:
- roasted squash
- cauliflower
- cabbage
- shellfish
- white fish
- ravioli
- gnocchi
- fried eggs
The more simply the dish is seasoned, the more clearly the brown butter reads.
Salted or unsalted?
Unsalted butter is usually best because it gives you control and tends to foam a bit more predictably. Salted butter can work, but salt levels vary by brand, and in some applications the concentration increases as water evaporates. If using salted butter, season the final dish cautiously.
Can you make it ahead?
Yes. Brown butter keeps well.
- Refrigerator: up to 1 week in a sealed container
- Freezer: up to 2 months
As it cools, it will solidify. Be sure the browned milk solids stay with the butter unless you intentionally want clarified browned fat. Rewarm gently or let soften before baking use.
You can also brown a larger batch, weigh it into portions, and store it for future cookies or quick pan sauces.
A few useful formulas for home cooks
These are not rigid laws, but they are reliable starting points.
For baking swaps
- Need 113 grams finished brown butter? Start with about 128 to 135 grams butter.
- Need 227 grams finished brown butter? Start with about 255 to 270 grams butter.
- If adapting a recipe and texture seems too dry, add back 15 to 30 grams water per 227 grams original butter.
For pasta sauce
Per 8 ounces/225 grams pasta:
- 4 tablespoons/57 grams butter
- 1/4 cup/60 ml pasta water
- acid to taste
- optional cheese and herbs
For vegetables
Per 1 pound/450 grams vegetables:
- 2 to 3 tablespoons brown butter
- 1 to 2 teaspoons acid
- herbs or nuts as garnish
How to know when it is perfect
Perfect brown butter is not defined by one exact shade, because different uses benefit from slightly different levels of toasting.
- For baking, a medium amber is often best: enough complexity without edging into bitterness.
- For vegetables and fish, a slightly lighter brown can taste fresher and more delicate.
- For robust pairings like sage pasta or squash, you can take it a little darker—but only to the point of deep nuttiness, never acridity.
The target sensory cues are:
- aroma like toasted nuts, butterscotch, or warm pastry
- visible golden-brown to chestnut flecks
- a clear amber fat phase
- no burnt or smoky harshness
If it smells bitter, it probably tastes bitter.
The big takeaway: brown butter is a controlled reduction, not just melted butter left on the stove
The best way to think about brown butter is as a tiny sauce project and a tiny baking reformulation at the same time. You are concentrating fat, removing water, and browning milk solids. That one process changes flavor, texture, aroma, and behavior.
So the rules become simple:
- Use a light-colored pan so you can see the solids.
- Keep the heat moderate so the browning window is manageable.
- Watch the foam, but read the smell because aroma is your most accurate cue.
- Move the solids by stirring or swirling so they toast evenly.
- Transfer immediately to stop carryover cooking.
- Account for lost water when using brown butter in baking.
- Balance richness with acid, starch, or herbs in savory dishes.
Once you understand those rules, brown butter stops being a gamble. It becomes a repeatable technique—a way to pull more flavor out of one ordinary ingredient than seems reasonable. A stick of butter becomes sauce, perfume, structure, and color all at once. And when you catch it at exactly the right moment, before bitterness sets in, it delivers one of the most satisfying aromas in the kitchen.