Sheet Pan vs. Skillet vs. Air Fryer: How Heat Transfer Changes Crispiness, Browning, and Cook Times
RecipeSimpli

Sheet Pan vs. Skillet vs. Air Fryer: How Heat Transfer Changes Crispiness, Browning, and Cook Times
Crispy edges, deep browning, and “done at the same time” aren’t just luck—they’re physics.
A sheet pan, a skillet, and an air fryer can cook the same ingredients into noticeably different results: potatoes that are shatter-crisp vs. tender-crisp, chicken skin that’s bronzed vs. pale, tofu that’s chewy vs. crunchy. The reason is how each tool moves heat into your food.
This guide breaks down heat transfer in plain terms—conduction, convection, and radiant heat—then translates it into practical choices and timing tips for four common categories: vegetables, chicken, tofu, and potatoes. You’ll also get troubleshooting fixes for the problems that haunt home cooks: soggy vegetables, uneven browning, and “why is it burning outside but raw inside?”
The three ways heat gets into food (plain-language version)
Most cooking uses all three types of heat transfer, but one usually dominates, which is why the cooking tool matters.
1) Conduction: heat by direct contact
Conduction is heat moving from a hot surface into whatever is touching it.
- A skillet’s metal transfers heat directly into chicken skin.
- A sheet pan transfers heat into the flat side of potato wedges.
- An air fryer has some conduction where food touches the basket—but less continuous contact than a skillet, and often less surface area contact than a sheet pan.
Why conduction matters: It’s the most reliable path to strong browning at the contact points. That’s why a steak sears in a pan faster than it browns on a rack.
2) Convection: heat delivered by moving air (or fluid)
Convection is heat carried by motion—air in an oven, or super-fast air in an air fryer.
- In a conventional oven, air moves slowly and unevenly.
- In a convection oven, a fan increases air movement.
- In an air fryer, a powerful fan pushes hot air rapidly through a small chamber.
Why convection matters: It can brown and dry the surface more evenly than still air, especially on irregular shapes (broccoli, wings, tofu cubes). Faster convection also means faster evaporation—often leading to more crispiness.
3) Radiant heat: heat delivered by “line of sight” energy
Radiant heat is energy traveling from a hot element (or flame) directly to the food—think broilers, toaster ovens, grill flames, or glowing coils.
- The oven’s top element under the broiler can rapidly brown the top surface.
- A skillet also provides radiant heat from a flame/coil and from the hot pan surface, but conduction is usually the star.
Why radiant heat matters: It can brown fast without relying on air movement or contact. Great for finishing, less predictable for interior doneness.
Browning and crispiness: what you’re actually trying to control
The Maillard reaction (browning)
Deep savory browning comes mostly from the Maillard reaction, which speeds up when:
- The surface is hot enough (often starts noticeably around ~300°F/150°C at the surface)
- The surface is relatively dry
- There are proteins and sugars available (chicken skin, tofu proteins, vegetable sugars)
This is why wet food doesn’t brown well. Evaporating water keeps the surface temperature pegged near the boiling point of water (212°F/100°C) until enough moisture leaves.
Crispiness (texture)
Crispiness usually means:
- Dehydration at the surface (removing water)
- Sometimes starch gelatinization then drying (potatoes)
- Sometimes fat rendering and frying-like blistering (chicken skin)
So crispiness isn’t only “higher heat.” It’s heat + dryness + airflow/contact.
Meet the contenders
Sheet pan (oven roasting)
What it’s best at: Batch cooking, hands-off roasting, caramelization over time, large quantities.
Dominant heat: Convection (hot air) + conduction (where food touches pan). Radiant heat plays a role depending on oven position and elements.
Strengths
- Big capacity: great for meal prep and feeding groups.
- More gentle heat: easier to avoid scorching.
- Easy to combine foods (veg + protein) if you manage timing.
Weak points
- Crowding creates steam and slows browning.
- A standard oven’s convection can be mild; drying is slower.
- The underside can brown more than the top unless flipped.
Skillet (stovetop searing / sautéing)
What it’s best at: Fast browning, strong sear, pan sauces, precise control.
Dominant heat: Conduction from hot metal into food; some radiant from burner.
Strengths
- Fastest route to deep browning.
- Great for skin-on chicken, tofu crust, crisped potatoes.
- You can adjust moment-to-moment.
Weak points
- Limited capacity; crowding drops pan temperature.
- Requires attention and technique.
- Some foods need finishing in the oven for interior doneness.
Air fryer (high-speed convection)
What it’s best at: Quick crisping, small batches, reheating, “fried-like” textures with less oil.
Dominant heat: Intense convection + some radiant + minor conduction at contact points.
Strengths
- Rapid moisture removal = crispiness.
- Quick preheat; efficient for weeknights.
- Great for uneven shapes (wings, florets, tofu cubes).
Weak points
- Small capacity; overcrowding ruins airflow.
- Can dry foods out if you don’t adapt.
- Browning can be patchy where pieces touch.
A quick choosing framework (what to use when)
Ask three questions:
- Do I need deep browning on one specific surface?
- Yes → Skillet (conduction)
- Do I want all-around crispiness on lots of small pieces?
- Yes → Air fryer (fast convection)
- Am I cooking a lot at once, or doing a hands-off meal?
- Yes → Sheet pan (capacity, steady roasting)
Then refine:
- Need a killer crust and cooked-through interior? Skillet + oven finish is a classic restaurant move.
- Need weeknight speed for small portions? Air fryer often wins.
- Need consistency and scale? Sheet pan is your friend.
Timing and technique by ingredient
Timing varies with size, moisture, starting temperature, and your specific equipment. Consider these reliable starting ranges and adjust.
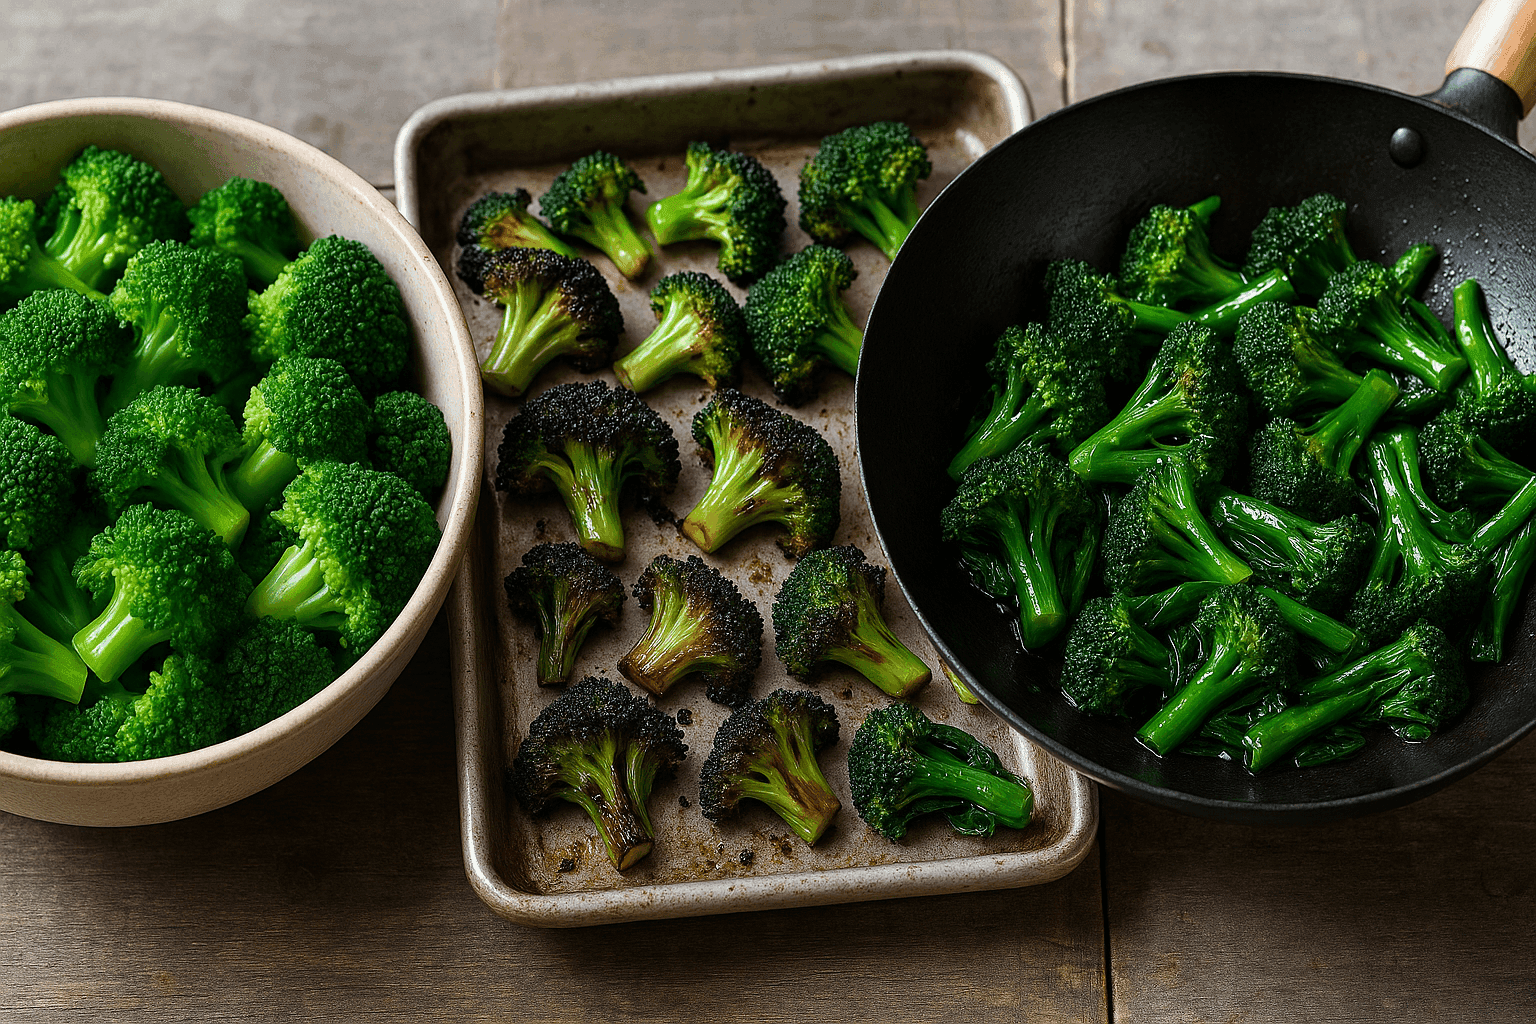
1) Vegetables (broccoli, Brussels sprouts, carrots, peppers)
Vegetables are mostly water. The challenge is getting enough moisture off the surface so sugars can caramelize and Maillard browning can kick in.
Sheet pan vegetables
Best for: Big batches, mixed trays, roasted flavor.
- Temperature: 425°F/220°C (or 450°F/230°C for extra browning if your oven can handle it without smoking)
- Typical time: 15–30 minutes depending on veg and size
- Broccoli florets: 15–20 min
- Brussels sprouts halves: 20–30 min
- Carrot coins: 20–30 min
- Technique tips
- Preheat the pan in the oven for a head start on conduction (especially for broccoli and sprouts).
- Don’t crowd. Leave space so moisture can escape.
- Oil lightly but thoroughly. Oil improves heat transfer and promotes browning.
- Flip once for even browning.
Result profile: Deep roasted flavor, caramelization, slightly more tender interiors.
Skillet vegetables
Best for: Fast browning, stir-fry style, controlled doneness.
- Typical time: 6–15 minutes
- Technique tips
- Use high heat for searing, then add a splash of water and cover briefly to steam/finish thicker veg (a classic sauté/steam combo).
- Avoid moving constantly at the start—give contact time for browning.
Result profile: Strong sear/char on contact points, crisp-tender texture, quick.
Air fryer vegetables
Best for: Crisp edges, quick weeknights, small batches.
- Temperature: 375–400°F / 190–205°C
- Typical time: 8–15 minutes
- Broccoli: 8–12 min
- Brussels sprouts: 12–15 min
- Cauliflower: 10–14 min
- Technique tips
- Dry the veg well after washing.
- Toss with oil + salt; add spices after cooking if they burn easily.
- Shake/flip halfway.
Result profile: Drier surface, crisp tips, less “slow-roasted sweetness” than sheet pan unless you extend time.
2) Chicken (thighs, breasts, wings; skin-on vs skinless)
Chicken highlights the tradeoff between surface browning and interior doneness.
Sheet pan chicken
Best for: Hands-off roasting, multiple pieces, skin-on crisping with patience.
- Bone-in, skin-on thighs: 425°F/220°C for ~35–45 min
- Drumsticks: 425°F/220°C for ~35–45 min
- Boneless skinless breasts: 400–425°F/205–220°C for ~18–25 min depending on thickness
Technique tips
- Pat skin dry; salt ahead if possible (even 30–60 minutes helps).
- Use a wire rack on the sheet pan if you want more even airflow (more convection around the chicken), but note: you lose some bottom-side conduction.
- If skin isn’t crisp enough, finish under the broiler 1–3 minutes—watch closely.
Result profile: Even cooking, good browning, crisp skin possible but slower than skillet.
Skillet chicken
Best for: The crispiest skin, strong sear, pan sauces.
- Skin-on thighs (stovetop-to-oven method):
- Start skin-side down in a cool or barely warm pan, then bring to medium heat to render fat gradually.
- Cook skin-side down 10–15 minutes until deep golden.
- Flip and finish in 400°F/205°C oven 10–20 minutes (or stovetop covered at gentle heat).
Technique tips
- Don’t rush: crisp skin often comes from rendering fat, not blasting heat.
- Avoid moving the chicken early; it will release when the crust forms.
Result profile: Best skin crispness and browning; excellent flavor development.
Air fryer chicken
Best for: Wings, thighs, tenders—fast crisping.
- Wings: 380°F/193°C for 18–24 min, flip halfway; optional 400°F/205°C for 3–5 min to finish crisp
- Thighs (bone-in, skin-on): 380–400°F / 193–205°C for ~22–30 min depending on size
- Breasts: 375–390°F / 190–200°C for ~12–18 min depending on thickness
Technique tips
- Lightly oil skin for better browning (even though chicken has fat, a thin film helps).
- Don’t overcrowd; wings especially need airflow.
- Use a thermometer: pull breasts around 155–160°F (68–71°C) and rest; thighs are forgiving and often best at 175–195°F (79–90°C) for tenderness.
Result profile: Crisp exterior quickly, slightly less “pan-seared depth” than skillet but very efficient.
3) Tofu (firm/extra-firm)
Tofu crispiness is mostly a moisture-management problem. You’re trying to drive off surface water so proteins and starches can brown.
Sheet pan tofu
Best for: Large batches, even cooking, hands-off.
- Temperature: 425°F/220°C
- Time: 25–35 minutes, flipping halfway
Technique tips
- Press tofu 15–30 minutes (or at least pat very dry).
- Toss with oil + salt; optionally add cornstarch for a crisp shell.
- Use parchment for easy release; for more browning, go directly on the pan (more conduction) but watch sticking.
Result profile: Evenly dried and pleasantly chewy-crisp; great for sauces after roasting.
Skillet tofu
Best for: The strongest crust and fastest browning.
- Time: 10–18 minutes total depending on cube size
Technique tips
- Use enough oil to create full contact patches.
- Let tofu sit undisturbed to form a crust; turn thoughtfully rather than constantly stirring.
- For a restaurant-style crust, dust lightly with cornstarch.
Result profile: Deeply browned sides, crispy edges, excellent texture contrast.
Air fryer tofu
Best for: Quick crisp cubes, minimal oil.
- Temperature: 375–400°F / 190–205°C
- Time: 12–18 minutes, shaking halfway
Technique tips
- Press/dry thoroughly—air fryers reward dryness.
- Cornstarch works well here too, but use a light coating to avoid powdery patches.
Result profile: Crunchy outside, tender inside; slightly drier than sheet pan tofu.
4) Potatoes (fries, wedges, roasted chunks)
Potatoes are a masterclass in heat transfer because crispness depends on starch + moisture + fat.
Key idea: you often want to gelatinize starch (via parboiling or steaming) and then dehydrate and brown the surface.
Sheet pan potatoes
Best for: Large batches, classic roast potatoes.
- Temperature: 425–450°F / 220–230°C
- Time: 35–55 minutes depending on size and whether parboiled
Technique tips
- Parboil chunks 7–10 minutes in salted water, drain, rough them up, then roast. This creates a starchy exterior that crisps beautifully.
- Preheat the pan with oil for a head start (careful adding potatoes—sizzle is good).
- Flip once or twice.
Result profile: Great balance of fluffy interior and crisp exterior; excellent for crowds.
Skillet potatoes
Best for: Hash browns, home fries, ultra-crisp contact browning.
- Time: 15–30 minutes depending on cut and whether pre-cooked
Technique tips
- For home fries, microwave or parboil first, then crisp in the skillet.
- Don’t overcrowd; you want contact with hot metal.
- Use enough fat for even browning; butter can burn—combine with oil.
Result profile: The most aggressive browning and crunch on the surfaces that touch the pan.
Air fryer potatoes
Best for: Fries/wedges for 1–3 people, fast crisping.
- Temperature: 380–400°F / 193–205°C
- Time: 15–25 minutes depending on thickness
Technique tips
- Rinse cut potatoes to remove surface starch, then dry extremely well.
- Toss with oil; don’t use too much or you’ll inhibit airflow.
- Shake frequently (every 5–7 minutes) for even browning.
Result profile: Crisp exterior quickly; interiors can be slightly less fluffy than parboiled oven roasts unless you pre-cook.
Practical timing cheat sheet (starting points)
Use these as baselines; adjust for cut size and your machine.
| Food | Sheet pan (425°F/220°C) | Skillet | Air fryer (390°F/200°C) |
|---|---|---|---|
| Broccoli florets | 15–20 min | 6–10 min | 8–12 min |
| Brussels sprouts (halved) | 20–30 min | 10–15 min | 12–15 min |
| Chicken wings | 40–50 min | 20–30 min (often + oven) | 18–24 min |
| Chicken thighs, bone-in | 35–45 min | 10–15 min + 10–20 min oven | 22–30 min |
| Tofu cubes | 25–35 min | 10–18 min | 12–18 min |
| Potato wedges | 40–55 min | 20–30 min | 18–25 min |
Troubleshooting: common problems and fixes
Problem: “My sheet pan vegetables are steaming, not browning.”
Cause: Crowding + moisture = steam; surface temp stays too low for browning.
Fixes
- Use a bigger pan or two pans.
- Roast hotter (450°F/230°C) if safe for your oil and oven.
- Preheat the pan.
- Dry vegetables thoroughly; oil lightly.
Problem: “My skillet food is burning before it’s cooked through.”
Cause: Conduction is intense; exterior over-browns before heat penetrates.
Fixes
- Lower heat and cook longer.
- Use thinner cuts or butterfly chicken breasts.
- Use a two-stage method: sear, then finish in the oven with gentler heat.
Problem: “My air fryer isn’t getting things crispy.”
Cause: Overcrowding blocks airflow; food is wet; temperature too low.
Fixes
- Cook in smaller batches.
- Dry the food more; salt after cooking for some items if salt draws moisture early.
- Increase temp slightly and shake/flip more often.
Problem: “The outside browns but the inside is still cold (especially reheating).”
Cause: High convection browns fast; interior lags.
Fixes
- Lower temp and extend time.
- Cut food smaller.
- For dense items (thick potatoes, big chicken pieces), pre-cook (microwave/parboil) then crisp.
Problem: “My food sticks to the sheet pan or skillet.”
Causes: Not enough fat; pan not hot; proteins haven’t released yet.
Fixes
- Preheat properly and oil the surface.
- Let crust form before moving.
- For sheet pans, parchment helps—though it can slightly reduce browning compared to bare metal.
Problem: “My chicken skin is rubbery.”
Cause: Skin is wet or fat didn’t render; heat wasn’t managed.
Fixes
- Pat dry and salt ahead.
- Use skillet rendering: start skin-side down and don’t rush.
- In oven/air fryer, cook at a temperature high enough to render fat and evaporate moisture; finish with a brief higher-heat blast if needed.
Tool-specific “pro moves” that change results
Sheet pan pro moves
- Preheat the pan: boosts conduction and reduces sticking.
- Use dark, heavy-gauge aluminum or steel: tends to brown better than thin, shiny pans.
- Rotate the pan: ovens have hot spots; rotating halfway improves evenness.
- Use the broiler strategically: roast to cook through, broil to brown.
Skillet pro moves
- Control thermal mass: cast iron holds heat; stainless responds faster. Both can brown well, but technique changes.
- Don’t overcrowd: crowding drops surface temperature and causes steaming.
- Use the “sear then finish” workflow: common in professional kitchens for thick proteins.
Air fryer pro moves
- Treat it like a small convection oven: airflow is everything.
- Shake/flip: you’re compensating for contact points and basket shadows.
- Oil is still useful: a thin film improves heat transfer and browning (it’s not “no oil,” it’s “less oil”).
Cultural and historical context: why these tools feel different
Roasting on trays and pans is one of the oldest “set it and forget it” methods—think hearth cooking evolving into ovens that could cook multiple items at once. Sheet-pan cooking is the modern home version of that scale: it’s efficient, communal, and built for abundance.
Skillet cooking, on the other hand, carries a long tradition of direct-contact browning—from cast-iron cornbread and fried potatoes to stir-fried vegetables in woks (another conduction-dominant tool, aided by flame and rapid tossing). The skillet is where many iconic flavors are born because browning happens quickly and intensely.
Air fryers are new, but the principle—high-speed convection—is not. Professional convection ovens, impingement ovens (used for fast pizza baking), and even some commercial fryers rely on aggressive heat movement to speed cooking and dry surfaces. The air fryer simply miniaturized that idea for home counters.
Expert-source science (lightly cited concepts)
If you’ve heard chefs or food scientists talk about browning, they nearly always come back to the same fundamentals:
- Maillard reaction and caramelization are surface-temperature and dryness dependent.
- Evaporation is a bottleneck: as long as surface water is boiling off, surface temperature struggles to climb.
- Airflow increases evaporation and heat delivery (why convection and air fryers brown faster).
These are widely discussed in culinary science writing and teaching—especially in the work of authors like Harold McGee (On Food and Cooking) and in modern food-science testing culture (e.g., methodical equipment testing and heat-transfer explanations common in outlets like Serious Eats and America’s Test Kitchen). You don’t need to memorize the chemistry to use the principle: dry surfaces brown; moving hot air dries faster; direct contact browns fastest.
So which one should you choose?
Choose sheet pan when you want:
- Big batches
- Hands-off roasting
- Even doneness with good browning over time
Choose skillet when you want:
- The deepest sear and fastest browning
- Crisp skin and strong crusts
- Pan sauces and stovetop control
Choose air fryer when you want:
- Fast crispiness in small batches
- Efficient weeknight cooking
- Great results on bite-size pieces (wings, florets, tofu cubes, fries)
And remember the best “tool” is often a combo:
- Skillet → oven: sear then finish thick chicken or pork chops.
- Parboil → sheet pan: the gold standard for roast potatoes.
- Oven roast → air fry re-crisp: revive leftovers without turning them leathery.
Heat transfer isn’t an abstract science topic—it’s the difference between pale and golden, soggy and crisp, 25 minutes and 45. Once you see conduction, convection, and radiant heat as knobs you can turn, you’ll start choosing the right tool on purpose—and getting the texture you wanted all along.