Vegan Instant Pot Recipes Without the “Burn” Error: Layering Rules, Sauce Thickness, and Pressure‑Cook Timing for Perfect Beans, Grains, and Stews
RecipeSimpli
The Instant Pot “Burn” Error—What It Really Means (and Why Vegan Cooking Triggers It)
The Instant Pot’s infamous “Burn” notice (often displayed as Ovht or Burn) is not a moral judgment on your cooking—it’s the machine detecting overheating at the bottom of the inner pot. Instant Pots and similar electric pressure cookers heat from a single element under the pot. If heat isn’t being carried away efficiently by liquid (or if thick food insulates the bottom), the temperature at the base spikes above the expected range and the cooker stops to protect itself.
Vegan recipes are especially likely to trigger this for three common reasons:
- Thick sauces and purées (tomato paste, blended casala bases, pumpkin, refried beans, coconut cream reductions) settle at the bottom and act like insulation.
- Starchy ingredients (rice, oats, flour thickeners, certain grains) can gel at the base and form a hot, sticky layer.
- Sautéed aromatics left undeglated create browned bits (“fond”) that can be delicious on a stove—but in an Instant Pot they can become the seed of a scorched layer if not dissolved.
The good news: avoiding burn errors isn’t about being timid. It’s about learning a few repeatable rules—liquid minimums, layering, deglazing, and thickener timing—that produce reliably great vegan beans, grains, and stews.
How Electric Pressure Cookers Heat Food (A Quick, Useful Bit of Science)
On the stovetop, you can stir constantly, adjust the flame instantly, and spread heat across the pan. An electric pressure cooker is different:
- Heat comes from one hot plate beneath the inner pot.
- During pressure cooking, you cannot stir.
- The pot relies on convection in a thin liquid to distribute heat evenly.
A thin, water-like liquid transfers heat well. A thick sauce (especially one with sugar, starch, or fiber) doesn’t circulate as easily, so the bottom overheats.
This is why many experienced Instant Pot cooks treat pressure cooking like a physics problem: keep thin liquid at the bottom, keep thick and sugary components away from the base, and let the cooker do steady, moist heat.
The Five Core Rules to Prevent “Burn” (Vegan Edition)
1) Deglaze Like You Mean It
If you sauté onions, garlic, ginger, spices, or tomato paste on Sauté, you’ll often see browned spots on the bottom. Those browned bits are tasty, but they must be dissolved.
Best practice:
- After sautéing, press Cancel.
- Add a thin liquid (water, vegetable broth) and scrape firmly with a wooden spoon or silicone spatula until the bottom feels smooth.
- Only then add the remaining ingredients.
Tip: If you used tomato paste, miso, or spices that stuck, deglaze with a splash of broth plus a splash of acid (lemon juice, vinegar) to help dissolve stubborn fond.
2) Thin Liquid Goes In First
Think of the bottom layer as the cooker’s heat-exchange zone.
- Put water/broth first.
- Then add aromatics and items that don’t thicken.
If your recipe includes crushed tomatoes, salsa, coconut milk, blended cashew cream, pumpkin purée, or anything thick: do not put it directly against the bottom.
3) Respect Minimum Liquid (But Don’t Drown the Food)
Most 6-quart Instant Pots need roughly 1 to 1 1/2 cups of thin liquid to reliably come to pressure (exact needs vary by model and food load). An 8-quart often needs a bit more.
However, “minimum liquid” is not just a volume requirement—it’s a thin liquid requirement. One cup of marinara is not the same as one cup of water.
Rule of thumb: Ensure at least 1 cup (240 ml) of thin liquid at the bottom for a 6-quart, more for larger pots or very dense loads.
4) Layer Thick Ingredients on Top—Don’t Stir
Layering is the single most reliable burn-prevention tactic.
A common approach for vegan chili, dal, or stew:
- Thin liquid (water/broth)
- Aromatics (onion/garlic), spices
- Beans/lentils (rinsed)
- Vegetables
- Thick sauce components (crushed tomatoes, salsa, coconut milk, cashew cream)
Then do not stir before pressure cooking. Stirring can pull thick ingredients down to the hot zone.
After cooking and releasing pressure, then you stir thoroughly.
5) Thickeners and Sugary Ingredients Come Last
Many vegan recipes rely on plant-based thickening strategies:
- Flour, cornstarch, arrowroot
- Ground nuts, nut butters
- Mashed beans
- Oat milk reductions
- Tomato paste
These are best added after pressure cooking using Sauté—or used in ways that avoid bottom contact.
Sugars (maple syrup, brown sugar, some BBQ sauces) also burn easily. Add them after cooking, or keep them in the top layer away from the base.
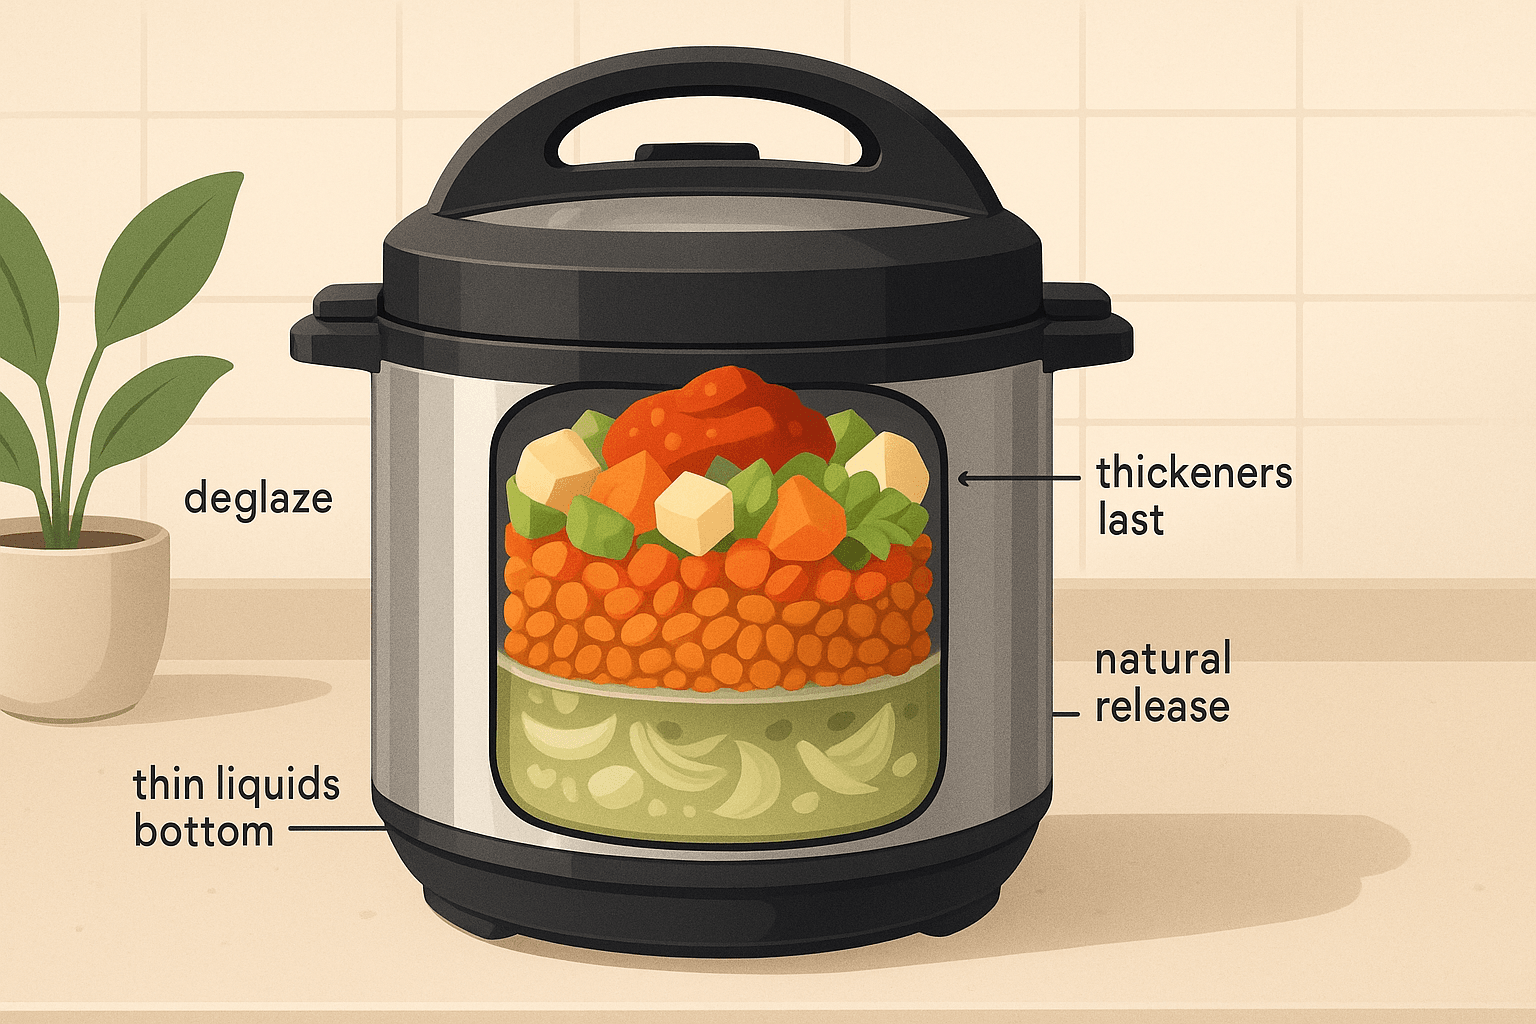
A Layering Blueprint You Can Use for Almost Anything
Use this as a default template for vegan pressure-cooker meals:
- Bottom: 1–2 cups thin liquid (broth/water)
- Aromatics: onion/garlic/ginger (raw is fine), dried spices
- Legumes or grains: rinsed, drained
- Firm vegetables: carrots, potatoes, squash
- Tender vegetables: peppers, zucchini, leafy greens (greens often added after)
- Thick sauces: crushed tomatoes, coconut milk, blended sauces
- Delicate toppings (optional): frozen corn, herbs (often better after)
Important: If you used Sauté, always deglaze between steps 1 and 2.
Sauce Thickness: The Hidden Trigger
Many vegan Instant Pot recipes are tomato-forward: chili, chana masala-inspired stews, bolognese-style lentils. Tomato products vary wildly in thickness:
- Tomato paste: extremely thick and burn-prone.
- Crushed tomatoes: medium-thick; can burn if stirred down.
- Tomato sauce/purée: varies by brand; often thick.
- Diced tomatoes: more liquid; typically safer.
- Salsa: unpredictable—can be thickened with starch.
Practical Tomato Rules
- If using tomato paste, sauté briefly (optional) then deglaze thoroughly; or skip sauté and add paste in the top layer.
- If using crushed tomatoes, pour them on top and do not stir.
- If your recipe is mostly tomato (e.g., “no added water”), add at least 1 cup thin liquid anyway and rely on post-cook reduction if needed.
Coconut Milk and Cashew Cream
Full-fat coconut milk can separate and thicken at the base. Cashew cream is essentially a nut purée—very burn-prone.
Best practice: pressure cook with broth + spices + legumes, then stir in coconut milk/cashew cream after cooking (or keep it as a top layer).
Pressure-Cook Timing: Why Beans and Grains Go Wrong
Two frustrations often happen together:
- You try to avoid burn by adding more liquid, but then the dish is watery.
- Or you keep it thick and get burn—or the legumes are undercooked.
The key is to separate cooking from thickening.
The Two-Phase Method
- Pressure cook in a thinner environment so heat moves safely.
- Thicken and finish with Sauté or by adding purées and letting it rest.
This mirrors professional kitchen logic: braise first, reduce after.
Release Methods Matter (Especially for Beans and Grains)
Pressure release isn’t just about convenience—it affects texture and foaming.
- Natural Release (NR): Let pressure drop on its own. Best for beans, lentils that foam, and starchy dishes. Prevents liquid from spurting and helps soften legumes.
- Quick Release (QR): Manually vent. Can cause foaming/splatter in bean-heavy dishes and can make grains seize.
- Hybrid: 10–15 minutes NR, then QR.
Rule of thumb: For beans and thick stews, use at least 10–15 minutes natural release.
Foolproof Cook Charts (Vegan Staples)
These timings assume a 6-quart electric pressure cooker, standard pressure/high, and typical pantry dryness. Results vary with bean age, altitude, and water chemistry.
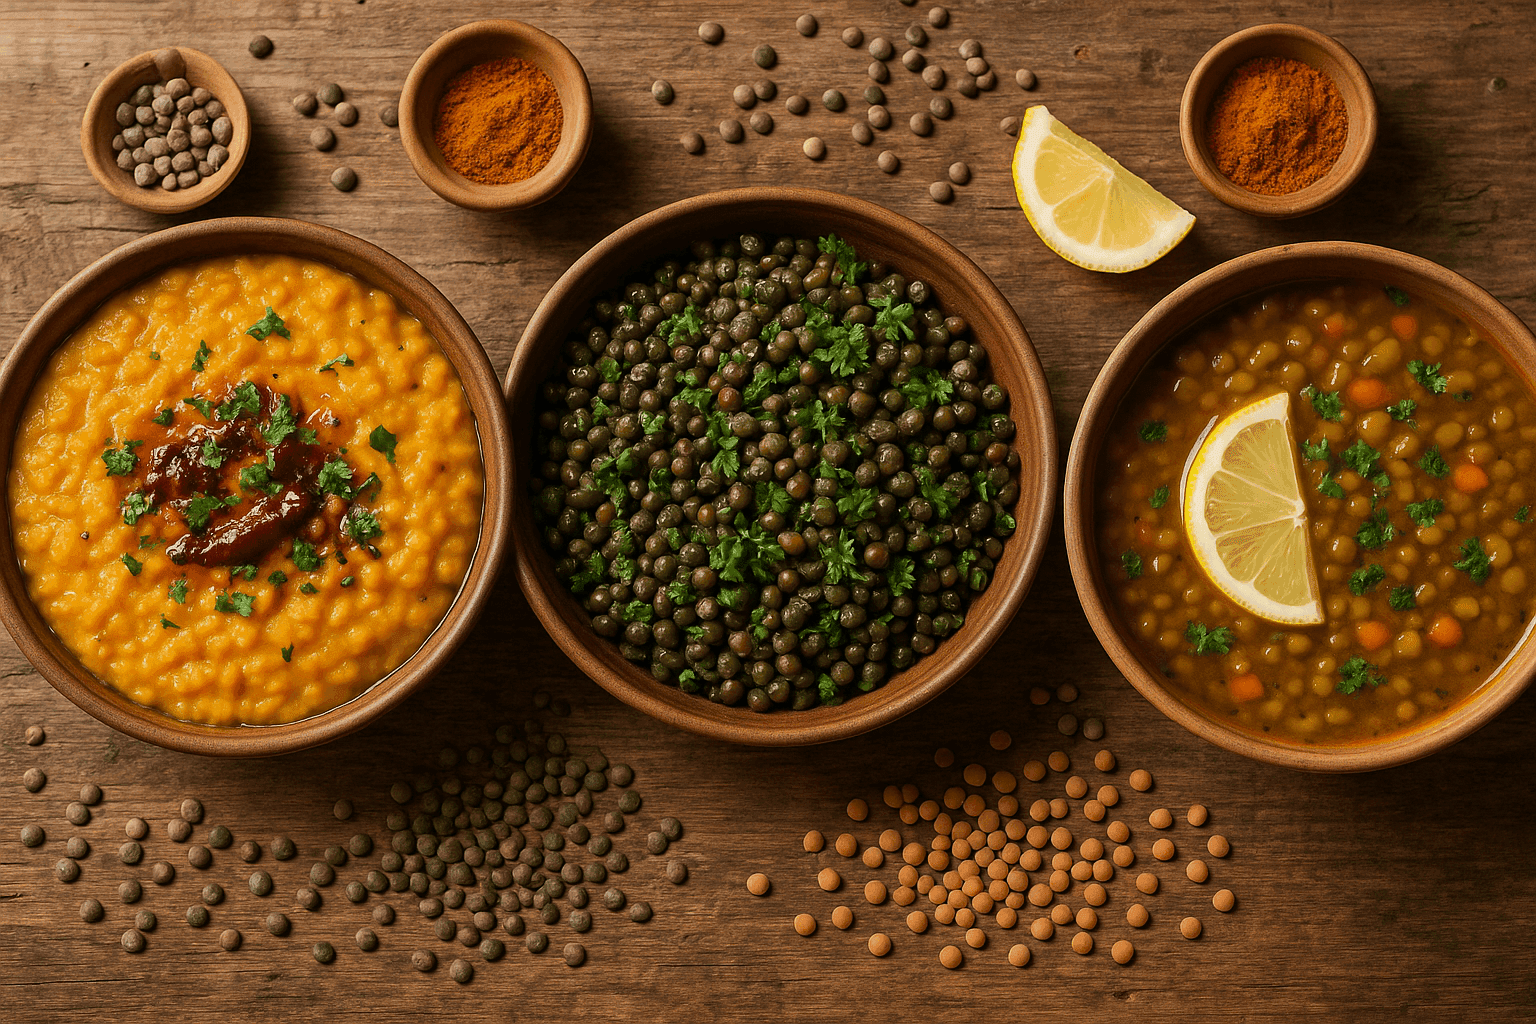
Lentils (Rinsed)
- Red lentils (split): 3–6 min + 10 min NR (break down easily; great for dal texture)
- Yellow lentils (split): 6–8 min + 10–15 min NR
- Brown/green lentils: 9–12 min + 10 min NR (hold shape better)
- French/Puy lentils: 8–10 min + 10 min NR (firmer)
Tip: Acid (tomatoes, lemon) slows softening. If you need tang, add acid after cooking or keep it on top.
Chickpeas and Beans (Unsoaked vs Soaked)
Chickpeas:
- Soaked: 12–15 min + full NR
- Unsoaked: 35–45 min + full NR
Black beans:
- Soaked: 8–10 min + full NR
- Unsoaked: 25–30 min + full NR
Pinto beans:
- Soaked: 10–12 min + full NR
- Unsoaked: 28–35 min + full NR
Kidney beans (boil-safety note):
- Soaked: 10–12 min + full NR
- Unsoaked: 30–35 min + full NR
Kidney beans contain phytohaemagglutinin; pressure cooking at high pressure is commonly used to render them safe, but ensure they reach a full cook (tender throughout).
Grains
White rice (long grain): 3–5 min + 10 min NR (water ratio often ~1:1)
Brown rice: 20–24 min + 10 min NR (ratio often ~1:1 to 1:1.25)
Quinoa: 1 min + 10 min NR (ratio ~1:1)
Steel-cut oats: 3–4 min + 10–15 min NR (use pot-in-pot to prevent sticking)
Barley (pearled): 20–25 min + 10 min NR
Farro (pearled): 10–15 min + 10 min NR
Burn note for grains: Rice and oats are among the easiest foods to stick and scorch. When cooking grains alone, many cooks use pot-in-pot (a stainless bowl on a rack above water) to nearly eliminate burn risk.
The “No-Stir” Chili Method (Vegan Chili That Doesn’t Burn)
Tomato-based chilis are burn-error magnets. Here’s the structure that works consistently.
Example: Vegan Black Bean & Sweet Potato Chili (Layered)
Bottom layer (thin):
- 1 1/2 cups vegetable broth or water
Aromatics & spices:
- 1 diced onion
- 3–4 cloves garlic, minced
- 2 tsp ground cumin
- 1 tsp smoked paprika
- 1–2 tsp chili powder
- Salt (lightly; adjust later)
Legumes & firm veg:
- 1 cup dried black beans (or 2–3 cups cooked; see timing notes)
- 1 medium sweet potato, diced
Top layer (thick):
- 1 can crushed tomatoes OR 1 1/2 cups tomato purée (poured on top)
- Optional: 1–2 tbsp tomato paste (dot on top)
Do not stir.
Cook:
- If using dried unsoaked black beans: 28–30 min high pressure + full NR
- If using cooked beans: 6–8 min high pressure + 10 min NR (mostly to meld flavors; add less liquid)
Finish (after pressure):
- Stir well.
- If you want thicker chili: mash some beans, or simmer on Sauté 5–10 minutes.
- Add corn, lime juice, cocoa, or maple syrup at the end.
Why this works: thin liquid at the bottom prevents overheating; tomatoes stay away from the base until heat circulation is established; thickening happens after.
Dal Without Drama: Getting Creamy Lentils Without Scorching
Dal (a broad family of South Asian lentil dishes) is a perfect Instant Pot match: pressure cooking shortens cook time and produces creamy texture. Burn errors usually happen when cooks sauté spices hard, add tomato or thick purées early, and stir.
Example: Simple Red Lentil Dal (Tarka-Style Finish)
In the pot (pressure cook):
- 1 1/2 cups red lentils, rinsed
- 3 1/2 cups water (or broth)
- 1/2 tsp turmeric
- 1 tsp salt (start modest)
- 1 inch ginger, grated
Cook: 5 min high pressure + 10 min NR
Finish:
- Stir until creamy.
- For flavor, make a quick tarka (tempering) separately: heat oil, toast cumin/mustard seeds, chili, garlic, then pour over dal.
Burn-proof idea: Do the high-heat spice work outside the Instant Pot (or after cooking). This respects how spices bloom in oil without risking stuck-on bits during pressurization.
Grain Bowls: Best Practices (and When to Use Pot-in-Pot)
Grain bowls sound simple—until you get a scorched rice disk.
When to Use Pot-in-Pot
Use pot-in-pot (PiP) when:
- Cooking white rice with minimal water
- Cooking oats
- Cooking quinoa with delicate ratios
- Making cheesecake-like or custardy vegan items
How PiP works:
- Add 1–2 cups water to the main liner.
- Put grain + measured water in a stainless bowl.
- Set bowl on a trivet.
This method virtually eliminates burn errors because the main pot always has thin water circulating.
One-Pot Grain + Beans (Proceed Carefully)
If you cook grains and beans together, choose combos with similar timing—or expect compromise.
Good pairings:
- Brown rice + black beans (soaked) can align better than white rice.
- Lentils + rice can work if you choose lentil type carefully.
If you’re new: cook beans separately, then combine with grains after.
Thickening After Pressure: A Toolkit for Vegan Stews
Instead of risking burn by thickening early, thicken at the end with methods that also improve flavor.
1) Reduction on Sauté
After pressure cooking:
- Stir.
- Use Sauté to simmer 5–15 minutes, stirring often.
This evaporates water and concentrates flavors.
2) Starch Slurry (Cornstarch/Arrowroot)
- Mix 1 tbsp starch with 1–2 tbsp cold water.
- Stir into simmering stew.
- Cook 1–2 minutes until glossy.
Arrowroot stays clearer but can get slimy if overboiled; cornstarch is more forgiving.
3) Blend a Portion
Blend 1–2 cups of the cooked stew (or use an immersion blender briefly). This thickens with the stew’s own starch and fiber—common in bean soups.
4) Mash Beans or Vegetables
Mashing cooked beans, potatoes, or squash thickens naturally and keeps a rustic texture.
5) Add Creamy Elements at the End
Stir in:
- Coconut milk
- Cashew cream
- Tahini
- Nut butter
This gives richness without risking bottom scorch during pressurization.
Cultural Context: Why Many Traditional Legume Dishes Translate Well (With One Adjustment)
Many global plant-forward staples—Indian dals, Middle Eastern lentil soups, Latin American bean stews—were developed around gentle simmering and gradual thickening. The Instant Pot compresses that timeline.
The main adaptation is separating:
- the tenderizing cook (pressure phase)
- from the flavor blooming and thickening (sauté/reduction phase or a final tempering step)
This mirrors professional practice and respects how aromatics and spices behave differently under pressure (volatile aromas can dull, and frying spices requires dry heat and attention).
Troubleshooting: If You Still Get Burn
Burn Appears Before It Comes to Pressure
Likely causes:
- Thick sauce at the bottom
- Not enough thin liquid
- Stuck-on fond from sautéing
Fix:
- Cancel, release pressure if needed.
- Open, move contents to a bowl.
- Scrub liner clean.
- Add thin liquid first, deglaze, then re-layer without stirring.
It Comes to Pressure, Then Burn Appears Mid-Cook
Likely causes:
- Food is too thick overall; convection stalled
- Too much starch (rice/oats) against bottom
Fix:
- Add more thin liquid and restart.
- Consider pot-in-pot next time.
Beans Are Still Hard
Likely causes:
- Beans are old
- Too much acid early
- Not enough time or NR
Fix:
- Add 5–15 minutes pressure time.
- Use full NR.
- Add acidic ingredients after beans are tender.
Food Tastes Flat After “Safe” Cooking
Common when cooks avoid sautéing entirely.
Fix:
- Bloom spices in oil after cooking (tarka).
- Add umami boosters at the end: miso, soy sauce, nutritional yeast, mushroom powder.
- Finish with acid and herbs.
Three Complete Vegan Templates (Mix-and-Match)
Template 1: Burn-Proof Tomato Bean Stew
- Add 1–2 cups broth (bottom).
- Add onion/garlic/spices.
- Add dried beans (rinsed).
- Add firm veg.
- Pour crushed tomatoes on top—don’t stir.
- Pressure cook with appropriate bean timing + full NR.
- Stir, reduce, then add sugar/acid.
Template 2: Creamy Coconut Lentil Curry
- Broth/water + aromatics + lentils + veg.
- Pressure cook.
- Stir in coconut milk + lime + greens.
- Simmer briefly to thicken.
Template 3: Grain Bowl Base (PiP)
- Water in main pot.
- Grain + measured water in bowl on trivet.
- Pressure cook + NR.
- Top with quick-simmered beans/veg cooked separately or using Sauté afterward.
Safety and Quality Notes Worth Knowing
- Don’t overfill: For beans, soups, and grains, stay below the manufacturer’s max fill lines (often 1/2 for foamy foods like beans).
- Rinse legumes and grains to reduce surface starch and foaming.
- Oil can help reduce foaming and sticking, but oil alone won’t prevent burn if the base is thick.
- Altitude matters: Higher altitude often means longer cook times.
A Practical “Burn-Free” Checklist (Print This in Your Head)
Before pressure cooking:
- At least 1 cup thin liquid at the bottom (6-quart; more if needed)
- Deglazed after sautéing until bottom is smooth
- Thick sauces/purées placed on top
- No stirring once thick ingredients are added
- Plan to thicken after cooking
- Use NR for beans/starchy foods
Putting It All Together: Confident Vegan Pressure Cooking
Avoiding the burn error isn’t about abandoning hearty vegan comfort food—it’s about cooking it in the order your Instant Pot prefers. Thin liquids and dissolved fond protect the heating surface; layering prevents thick components from insulating the bottom; natural release finishes legumes gently; and post-cook thickening gives you the rich texture you wanted all along.
Once these rules become habit, you can improvise freely: a smoky black bean chili one night, a lemony lentil soup the next, and a coconut chickpea curry after that—without scraped, scorched surprises. Your reward is exactly what pressure cookers promise: fast, hands-off, deeply satisfying vegan food, with beans fully tender, grains fluffy, and stews thickened on your terms.