Why Mussels Turn Briny, Rubbery, or Incredibly Sweet: Glycogen, Salinity, and the Steam Rules for Better Broths, Pastas, and Pot-Style Seafood
RecipeSimpli
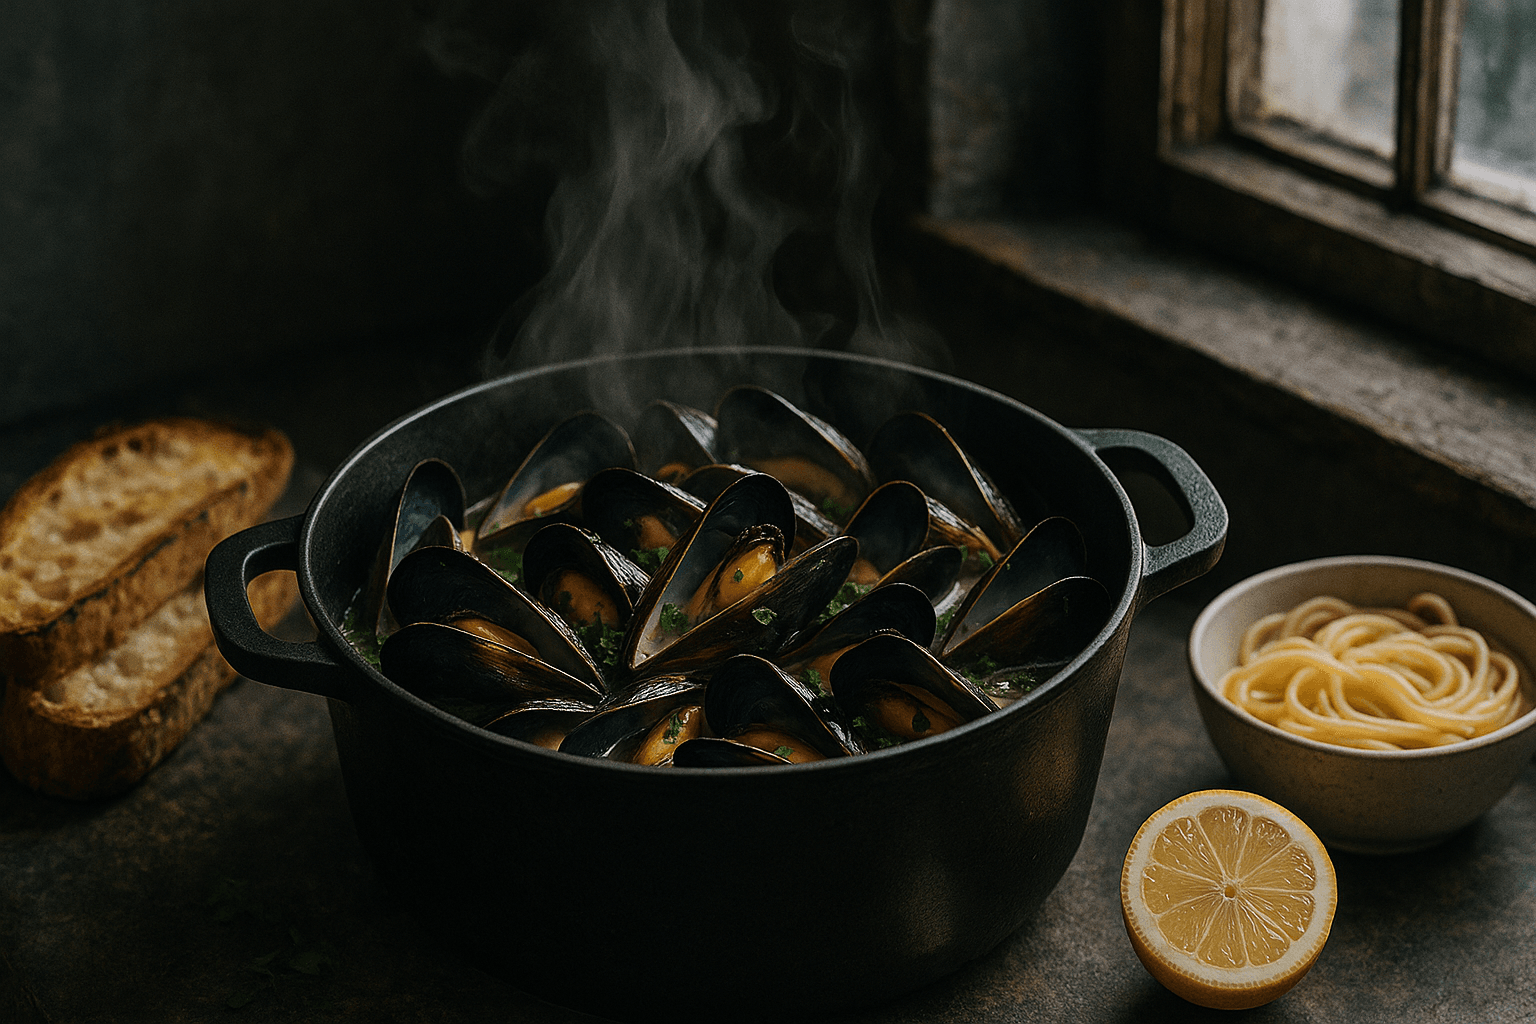
If you have ever cooked mussels that tasted vividly of the sea one night, almost candy-sweet on another, and disappointingly rubbery on a third, you have already discovered the central truth of shellfish cookery: mussels are small animals with changing biology, not static ingredients. Their flavor and texture shift with species, season, salinity, stress, and how they are handled between harvest and your pot. Then your cooking either preserves those qualities or bulldozes them.
That is why the same basic method—throw mussels in a hot pot with wine and garlic—can produce dramatically different results. Some batches release a clean, mineral broth and turn plump and tender in barely three minutes. Others flood the pot with salinity, need careful balancing, and go from juicy to bouncy before you have even set the table. Mussels are fast, but they are not forgiving.
The good news is that excellent mussels at home are not mysterious. Once you understand how glycogen affects sweetness, how salinity shapes liquor, why the adductor and mantle toughen with excess heat, and how steam timing determines texture, the whole subject becomes less intimidating and much more delicious. Better still, these principles scale. They help whether you are making a quick bowl of moules marinières, tossing mussels into pasta, or building one of those coastal-style seafood pots where the broth matters as much as the shellfish.
Why mussels can taste sweet, briny, bland, or harsh
Mussels live by filtering water. That simple fact explains both their appeal and their variability. They concentrate the character of their environment more directly than many other foods. Water temperature, plankton availability, salinity, tide patterns, species, and post-harvest storage all alter what you taste.
At the center of sweetness is glycogen, a storage carbohydrate that shellfish accumulate as an energy reserve. In practical cooking terms, glycogen is one big reason some mussels taste mellow, rounded, and faintly sweet rather than aggressively salty. When mussels are well-fed and in a physiological state that favors energy storage, they often taste richer and sweeter. When those reserves are lower—because of spawning cycles, stress, or less favorable feeding conditions—the flavor may skew more marine, lean, or flat.
This is also why season matters, though not in a simplistic “only eat mussels in months with an R” way. That old rule made some sense in pre-refrigeration times and in the context of shellfish safety and warm-weather spoilage, but it is not a reliable modern flavor rule. Farmed mussels are available year-round and can be excellent in many seasons. What matters more is where they were grown, what species they are, how they were handled, and where they are in their reproductive cycle.
During and around spawning, many bivalves taste less full because energy reserves are being redirected. Depending on species and region, that can mean a softer texture and less sweetness. Outside that phase, especially when feeding has been strong, mussels can taste almost buttery beneath the saline edge.
Species and place: not all mussels are the same
If you buy mussels casually, you may think of them as one ingredient. In reality, several commercial species and growing environments create meaningful differences.
Mediterranean mussels (Mytilus galloprovincialis) are common in Europe and many export markets. They often have broad, meaty shells and a robust sea flavor.
Blue mussels (Mytilus edulis) are widely prized for a balanced profile: clean, sweet, and delicately marine when well handled.
Pacific blue mussels and New Zealand green-lipped mussels introduce further differences in size, shell shape, and intensity. Green-lipped mussels in particular can be larger and more dramatic in presentation, though their cooking needs are slightly different because of size.
Then there is the question of growing method. Rope-grown mussels are often cleaner than bottom-grown mussels because they spend less time in contact with grit and sediment. They may require less purging and usually bring less mud into the pot. Bottom-grown mussels can still be excellent, but they often need more careful washing.
Salinity in the growing waters matters too. Mussels from higher-salinity environments can taste more powerfully oceanic and release saltier liquor. Mussels from estuarine or less saline waters may be softer in salinity and sometimes sweeter or more rounded, though local ecology complicates any blanket rule. The point is not to memorize a fixed flavor map; it is to understand that your broth begins before you start cooking.
Post-harvest handling shapes flavor more than most home cooks realize
A mussel continues to live after harvest, and that means storage conditions matter enormously. Stress depletes glycogen. Heat accelerates deterioration. Sitting in fresh water can kill the animal. Sealing live mussels in an airtight container deprives them of oxygen. Leaving them submerged in melting ice can also damage them.
The best mussels are usually sold alive, cold, and moist, ideally in mesh or perforated packaging that allows airflow. They should smell like clean seawater, not strong fish, ammonia, or swampy mud.
When you get them home, do this:
- Remove them from any sealed plastic bag.
- Set them in a bowl or tray.
- Cover with a damp towel or damp paper towels.
- Keep them in the refrigerator at 32 to 40°F / 0 to 4°C.
- Cook within 24 hours, and preferably the same day.
Do not store mussels in fresh water. Do not leave them soaking overnight. Do not pack them directly under ice where meltwater can drown them.
A stressed mussel may still open in the pot, but its flavor can be diminished and its liquor less sweet. If you have ever made a broth that tasted merely salty rather than fragrant and rounded, poor handling may have been part of the story.
The anatomy of rubberiness: why overcooking ruins mussels fast
The maddening thing about mussels is how little overcooking it takes to turn tender shellfish into something chewy. The reason is structural.
A mussel’s edible body includes the mantle and the muscles that help it keep the shell closed, including adductor structures and other protein-rich tissues. Like the proteins in fish, squid, scallops, or shrimp, these tissues respond quickly to heat. As temperature rises, proteins denature and tighten. Moisture is pushed out. Texture changes from translucent and supple to firm, then springy, then rubbery.
Because mussels are small and cook in moist, enclosed heat, this happens in minutes, not tens of minutes. In most home pots, live mussels begin opening at roughly the point when their internal tissues have just cooked through. Once open, they need very little additional time.
The common home-cook mistake is to think of opening as the beginning of cooking. In fact, it is nearly the end.
For average cultivated mussels in a wide pot over high heat, total cooking time is often just 3 to 6 minutes from lid-on to done. Small rope-grown mussels may be ready in 3 to 4 minutes. Larger mussels may need 5 to 7 minutes. If they are still being vigorously boiled for 10 minutes, texture loss is almost inevitable.
Steam is the rule, not boiling
If you want sweet mussels and a clear, balanced broth, steam them with a small amount of flavorful liquid rather than submerging them in a large volume of boiling water.
This matters for two reasons.
First, steam cooks gently and rapidly. The pot environment gets hot fast, shells open efficiently, and the mussels cook mostly in their own released liquor plus your aromatized base.
Second, less added liquid means less dilution and more control. Mussels release a surprising amount of liquid on their own. If you start with too much wine, stock, or water, you can wind up with a thin broth that tastes vaguely shellfish-like rather than concentrated and alive.
For 2 pounds / 900 g to 1 kg mussels, you usually need only:
- 1 to 2 tablespoons olive oil or 2 tablespoons butter
- 2 to 4 shallots, finely sliced, or 1 small onion
- 2 to 4 garlic cloves, sliced
- 1/2 to 3/4 cup / 120 to 180 ml dry white wine, cider, or light beer
- optionally 1/4 cup / 60 ml water or light stock if needed
That is enough. The mussels themselves will contribute the rest of the liquid.
Acid, fat, and aromatics: building broth without burying the shellfish
A great mussel broth is not a random pile-on of ingredients. It is a controlled system in which each component does a job.
Acid
Wine, cider, vermouth, tomatoes, or a squeeze of lemon add brightness and aromatic lift. Acid helps balance salinity and richness, but too much can make the broth sharp and flatten the mussels’ sweetness.
A useful rule: for 2 pounds / 900 g mussels, keep the main acidic liquid in the range of 1/2 to 3/4 cup to start. You can always sharpen later with lemon juice, a spoonful of tomato, or a splash more wine reduced separately.
Fat
Butter and olive oil carry aroma and soften harsh edges. Butter in particular emulsifies with mussel liquor and wine into a glossy broth that tastes rounder than its ingredient list suggests.
For a classic wine broth, finish with 2 to 4 tablespoons cold butter, whisked or swirled in off the heat. For a more Mediterranean profile, use fruity olive oil and perhaps a smaller amount of butter.
Aromatics
Shallots, garlic, leeks, fennel, parsley stems, thyme, bay, saffron, or chile can all be wonderful. But mussels are easy to overpower. Heavy rosemary, lots of smoked paprika, too much curry paste, or a dark stock can push the broth away from shellfish and into generic stew territory.
A good guideline is to treat aromatics as background architecture. The mussels should still smell unmistakably like themselves.
Cleaning, debearding, and the soaking myth
Many home cooks have been taught to soak mussels in fresh water with flour, cornmeal, or salt for long periods so they “spit out sand.” This advice is often outdated or unnecessary for cultivated mussels, especially rope-grown ones.
Here is the practical approach.
Step 1: Inspect
Discard any mussels with:
- cracked or shattered shells
- gaping shells that do not close when tapped firmly
- a strong off odor
A slightly open shell is not automatically dead. Tap it. If it closes or begins to close, it is alive.
Step 2: Rinse and scrub
Place the mussels in a colander and rinse under cold running water. Use your hands or a stiff brush to remove mud, seaweed, or barnacle-like debris. This usually takes 3 to 5 minutes for a typical batch.
Step 3: Debeard if needed
The “beard” is the byssal thread, the fibrous tuft some mussels use to attach themselves. Many cultivated mussels come mostly debearded already. If threads remain, grasp them with your fingers or a towel and pull toward the shell hinge. Do this shortly before cooking, not hours ahead, since aggressively debearding too early can stress the mussels.
Step 4: Avoid prolonged soaking
If your mussels are visibly gritty, a brief soak of 10 to 20 minutes in very cold, well-salted water that approximates seawater can help loosen sediment. But prolonged soaking in fresh water is a mistake. Mussels are saltwater animals. Fresh water stresses or kills them and can waterlog flavor.
For most supermarket farmed mussels, a rinse and scrub are enough.
The ideal base method for steamed mussels
This is the core technique that works for broths, pasta, and the shellfish component of larger seafood pots.
Ingredients for 2 pounds / 900 g mussels
- 2 pounds / 900 g live mussels
- 2 tablespoons unsalted butter or 1 tablespoon butter + 1 tablespoon olive oil
- 2 medium shallots, thinly sliced
- 3 garlic cloves, thinly sliced
- 1/2 cup / 120 ml dry white wine
- 2 sprigs thyme or 1 small bay leaf
- 2 tablespoons chopped parsley stems and leaves, divided
- black pepper, to taste
- optional: 1 to 2 tablespoons heavy cream or 2 tablespoons cold butter to finish
- lemon wedges, for serving
Equipment
Use a wide pot or Dutch oven with a tight-fitting lid, ideally 5 to 7 quarts for 2 pounds of mussels. Width matters because it lets the mussels sit in a relatively shallow layer and cook more evenly.
Method
- Clean the mussels as described above. Keep them cold until the pot is ready.
- Set the pot over medium heat and melt the butter. Add shallots and cook 2 to 3 minutes until softened but not browned.
- Add garlic and thyme; cook 30 seconds until fragrant.
- Increase heat to high, add the wine, and let it come to a strong simmer for 30 to 60 seconds.
- Add the mussels and half the parsley. Toss once, cover immediately, and steam over high heat.
- Begin checking at 3 minutes. Shake the pot once or twice. As soon as most mussels are open—usually by 4 to 5 minutes—start transferring them to a warm bowl with tongs or a spider.
- If a few remain closed, cover and cook 30 to 60 seconds more. Remove the opened ones promptly.
- Discard any mussels that remain stubbornly closed after the others are done.
- Taste the broth before seasoning. Often it will need little or no salt. Add black pepper, remaining parsley, and optional cold butter or a spoonful of cream off heat.
- Return the mussels to the pot briefly just to coat, no more than 15 to 30 seconds, or ladle broth over them in the bowl.
This method protects texture. The key move is removing the mussels as soon as they open rather than letting them wait in the boiling environment.
Doneness cues that matter more than a timer
Timers help, but visual cues are better.
Properly cooked mussels should be:
- opened or just opening wide
- plump rather than shrunken
- juicy and glossy
- firm but easy to bite through
Overcooked mussels look:
- smaller and tighter
- drier at the edges
- deeply curled or shrunk away from the shell
- chewy or squeaky when eaten
Remember: carryover cooking is real, especially if the broth is still simmering. If you plan to combine mussels with pasta or return them to a seafood pot, undercook very slightly during the steaming phase so they finish gently later.
Why some mussel broths become too salty or too muddy
The broth in a pot of mussels is a combination of your added liquid, aromatic base, fat, and the liquor released by the shellfish. That liquor is precious—but it can also create problems.
Problem 1: The broth is too salty
Causes:
- naturally high-salinity mussels
- reduced broth too aggressively
- added stock or salted butter on top of salty shellfish liquor
- seasoning before tasting
Fixes:
- Add a small splash of water, unsalted stock, or cream.
- Swirl in additional cold butter.
- Increase aromatic sweetness with softened leeks or shallots next time.
- Serve with unsalted starch—bread, boiled potatoes, or pasta—to absorb some salinity.
Prevention:
- Use unsalted butter.
- Hold back extra salt until the end.
- Start with less wine/stock than you think you need.
- Do not reduce the broth hard before tasting the shellfish liquor.
Problem 2: The broth is muddy or gritty
Causes:
- insufficient scrubbing or rinsing
- sediment released from bottom-grown mussels
- stirring the pot excessively and redistributing grit
Fixes:
- Lift mussels out of the pot instead of pouring everything together.
- Let the broth settle briefly, then ladle the clearer upper portion.
- If making pasta sauce, strain the broth through a fine sieve, coffee filter, or cheesecloth-lined strainer before reducing.
Problem 3: The broth tastes harshly acidic
Causes:
- too much wine
- acidic tomatoes not cooked down enough
- finishing with lemon before tasting
Fixes:
- Mount with butter.
- Add a spoonful of cream.
- Dilute lightly with mussel liquor from the pot if separated, or a splash of water.
- Next time, reduce wine briefly before adding mussels, but do not over-reduce into sharpness.
The science of sweetness and salinity in the broth
When mussels steam open, they release intracellular fluids into the pot. Those fluids contain dissolved salts, amino acids, sugars, and flavor compounds shaped by the animal’s metabolism and environment. Glycogen itself is not simply pouring into the broth as table sugar would, but the mussel’s state of stored energy strongly influences the overall sensory impression of sweetness and fullness in the flesh. At the same time, free amino acids and nucleotides contribute savoriness.
This is why a broth can taste both salty and sweet, or salty and thin. Salinity is only one axis. Broth quality depends on balance among salt, aroma, fat, acidity, and dissolved umami compounds.
A little butter can make a broth seem sweeter even without adding sugar because fat changes how flavors are perceived. A small amount of shallot does similar work by bringing gentle allium sweetness and aroma. Dry wine contributes acid and fruit esters, creating lift. The result, if balanced, is not “wine sauce with mussels” but a liquid translation of the shellfish itself.
Mussels for pasta: the right sequence
Mussels and pasta are a classic pairing, but they go wrong when the shellfish are boiled in the sauce or held too long while the pasta finishes. The better method is separation, then recombination.
For 12 ounces / 340 g pasta and 2 pounds / 900 g mussels
- Steam the mussels using the base method above.
- Remove the mussel meats from half to two-thirds of the shells. Leave the rest in shell for presentation.
- Strain the broth through a fine sieve.
- Boil the pasta until 1 to 2 minutes shy of al dente.
- In a wide skillet, reduce the strained broth if needed for 1 to 2 minutes only.
- Add the pasta plus a splash of pasta water and finish cooking in the broth.
- Add butter or olive oil to emulsify.
- Fold in the mussel meats and shelled mussels at the very end, just long enough to heat through—30 to 60 seconds.
Good pasta shapes include spaghetti, linguine, bavette, and short shapes like fregola or small shells if you want a spoonable result.
Tomato variation
If using tomatoes, keep them restrained. For 2 pounds mussels, try 1 cup / 240 ml crushed tomatoes or 10 to 12 ounces / 280 to 340 g cherry tomatoes split and cooked down. Too much tomato masks the shellfish and turns the dish into tomato pasta with incidental mussels.
Cream variation
Cream should support, not dominate. Add 2 to 4 tablespoons to the strained broth, not a cup. You want marine sweetness, not chowder.
Mussels in wine broths: classic, but not one-note
The iconic white wine, garlic, and herb format survives for a reason. It respects mussels. But there are many smart variations if you preserve the same structural logic: aromatic base, modest liquid, hard steam, early removal, restrained finishing.
Coastal French / Belgian style
- shallots
- butter
- white wine
- parsley
- optional cream
Serve with fries or bread. If making moules-frites at home, keep the broth especially concentrated because fries dilute the experience with each dip.
Cider and bacon
A little diced bacon, rendered lightly, plus apple cider and thyme works beautifully with sweeter mussels. Keep bacon modest—2 to 3 ounces / 55 to 85 g—so the dish does not become smoky pork soup.
Fennel, saffron, and orange zest
This leans Mediterranean. Use 1 small fennel bulb, thinly sliced, softened before adding a pinch of saffron and wine. Finish with a whisper of orange zest, not juice, so bitterness and perfume sharpen the shellfish.
Chile, garlic, and olive oil
For a southern Italian feel, use olive oil, garlic, parsley, and a pinch of red pepper flakes. White wine is optional. The result is excellent over toasted bread or with spaghetti.
Mussels in pot-style seafood meals
In seafood pots—whether inspired by New England clambakes, Mediterranean shellfish stews, or casual mixed shellfish boils—mussels should be treated as the quickest-cooking component, not dumped in at the start.
The rule
Add mussels near the end, usually during the last 4 to 6 minutes of cooking, depending on pot heat and mussel size.
If your pot includes potatoes, sausage, corn, fish, shrimp, or clams, stage everything by cooking time. Mussels go in after the long-cooking components are already nearly done. Cover tightly, steam until they open, and serve immediately.
Why this matters
Mixed seafood pots often run very hot and retain heat. If mussels go in too early, they overcook while the broth finishes reducing and while the rest of the ingredients catch up. The result is a lovely broth surrounding shellfish with the texture of pencil erasers.
Smart staging for a coastal-style pot
For a pot serving 4 people:
- Simmer potatoes in seasoned liquid until almost tender: 12 to 15 minutes
- Add sausage or firm vegetables: 5 to 8 minutes
- Add clams if using: 5 to 7 minutes
- Add fish chunks or shrimp: 3 to 5 minutes depending on size
- Add mussels last: 4 to 5 minutes, covered, then serve
Lift the mussels out as soon as they open if anything else still needs a moment.
Common mistakes that sabotage mussels
1. Buying old mussels
If they smell fishy or are mostly gaping and unresponsive, no technique will rescue them.
2. Storing them in water or airtight plastic
This shortens their life and dulls flavor.
3. Overcleaning with long soaks
You are more likely to kill or waterlog them than improve them.
4. Using too much liquid
Mussels make their own broth. Respect that.
5. Salting early
The shellfish liquor may already be all the seasoning you need.
6. Cooking until every shell is flung dramatically wide open
By then the first mussels are probably overdone. Remove opened mussels in waves.
7. Letting them sit in a hot pot while you finish everything else
Residual heat keeps cooking them.
8. Masking them with aggressive ingredients
Mussels are not a blank protein. They are the point.
Practical buying rules
At the fish counter, ask:
- Where are these from?
- Are they rope-grown or bottom-grown?
- When did they arrive?
- Are they cultivated blue mussels, Mediterranean mussels, or another species?
Look for shells that are moist, mostly closed, and free of heavy breakage. Smell for freshness: marine, faintly iodine-like, but clean. If possible, buy from a source with high turnover.
A reasonable main-course portion is:
- 1 1/2 to 2 pounds / 680 to 900 g per person for in-shell mussels with bread or fries
- 3/4 to 1 pound / 340 to 450 g per person if mussels are part of pasta or a mixed seafood meal
Safety note: the “open before cooking, closed after cooking” rule is imperfect
You may have heard that any mussel unopened after cooking is unsafe. In practical kitchen terms, unopened mussels are best discarded, because you cannot assess their quality as confidently and forcing them open is not worth it. But the old rule is not a perfect scientific test of safety; shell mechanics vary. The more important principle is starting with live, fresh mussels from a reputable source and cooking them promptly.
Also remember that shellfish safety includes issues no home technique can fix, such as harvesting from contaminated waters. Buy from reliable suppliers, especially if you live in an area where recreational shellfish harvesting occurs.
A clear workflow for consistently excellent mussels
If you want one concise system to remember, use this:
- Buy lively, fresh mussels from a trusted source.
- Store cold and damp, not submerged and not airtight.
- Rinse, scrub, and debeard shortly before cooking.
- Build a modest aromatic base with shallot, garlic, fat, and a small amount of wine or other liquid.
- Steam over high heat in a wide covered pot.
- Check early—around 3 minutes.
- Remove mussels as they open.
- Taste the broth before adding salt.
- Finish with butter, herbs, or lemon carefully.
- Serve immediately or add to pasta/pot dishes only at the last moment.
That workflow preserves what is most exciting about mussels in the first place: the interplay of sweetness from good condition and glycogen reserves, salinity from place, tenderness from brief cooking, and broth that tastes more like the sea in a bowl than like a recipe.
The takeaway: mussels reward restraint
Mussels are one of the great arguments for cooking with precision instead of force. Their best qualities are subtle but unmistakable once you know what to look for. Sweetness is not random; it reflects biology and season. Brininess is not a flaw; it reflects salinity and environment, but it must be balanced. Rubberiness is almost always a heat-management problem. And a good broth is not about adding more ingredients—it is about helping the mussels express themselves.
Treat them gently on the way home. Keep them alive and cold. Clean them without drowning them. Steam, do not boil. Pull them the moment they open. Build the broth around their liquor rather than in competition with it.
Do that, and mussels stop being a restaurant-only treat or a gamble from the fish counter. They become one of the fastest, smartest, and most satisfying seafood meals you can cook: a pot, a lid, a few minutes of steam, and an ingredient whose sweetness and sea character can still surprise you.