Why Onions Taste Sweet, Sharp, or Flat: Cell Damage, Sulfur Chemistry, and the Best Cooking Method for Each Type
RecipeSimpli
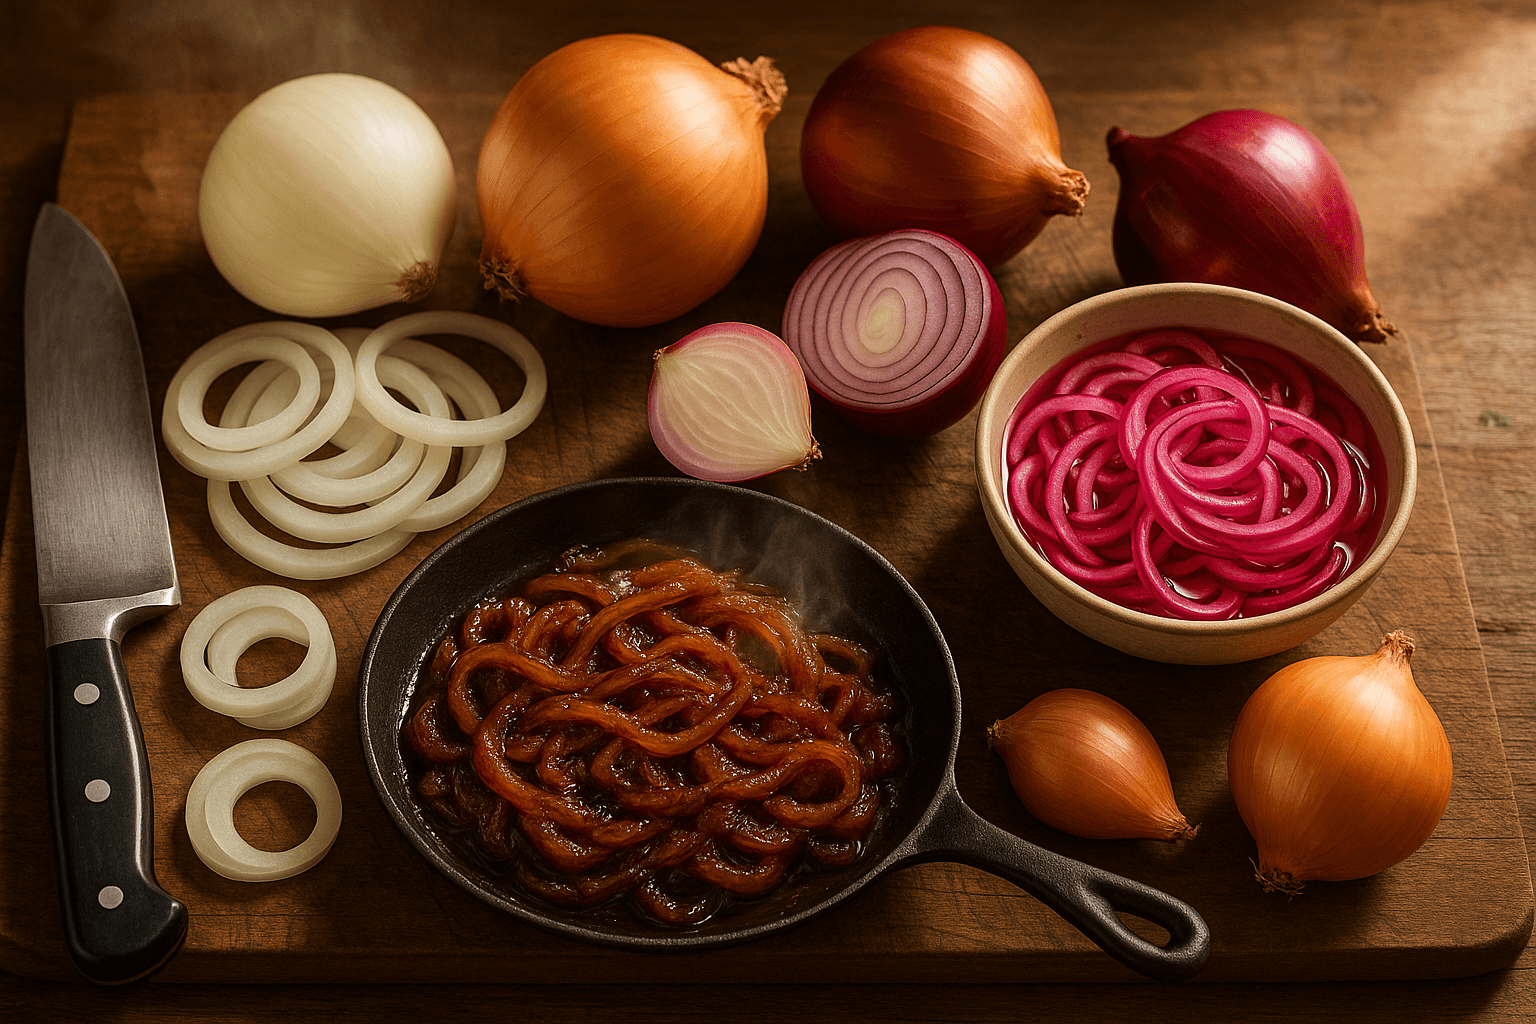
Why Onions Taste Sweet, Sharp, or Flat: Cell Damage, Sulfur Chemistry, and the Best Cooking Method for Each Type
There are few ingredients more ordinary—or more misunderstood—than the onion.
An onion can be juicy and almost fruity in a summer tomato salad, nose-prickling and aggressive on a burger, mellow and translucent in a soup base, or dark, sticky, and nearly jammy after a long stretch in a skillet. The strange part is that all of these can come from the same vegetable. Cut it one way and it tastes harsh. Slice it another way and it softens. Cook it too hot and it goes bitter. Crowd the pan and it turns pale, wet, and oddly flat. Store it too long and the spark disappears.
That dramatic range comes down to a combination of cell damage, sulfur chemistry, water content, heat, and time. Onions are little pressure vessels packed with flavor precursors. The moment your knife breaks those cells open, enzymes and sulfur-containing compounds meet, react, and create the aromas we recognize as fresh onion bite. Heat rearranges those compounds again, sometimes into sweetness and savoriness, sometimes into bitterness, and sometimes into the deep, rounded flavor people loosely call caramelized.
If you understand what is happening inside the onion, you can choose the right variety, cut it in the smartest way, and cook it with intention instead of habit. That means crisper salsa, sweeter onion rings, better caramelized onions, cleaner stir-fries, and fewer disappointing pans of steamed onion mush.
This is a science-first guide to onion behavior in the kitchen: why yellow, white, red, and sweet onions behave differently; how storage changes flavor; what rinsing, soaking, and chilling really do; why onions make you cry; and which cooking method best suits each type.
The onion’s personality starts before you cut it
All common bulb onions belong to Allium cepa, but they are not interchangeable in flavor or structure. Variety, growing conditions, maturity, and storage all affect how much sugar, water, and sulfur precursor an onion contains.
At the broadest level, the onion types most home cooks use break down like this:
Yellow onions
The workhorse onion. These usually strike the best balance of sulfur compounds, sugar, and durability. Raw, they can be assertive and a little hot. Cooked, they become round, savory, and sweet enough for soup, sauces, braises, and long cooking.
Best uses: mirepoix, soups, stews, caramelized onions, roasting, sautéing, burgers, gratins.
White onions
White onions often taste sharper, cleaner, and more direct than yellow onions. Their bite can feel more immediate, with less of the deep sweetness that yellow onions develop over long cooking. They are common in Mexican cooking and many fresh preparations where a crisp onion note is welcome.
Best uses: salsa, pico de gallo, tacos, relishes, quick sautés, stir-fries, grilled skewers.
Red onions
Red onions contain anthocyanin pigments in their outer layers, which give them color and a slightly different flavor profile. Raw, they can be pungent but also pleasantly bright. Their visual appeal makes them ideal for salads, sandwiches, and pickling. Cooked too long, they often lose their vibrant color and can turn muddy.
Best uses: salads, sandwiches, pickles, chutneys, grilling, roasting in wedges.
Sweet onions
Sweet onions—such as Vidalia, Walla Walla, Maui, and other regional sweet onions—are not just marketing. They truly have lower pungency because they tend to contain fewer sulfur compounds and often more water. That makes them mild and pleasant raw, but it also means they can be less complex and less robust in long-cooked savory dishes.
Best uses: onion rings, salads, sandwiches, grilling thick slices, gentle roasting, onion tarts.
A key point: “sweet” in an onion does not always mean dramatically more sugar. Often it means less sulfur-driven sharpness, so the sugars that were already there are easier to perceive.
Why cutting an onion changes its flavor so dramatically
A whole onion is relatively mild because the compounds responsible for its bite are stored separately. Once you cut it, you trigger chemistry.
Inside the onion are sulfur-containing flavor precursors called S-alk(en)yl-L-cysteine sulfoxides. In separate compartments sits an enzyme called alliinase. When a knife damages the cells, the enzyme meets the precursors and rapidly converts them into reactive sulfur compounds.
Those unstable compounds then become a mix of molecules that smell and taste fresh, hot, green, sharp, and oniony. One branch of this reaction creates the notorious tear-producing gas precursor, which quickly rearranges into syn-propanethial-S-oxide, the lachrymatory factor that irritates your eyes.
The more thoroughly you damage the onion’s cells, the more of these compounds you generate and release.
That is why:
- A very sharp knife can produce a cleaner, less brutal flavor than a dull knife.
- Finely minced onion tastes stronger than thick slices because more cells are ruptured.
- Grated or blended onion can taste explosively harsh because it destroys nearly every cell and releases juices loaded with sulfur compounds.
- Crushed onion in a mortar can be fiercer than sliced onion in a salad.
Cutting style matters more than most recipes admit
Here is the practical effect of cut size and direction:
- Large wedges or thick half-moons: milder perception, juicier bite, slower breakdown in the pan.
- Thin slices: more released compounds, more even softening, ideal for sautés and caramelization.
- Small dice: stronger raw flavor, faster cooking, useful for sauces and sofrito-style bases.
- Fine mince: maximum pungency raw, fastest flavor release in dressings, relishes, and meat mixtures.
- Grated onion: very strong, almost hot; excellent when you want onion juice to disperse, as in kofta, some dressings, or certain marinades.
Direction matters too. Onion cells are arranged in layers from root to stem.
- Pole-to-pole slices (root end to stem end) tend to hold their shape better in the pan.
- Crosswise slices break up faster and can feel slightly softer or more disrupted.
For French onion soup or long caramelization, pole-to-pole slices about 1/8 to 1/4 inch thick often give the best combination of structure and breakdown.
Why onions make you cry
The tear response is pure kitchen biochemistry.
When onion cells are damaged, a sulfur pathway leads to the formation of the eye-irritating molecule syn-propanethial-S-oxide. It volatilizes into the air, reaches the moisture on your eye’s surface, and forms tiny amounts of irritating sulfurous products. Your eyes respond by producing tears to wash it away.
How to reduce tears, with honest explanations
1. Use a sharp knife
A sharp knife cuts cleanly instead of crushing cells. Less crushing means fewer volatile irritants launched into the air all at once.
2. Chill the onion for 20 to 30 minutes
Cold temperatures slow enzyme activity and reduce volatility. Don’t freeze it solid; just chill it in the refrigerator. A very cold onion may be slightly firmer and less aromatic while cutting.
3. Cut near ventilation
A range hood, fan, or even open window helps move volatile compounds away from your face.
4. Leave the root end mostly intact until the end
The root area contains high concentrations of flavor precursors. If you trim it last, you release some of the most intense compounds later in the process.
5. Rinse the knife occasionally
This helps a little by removing onion juice from the blade, though the effect is modest.
What does not work especially well? Holding bread in your mouth, chewing gum, or other folk methods. They persist because onions are emotional.
Storage: why one onion tastes lively and another tastes flat
Freshness matters. Onions continue to change after harvest.
In storage, onions gradually lose moisture, their texture becomes less crisp, and some of their volatile aroma potential declines. Depending on storage conditions and onion type, sweetness can become more noticeable simply because pungency fades, but that does not always mean the flavor is better. Often it means the onion tastes duller.
Best storage conditions
Store whole dry onions in:
- a cool place, ideally around 45 to 55°F / 7 to 13°C if possible
- dry conditions
- good airflow
- darkness or low light
At home, a cool pantry, cellar, or ventilated cupboard is usually the best compromise.
Avoid:
- sealed plastic bags
- moisture buildup
- storing next to potatoes
Potatoes and onions are a bad pair because potatoes release moisture and gases that can accelerate spoilage.
Sweet onions are more perishable
Because sweet onions often contain more water and less protective pungency, they usually do not keep as long as standard storage onions. Use them within a couple of weeks if possible, and refrigerate if your kitchen is very warm.
Signs an onion is past its prime
- soft or spongy spots
- interior translucence before cooking
- mold under the skin
- strong musty smell
- sprouting plus shriveling
A sprouted onion is not automatically unusable, but it often tastes flatter because some stored energy has gone into growth.
Rinsing, soaking, and chilling: what they really do to flavor
If raw onion tastes too harsh, you have several tools. They work for different reasons.
Rinsing sliced onion under cold water
This physically washes away some of the sulfur compounds and onion juices on the cut surface. The result is a milder, cleaner flavor, but also less aroma and less complexity.
Best for: white or red onions in salads, salsas, and sandwiches when you want crunch without overwhelming bite.
Tradeoff: you lose some flavor intensity, not just harshness.
Soaking in cold water for 10 to 20 minutes
Soaking does more than rinsing because water dissolves and disperses some of the pungent surface compounds. It can also make thin slices crisper.
How to do it:
- Slice onion thinly.
- Soak in ice water for 10 to 20 minutes.
- Drain very well and pat dry.
Best for: red onions for salads, white onions for pico de gallo, burger toppings.
Soaking in salted water or lightly acidulated water
A mild brine or a splash of vinegar/lime juice changes flavor in a different direction. Salt can season while reducing harshness a little; acid shifts the flavor profile and begins a quick pickle effect.
Try:
- 1 cup cold water + 1 teaspoon kosher salt, soak 10 minutes
- or 1/2 cup vinegar + 1/2 cup water + 1 tablespoon sugar + 1 teaspoon salt for quick-pickled red onions
Chilling before slicing
This reduces tear production and slightly mutes the aromatic volatility. It can make raw onion seem less intense simply because fewer compounds reach your nose immediately.
Which method is best?
- For maximum fresh onion flavor: use as-is, but slice thinly and choose a mild onion.
- For milder onion with clean crunch: rinse or soak briefly.
- For balanced sharpness plus acidity: quick-pickle.
- For less crying while prepping: chill.
Heat changes onion flavor in stages
Onion cookery is not one thing. Different temperature ranges drive different reactions, and the results are dramatically different.
Stage 1: Sweating
This is gentle cooking over low to medium-low heat, typically around a pan surface temperature that encourages softening rather than browning.
In practice:
- burner on low or medium-low
- fat in the pan
- onions cooked 10 to 20 minutes
- often with a pinch of salt
The goal is to soften the onion, drive off some raw sulfur notes, and make it translucent. Cell walls weaken, water is released, and the harsh fresh-onion compounds mellow.
Best for: soup bases, risotto, curries, tomato sauces, braises.
Stage 2: Sautéing for light color
This uses medium to medium-high heat and less time. Some water evaporates, edges begin to color, and the onion gains sweetness plus light savory notes.
Cook time is often 8 to 12 minutes, depending on slice size and pan load.
Best for: fajitas, stir-fries, skillet dinners, hash, sautéed peppers and onions.
Stage 3: Deep browning and “caramelized” onions
This is where language gets sloppy. Many cooks call all deeply browned onions “caramelized onions,” but the flavor actually comes from a combination of processes.
Yes, onions contain sugars, and caramelization of sugars can occur at sufficiently high temperatures. But in a pan of onions, especially with moderate heat and lots of moisture present, much of the desirable browned flavor also comes from Maillard reactions and other complex thermal breakdown products formed as water gradually evaporates and onion solids concentrate.
In plain English: the magic of browned onions is not just sugar turning to caramel. It is a broader set of browning reactions that create nutty, savory, bittersweet depth.
For properly browned onions:
- use medium to medium-low heat most of the time
- allow 35 to 60 minutes for a standard batch
- stir periodically, not constantly
- let moisture evaporate before expecting real browning
The end point should be deep golden to chestnut brown, soft, collapsed, and jammy—but not blackened.
Stage 4: Too hot, too fast
If the heat is excessive, the onion’s natural sugars and solids can scorch before enough water has evaporated evenly. That produces bitterness, acrid notes, and uneven texture: burned edges with undercooked centers.
This is common when:
- the pan is too hot from the start
- there is not enough fat
- the onions are sliced too thin for the heat level
- stirring is neglected once browning is underway
The overcrowding problem: why your onions won’t brown
This is one of the most important practical lessons in onion cookery.
Onions are mostly water. When you add a large pile of sliced onions to a pan, they release that water quickly. If the pan is overcrowded, the moisture cannot evaporate efficiently. Instead of frying and browning, the onions steam in their own liquid.
Steamed onions are not automatically bad. For sweating, that is often fine. But if your goal is rich brown flavor, overcrowding sabotages it.
What overcrowding looks like
- the pan becomes soupy within minutes
- onions stay pale for a long time
- you keep turning up the heat, but they still don’t brown evenly
- once the liquid finally evaporates, some strands scorch while others remain blond
How to avoid it
For browning, use a wide skillet or sauté pan. As a rough guide:
- 2 pounds / 900 g sliced onions need at least a 12-inch skillet for decent browning
- for faster, more even results, divide them between 2 pans
A heavy pan helps because it stores heat better when the onions first hit the surface.
Don’t stir every 20 seconds
Constant stirring cools the surface and prevents prolonged contact with the pan. For deep browning, stir every 2 to 4 minutes early on, then more frequently toward the end as sugars concentrate and scorching risk rises.
The science of sweetness, bitterness, and jammy depth
What we describe as sweet onion flavor during cooking comes from several overlapping effects:
- Harsh sulfur notes diminish with heat.
- Water evaporates, concentrating natural sugars and flavor compounds.
- Cell walls break down, creating a softer texture that feels sweeter.
- Browning reactions add nutty, toasty, and savory notes that read as richness.
Bitterness usually appears when browning goes too far, too fast, or too unevenly. Burned milk solids in butter can also contribute bitter notes if the pan is hot for a long time.
That “jammy” onion texture comes from prolonged cooking after much of the water has evaporated. The onions collapse, pectin weakens, and the concentrated solids form a soft, spreadable mass. A small amount of added liquid during cooking—water, stock, wine—can help dissolve browned bits and redistribute flavor, but if you add too much too often, you reset the browning process and lengthen the total time.
Best cooking methods for each onion type
Now let’s turn the science into decisions you can make on a Tuesday night.
Yellow onions: the all-purpose champion
If you cook one onion most often, make it yellow.
Best raw uses
Raw yellow onions can work in dressings, burgers, and chopped relishes, but they are often too assertive for delicate salads unless soaked first.
Best cooked uses
Yellow onions shine in any application where you want balanced sweetness and depth.
Best method: slow caramelization
- 2 pounds / 900 g yellow onions, halved and sliced pole-to-pole 1/8 inch thick
- 2 tablespoons olive oil or 1 tablespoon oil + 1 tablespoon butter
- 1 teaspoon kosher salt
- 12-inch skillet over medium-low heat
- cook 40 to 55 minutes
Add fat and onions to the pan, toss with salt, and cook slowly. Stir every few minutes. If fond builds too dark too early, add 1 to 2 tablespoons water and scrape it up.
Result: deeply browned onions ideal for soups, tarts, burgers, pasta, or grain bowls.
Also excellent for
- sweating for mirepoix or sofrito
- roasting wedges at 425°F / 220°C for 25 to 35 minutes
- French onion soup
White onions: crisp, sharp, and fast-cooking
White onions are often the best choice when you want onion flavor that stays bright and obvious.
Best raw uses
- salsa fresca
- pico de gallo
- taco toppings
- chopped into ceviche-style mixtures
For a cleaner bite, dice and rinse briefly or soak 10 minutes in cold water, then drain well.
Best cooked uses
White onions are great in applications where you want quick softening without long, dark sweetness.
Best method: hot sauté
- 1 pound / 450 g white onions, sliced 1/4 inch thick
- 1 1/2 tablespoons neutral oil
- 1/2 teaspoon kosher salt
- wide skillet over medium-high heat
- cook 8 to 10 minutes
Let them pick up light color at the edges while keeping some structure. This preserves their clean, lively flavor.
Also excellent for
- grilling in thick rings
- stir-fries
- fajita-style onions with peppers
- charred onion sauces and salsas
If cooked very long, white onions can become sweet, but they often lack the same rounded depth as yellow onions.
Red onions: best when brightness matters
Red onions are at their best when you can appreciate both their color and their sharp-sweet contrast.
Best raw uses
- salads
- sandwiches
- burgers
- grain bowls
- Mediterranean-style tomato-cucumber salads
If they taste too harsh, soak thin slices in ice water for 15 minutes, then drain and dry.
Best cooked uses
Red onions are lovely roasted or grilled in wedges, where they retain some identity and gain sweetness without turning muddy.
Best method: roast in wedges
- Cut 2 medium red onions into 6 to 8 wedges each, root attached enough to hold pieces together
- Toss with 1 1/2 tablespoons olive oil, 3/4 teaspoon kosher salt, black pepper
- Roast at 425°F / 220°C for 25 to 30 minutes, turning once
The edges char lightly, the centers soften, and the flavor becomes sweet but still vivid.
Best preserving method: quick pickles
- 1 red onion, thinly sliced
- 1/2 cup red wine vinegar or apple cider vinegar
- 1/2 cup water
- 1 tablespoon sugar
- 1 1/2 teaspoons kosher salt
Bring the liquid just to a simmer or use it cold, pour over the onion, cool, and use after 20 minutes. Better after a few hours.
Perfect for tacos, fried foods, grilled meats, and rich sandwiches.
Sweet onions: mild and juicy, but not always the best for everything
Sweet onions are wonderful when you want low pungency and a succulent texture.
Best raw uses
- salads
- sandwiches
- burgers
- sliced with tomatoes and cucumbers
Because they are mild, they usually do not need soaking.
Best cooked uses
Sweet onions are especially good in applications that highlight their tenderness rather than deep savory browning.
Best method: onion rings
Their lower pungency and high moisture make sweet onions ideal for fried rings.
- Slice into 1/2-inch rings
- Dredge in seasoned flour
- Dip in batter or buttermilk
- Fry at 350 to 365°F / 175 to 185°C for 2 to 4 minutes, depending on batter and thickness
They emerge tender and sweet without a sulfur-heavy finish.
Also great for
- thick grilled slices brushed with oil
- onion pie or tart
- gentle roasting
- baked stuffed onions
A limitation to know
For very long caramelization, sweet onions can sometimes turn soft and pleasant but taste less complex than yellow onions. They can also release a lot of water, stretching out the browning timeline.
A step-by-step method for perfect caramelized onions at home
If there is one onion technique people most often rush, this is it.
Ingredients
- 2 pounds / 900 g yellow onions
- 2 tablespoons olive oil, or 1 tablespoon olive oil + 1 tablespoon unsalted butter
- 1 teaspoon Diamond Crystal kosher salt or about 1/2 teaspoon fine salt
- optional: 2 to 4 tablespoons water, stock, or dry sherry as needed for deglazing
Equipment
- 12-inch heavy skillet, sauté pan, or Dutch oven with wide base
- wooden spoon or heatproof spatula
Method
1. Slice evenly
Halve onions through the root and stem. Peel. Slice pole-to-pole into strips about 1/8 inch / 3 mm thick.
Uniform slices cook evenly. Thick and thin slices mixed together lead to burnt wisps and underdone chunks.
2. Heat the pan moderately
Set the pan over medium-low heat and add the fat. When the oil shimmers gently or the butter melts and foams, add the onions and salt.
3. Start with softening
Cook for 10 to 15 minutes, stirring every 2 to 3 minutes. The onions should collapse, turn glossy, and become translucent.
At this stage you are driving off rawness and beginning moisture loss.
4. Let browning begin slowly
Continue cooking another 20 to 30 minutes, stirring every 3 to 4 minutes. Adjust heat as needed so the onions brown gradually, not aggressively.
You should see fond forming on the pan and onions turning blond, then amber.
5. Deglaze in teaspoons, not splashes
If the fond turns very dark before the onions are fully browned, add 1 tablespoon water and scrape. This dissolves flavor back into the onions.
Do not pour in half a cup of liquid unless you want to pause browning and start steaming again.
6. Finish at the color you actually want
For pasta or omelets, stop at medium golden. For onion jam territory, go to deep chestnut brown, another 5 to 10 minutes.
Total time: usually 40 to 55 minutes, sometimes longer depending on onion variety, pan, and stove.
Common mistakes
Mistake: Adding sugar
Usually unnecessary. Onions have enough natural sugar. Added sugar can push flavor toward candy-like sweetness and increase scorching risk before the onions develop full savory depth.
Mistake: Using high heat to “speed it up”
You can speed up some cooking, but not the concentration and even browning that define great caramelized onions. High heat tends to burn edges before centers collapse.
Mistake: Overcrowding
If your pan is heaped and wet, use a second pan.
Mistake: Constant stirring
You need contact time with the hot pan for browning.
Caramelization myths worth clearing up
Myth 1: Caramelized onions take only 10 minutes
Not if you want the real thing. Ten minutes gets you softened or lightly browned onions, not deeply caramelized, jammy onions.
Myth 2: A pinch of baking soda is a harmless shortcut
Baking soda raises pH, which can accelerate browning. It works—but it also softens onions dramatically and can give them a mushy texture and slightly off taste if overused.
If you experiment, use no more than 1/8 teaspoon per 2 pounds / 900 g onions. Even then, I usually prefer patience over alkalinity.
Myth 3: Sugar is the secret
No. Time, evaporation, and controlled browning are the secret.
Myth 4: Butter alone is always best
Butter tastes wonderful, but because its milk solids can brown and eventually burn, many cooks get better control with mostly oil plus a little butter for flavor.
Matching method to outcome
When choosing how to cook onions, ask what you want them to contribute.
If you want sweetness without much color
Sweat them slowly with a lid for part of the time, then uncover.
If you want crisp-tender onion flavor
Use white onion and a fast sauté over medium-high heat.
If you want raw crunch without aggression
Use red or sweet onion; soak or rinse if needed.
If you want deep savory richness
Use yellow onions and give them space, moderate heat, and 45 minutes.
If you want visual drama and acidity
Quick-pickle red onions.
If you want the best fried onion experience
Use sweet onions for rings, yellow onions for strings with more savory punch.
A few high-value kitchen tips
- Salt early for sweating, carefully for browning. Salt helps draw moisture out, which is useful, but a heavily salted pan can release a flood of water that slows browning at first.
- Use the widest pan you own for browning onions.
- Don’t refrigerate whole storage onions unnecessarily. Very cold, humid storage can affect texture over time.
- Save strong onion for cooked dishes. If a raw onion tastes harsh, cook it instead of forcing it into a salad.
- Pair onion type with dish intensity. Sweet onions can disappear in a long braise; yellow onions hold up better.
- Acid after cooking brightens. A few drops of sherry vinegar or lemon juice added to browned onions at the end can wake up their flavor.
Takeaways
Onions taste sweet, sharp, or flat because flavor is built in layers long before the pan enters the picture.
First comes the variety: yellow for all-purpose depth, white for clean sharpness, red for color and brightness, sweet for low-pungency tenderness. Then comes storage, which can preserve crisp aromatic potential—or slowly dull it. Then your knife decides how much cell damage occurs, and that damage controls how much sulfur chemistry gets unleashed.
Raw onion bite is not a mystery. It is the direct result of ruptured cells, enzyme activity, and volatile sulfur compounds. That is why rinsing, soaking, or chilling can reduce harshness: each method either removes some compounds, slows their formation, or mutes their release.
Heat then rewrites the onion again. Gentle heat softens sulfur notes. Moderate evaporation concentrates sweetness. Browning reactions create savory depth. But too much heat too soon leads to bitterness, and too many onions in one pan trap steam and prevent browning entirely.
If you remember only a few things, let them be these:
- More cell damage = more pungency.
- Sweet onions are mild mostly because they are less sulfurous, not magically sugary.
- Rinsing and soaking tame bite by removing surface compounds.
- Good caramelized onions take time—usually 40 minutes or more.
- Overcrowding the pan is the enemy of browning.
- Yellow onions are best for long cooking; white for bright savory dishes; red for raw and pickled uses; sweet onions for mild raw use and onion rings.
Once you see onions as chemistry plus technique, they become much easier to control. And that means fewer flat sauces, fewer harsh salads, fewer burned skillets, and far more of the thing every cook wants from an onion: exactly the right kind of flavor, at exactly the right moment.